Asset Sheet/ Bulk Import
Creating Assets Using Import (Bulk Upload):
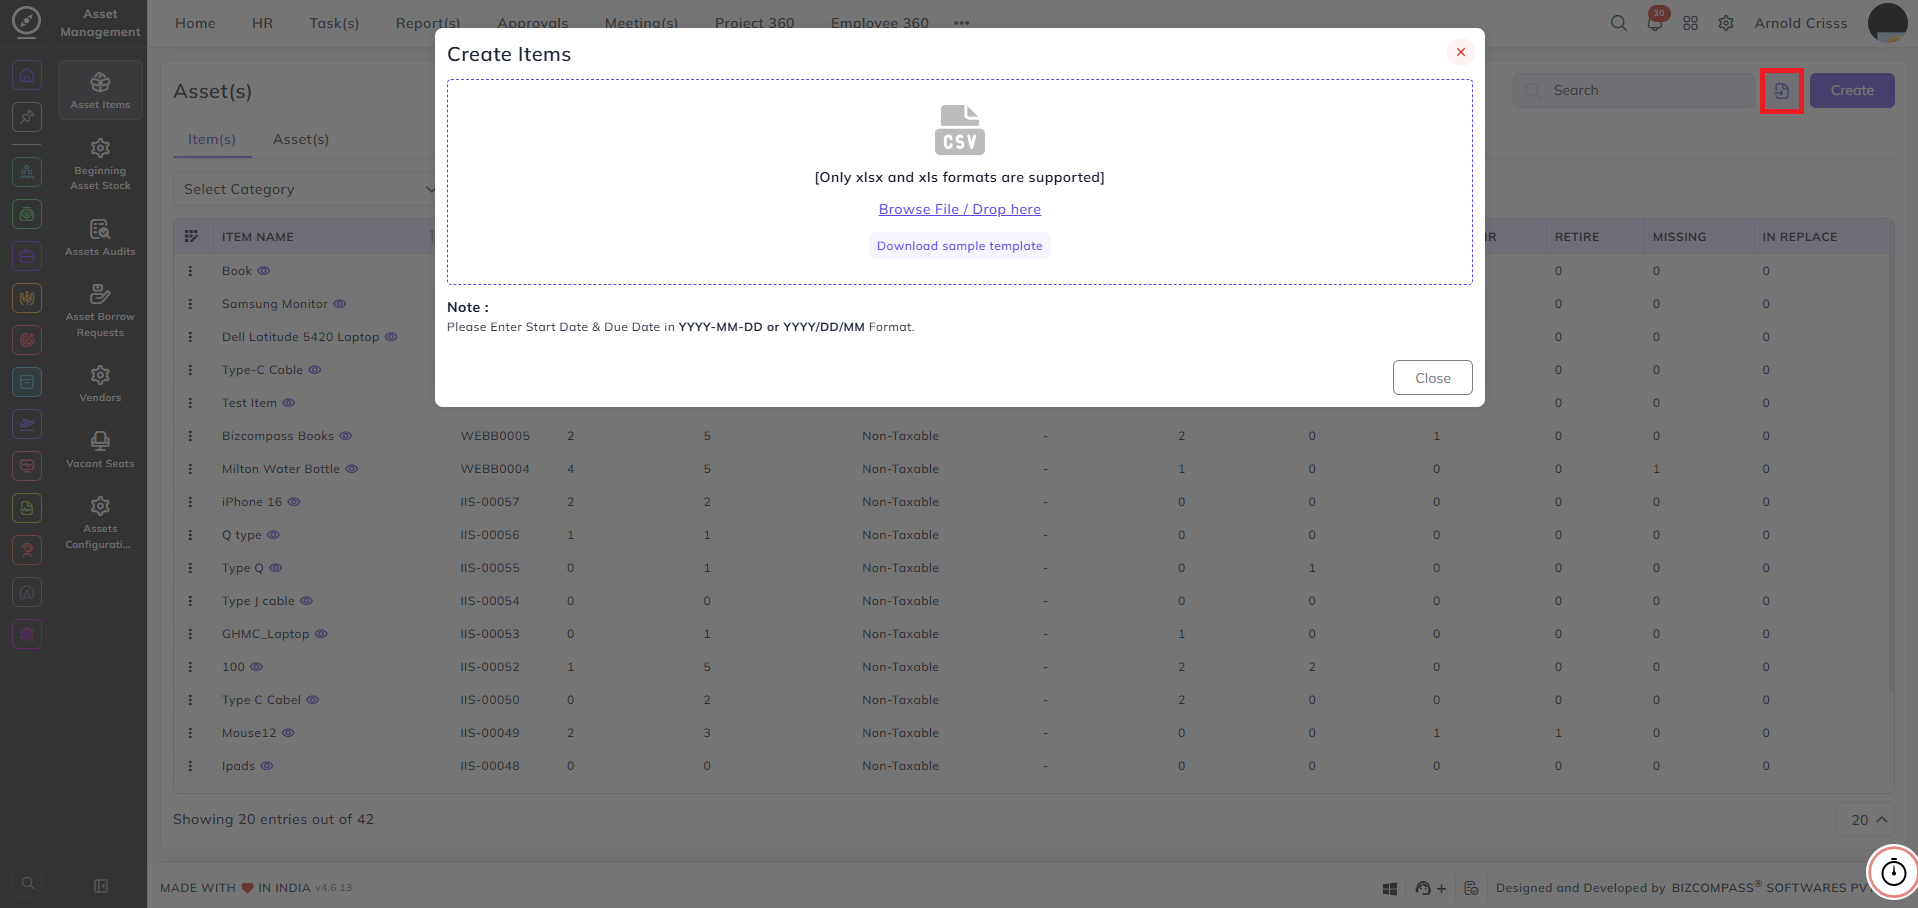
Assets can be created in bulk by downloading and uploading an import sheet.
Download Sample Template:
On the Items & Assets page:
-
Click on the Import Asset button.
-
Download the Sample Template.
Import Sheet Fields:
Fill the following fields in the template:
-
Company
-
Branch
-
Item Name
-
Brand
-
Model
-
Category
-
Subcategory
-
Item Type
-
Asset ID
-
Status
-
Current Status
-
Assignee
-
Room Name
-
Seat Name
-
Tax Preference
-
Description
-
Condition
-
Serial Number
-
Purchase Date
-
Warranty Date
-
Vendor
-
Purchase Price
-
Purchase Invoice Number
Important Behavior During Import:
-
Category and Subcategory must already exist
(They are not auto-created during import)
The following entities can be auto-created during upload if they do not exist:
-
Item
-
Brand
-
Model
-
Vendor
-
Room
-
Seat
-
Condition
Example Import Case:
-
Company: BIZCOM
-
Branch: Head Office
-
Item Name: New Monitor
→ A new item is created if it does not exist -
Brand: Dell
→ Brand is auto-created if missing -
Model: 14 Inch Monitor
→ Model is auto-created if missing -
Category and Subcategory: Must be selected from existing values
-
Item Type: Selected manually
-
Room: Developer Room
-
Seat: Seat-3
-
Condition: New
-
Serial Number, Purchase Date, Warranty Date, Vendor, Purchase Price, and Invoice Number are filled as required
Uploading the File:
After filling the import sheet:
-
Upload the file
-
Review the column mapping
-
Click Create
A popup displays:
-
Number of records inserted
-
Errors, if any
Errors occur if:
-
Category or Subcategory is missing
-
Room or Seat mapping is invalid
-
Required fields are empty
Imported Asset Result:
After a successful upload:
-
Items and assets appear in the Assets List
Each asset includes:
-
Item Name
-
Category and Subcategory
-
Model
-
Status
-
Condition
Adding More Assets to an Existing Item:
To add additional assets for an existing item:
Go To Beginning Asset Stock page:
-
Select the item in which you want to add the new assets.
-
Enter asset details manually:
-
Company
-
Branch
-
Quantity
-
Condition
-
Warranty
-
Vendor
-
Purchase Price
-
Invoice
-
New assets are added under the same item and you can review the asset and the asset series through the item page.
Exporting Assets:
Assets can be exported for:
-
Reporting
-
Status-based filtering
-
Record verification
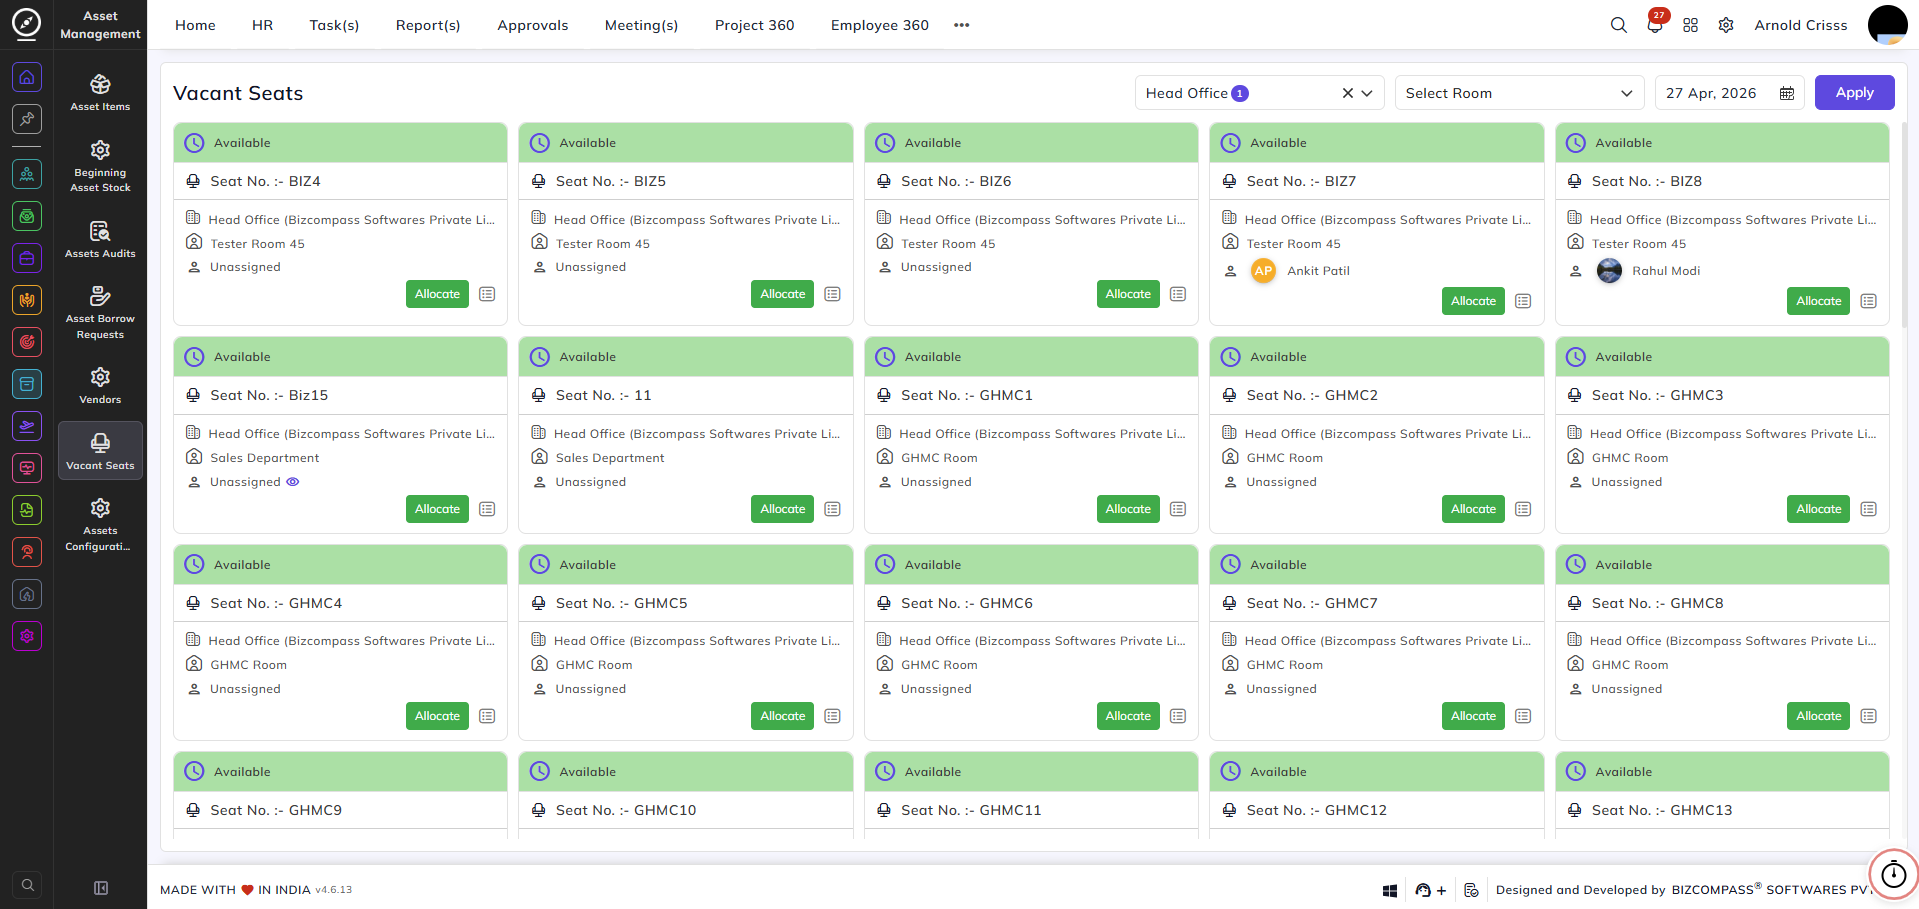
Vacant Seats (Seat Availability):
The Vacant Seats view shows available seats across the organization.
Use cases include:
-
Recruitment
-
Practical exams
-
Pre-onboarding allocations
If an employee is not assigned or has not clocked in, the seat status shows Available.
Once an employee is assigned or clocks in, the seat status updates automatically.
Seats can be allocated from Asset Management->Vacant Seats.