Bulk Policies
From this page, you can assign policies in bulk to multiple employees at once, streamlining policy management across your organization. Bulk assignment is supported for all policy types visible in the top navigation bar:
- Attendance Policy
- Leave Rule Policy
- DLD Policy
- Shift Assign
- Platform Access Policy
- Bulk Project Assign
- Attendance Allowed IP(S)
- TDS Slab
- Remote Work Policy
- Notice Period Policy
Attendance Policy:
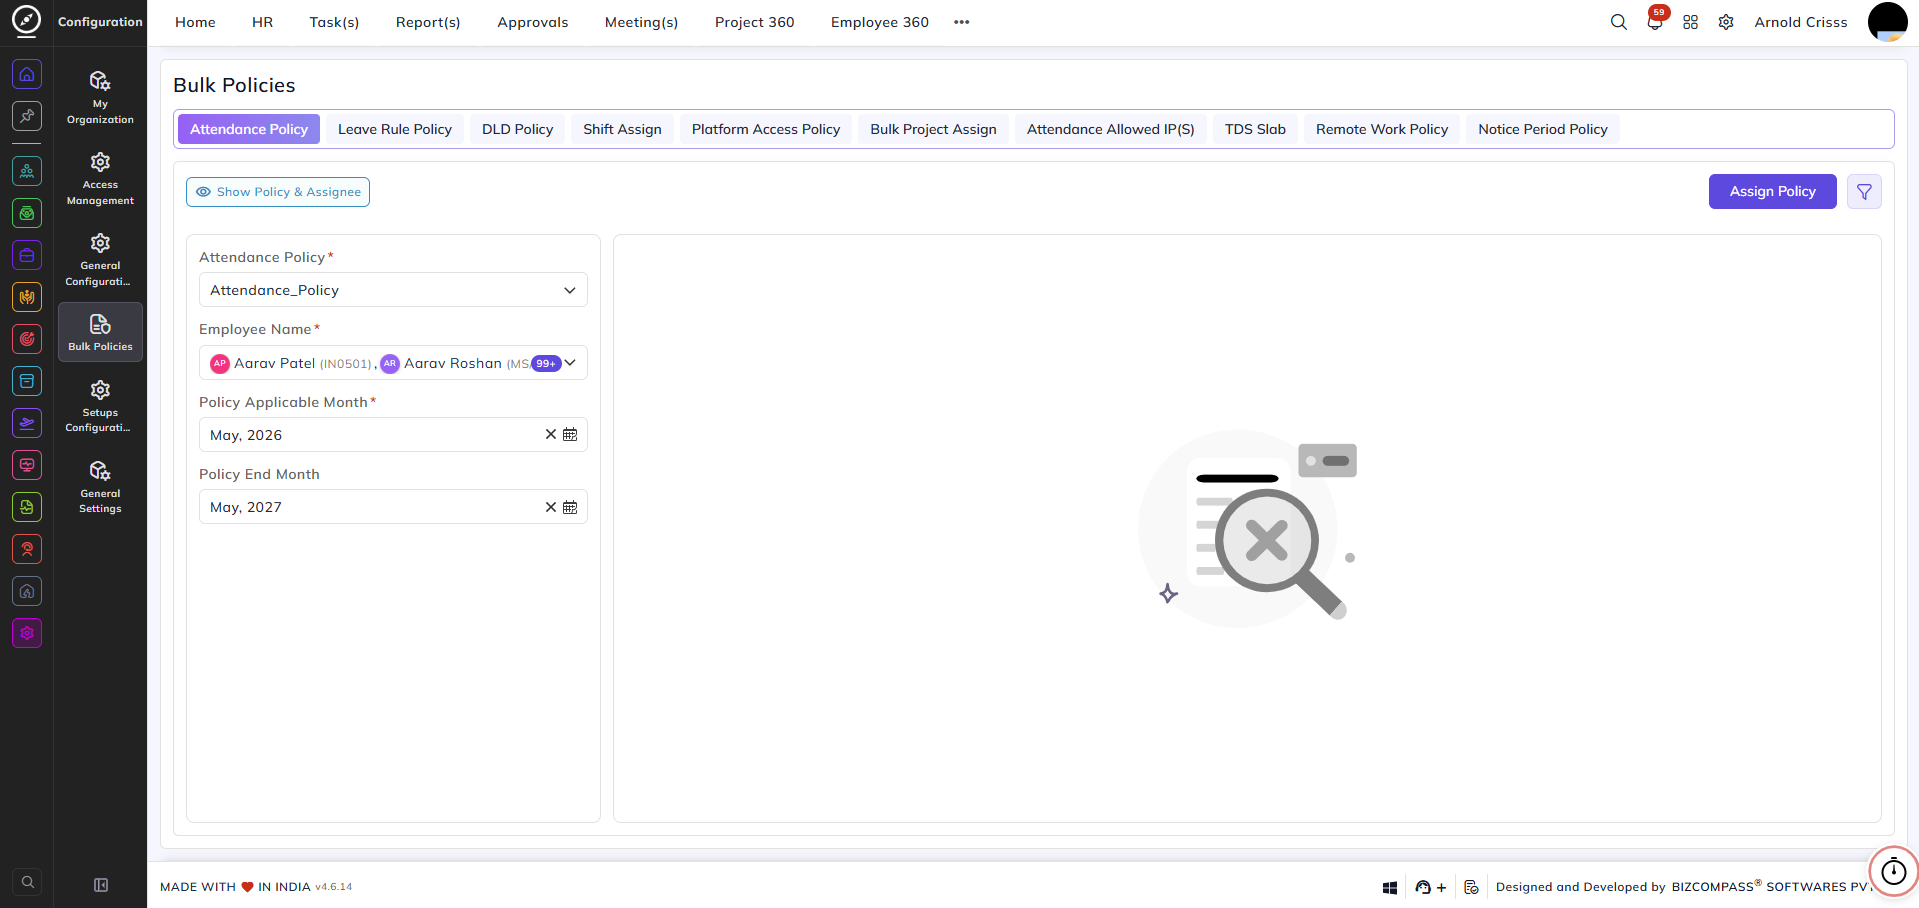
Select the attendance policy you want to assign from the dropdown — for example, Attendance_Policy.
Employee Name:
Select one or more employees to whom the policy should be applied. You can select individual employees or apply to all employees in bulk.
Policy Applicable Month:
Choose the month from which the policy should come into effect — for example, May, 2026.
Policy End Month:
Choose the month on which the policy should expire — for example, May, 2027.
Once the fields are filled in, click Assign Policy to apply the selected policy to the chosen employees.
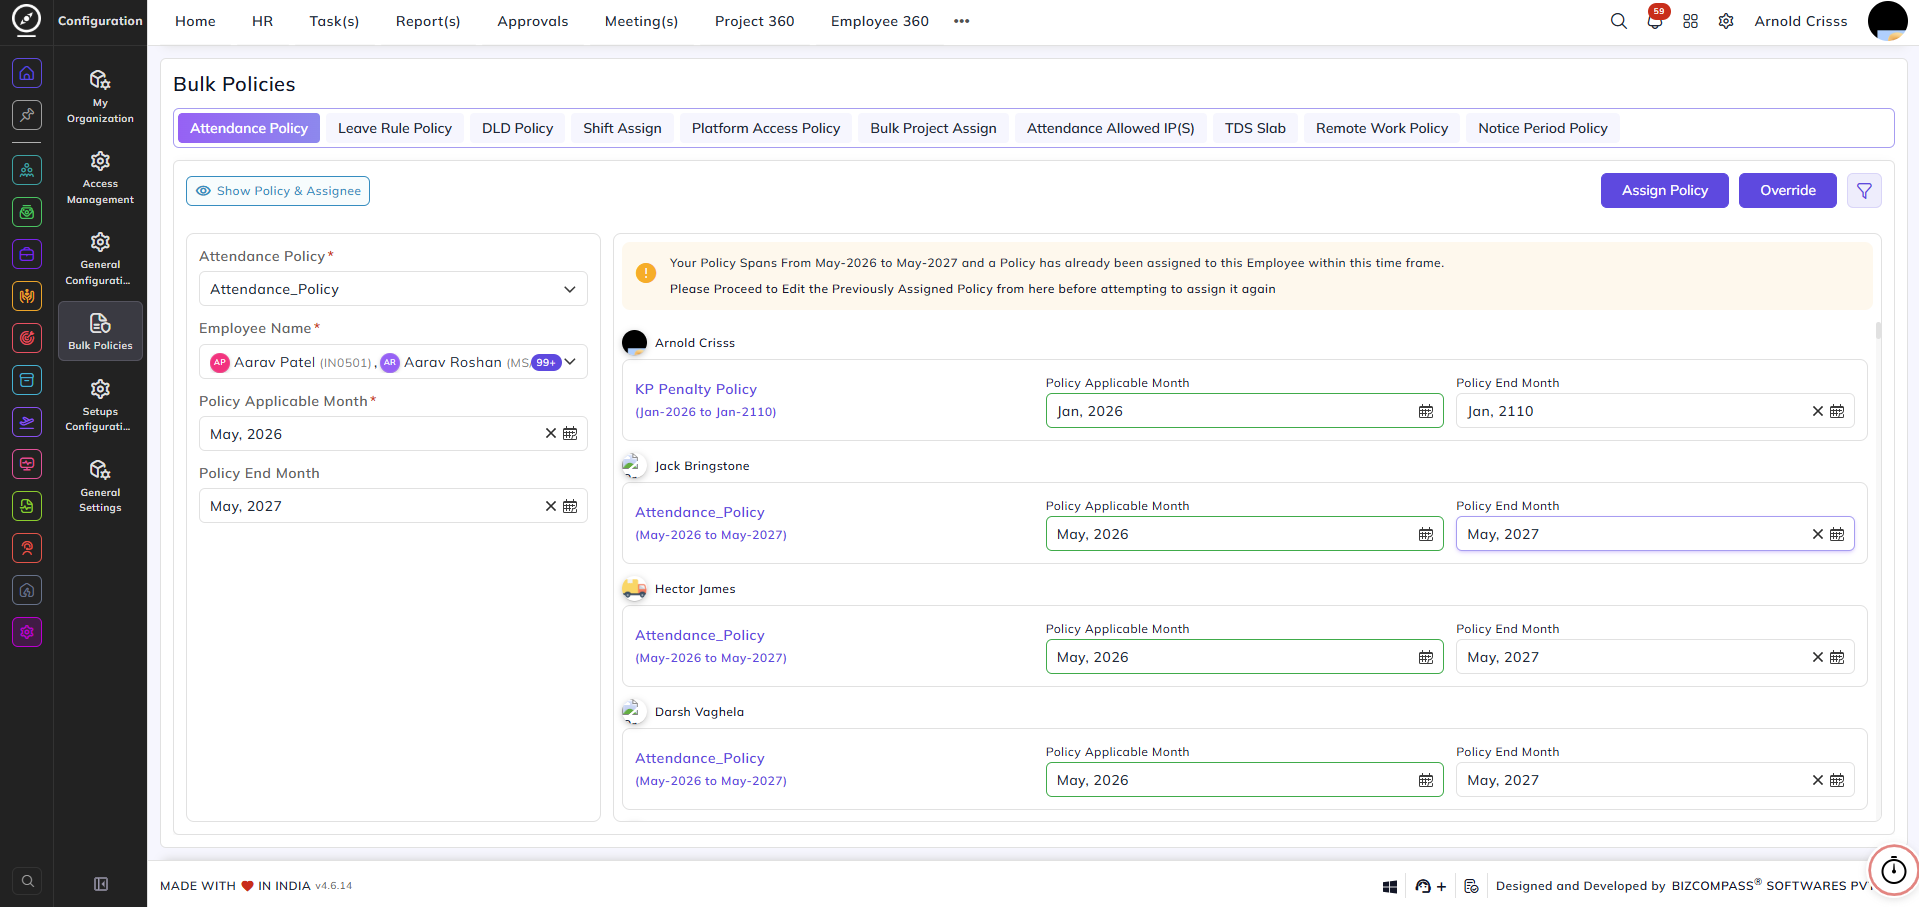
If a policy conflict is detected:
When the selected time frame overlaps with a policy already assigned to one or more employees, a warning banner will appear on the right panel listing the conflicting employees and their existing policies. You can either:
- Edit the previously assigned policy directly from the panel before reassigning, or
- Click Override to replace the existing policy — a confirmation dialog will prompt you to click Yes to confirm the override, or Not Now to cancel.

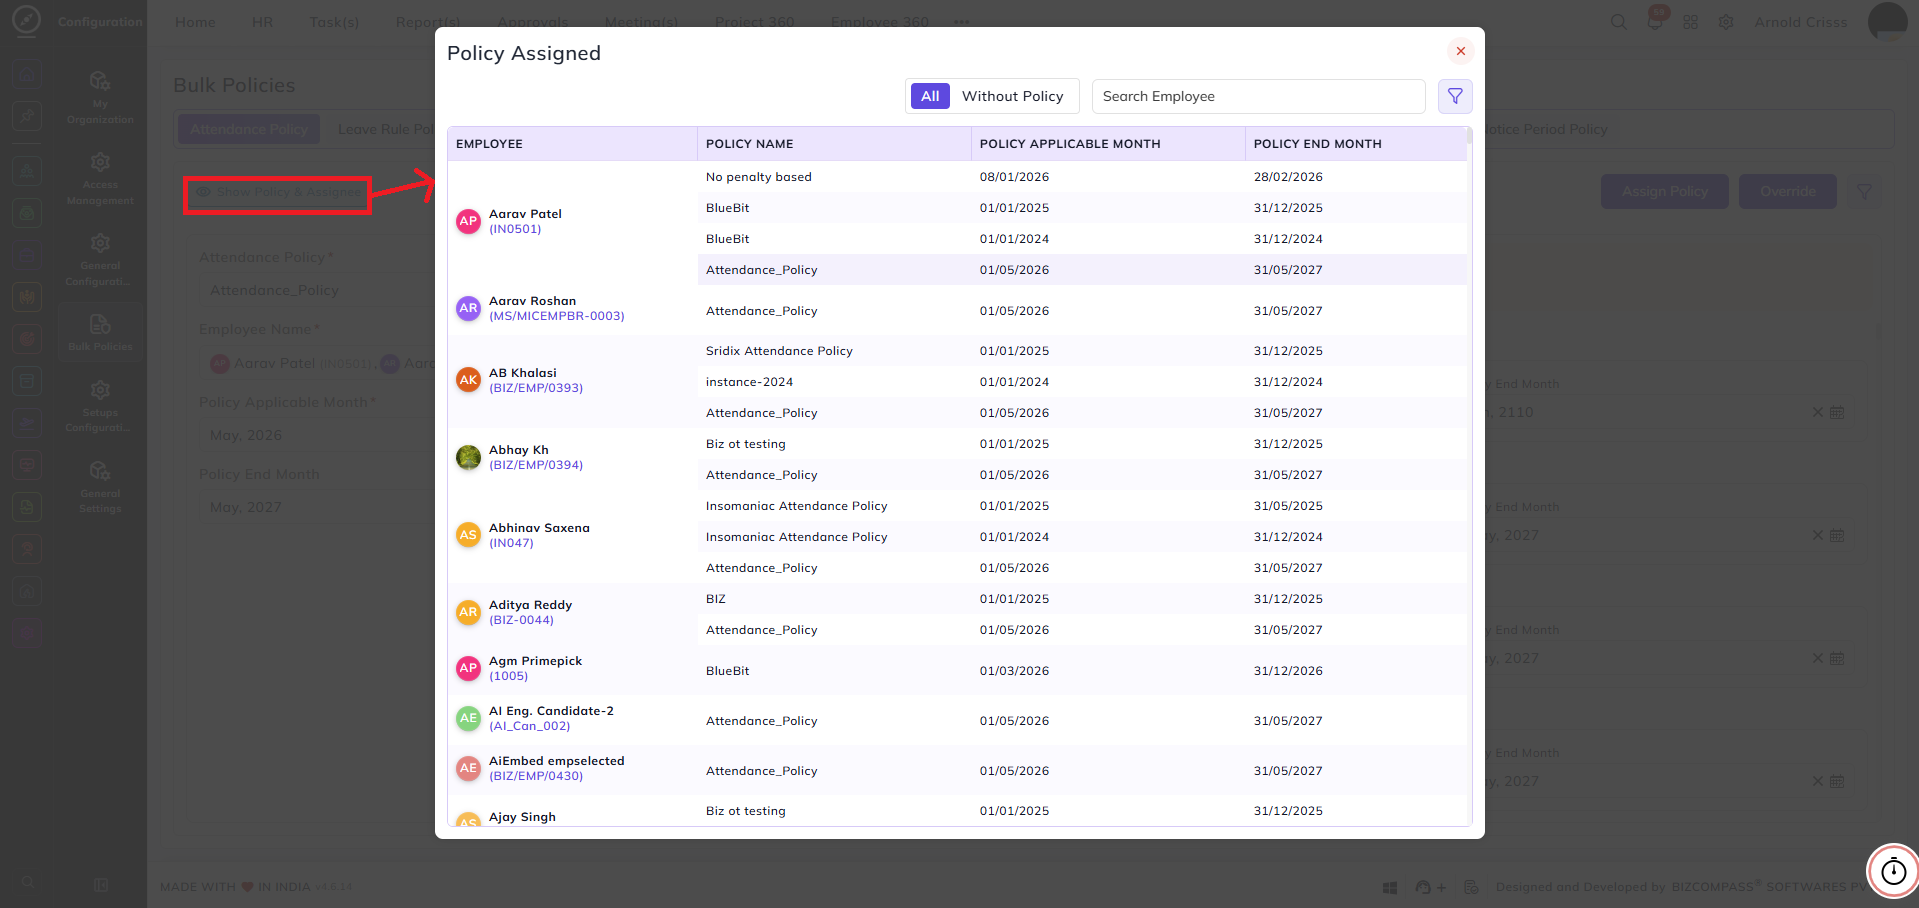
The Show Policy & Assignee button allows you to view a summary of currently assigned policies and their respective assignees for reference before making changes.
All policy types can be configured in the same way. Attendance Allowed IP(s) have some additional features which are explained below.
Attendance Allowed IP(S):
From this tab, you can assign or remove allowed IP addresses for multiple employees at once, controlling which IP addresses employees are permitted to use for attendance marking.
Allowed IP:
Select one or more IP addresses from the dropdown that you want to assign to the selected employees — for example, 4.4.4.42 (Green design) or 103.250.149.247 (UNKNOWN IP).
Search:
Use the search bar to filter and find specific employees from the list. The employee table displays each person's Name, Designation, Department, and their currently Allowed IP(S).
Select the employees you want to update by checking the checkboxes next to their names.
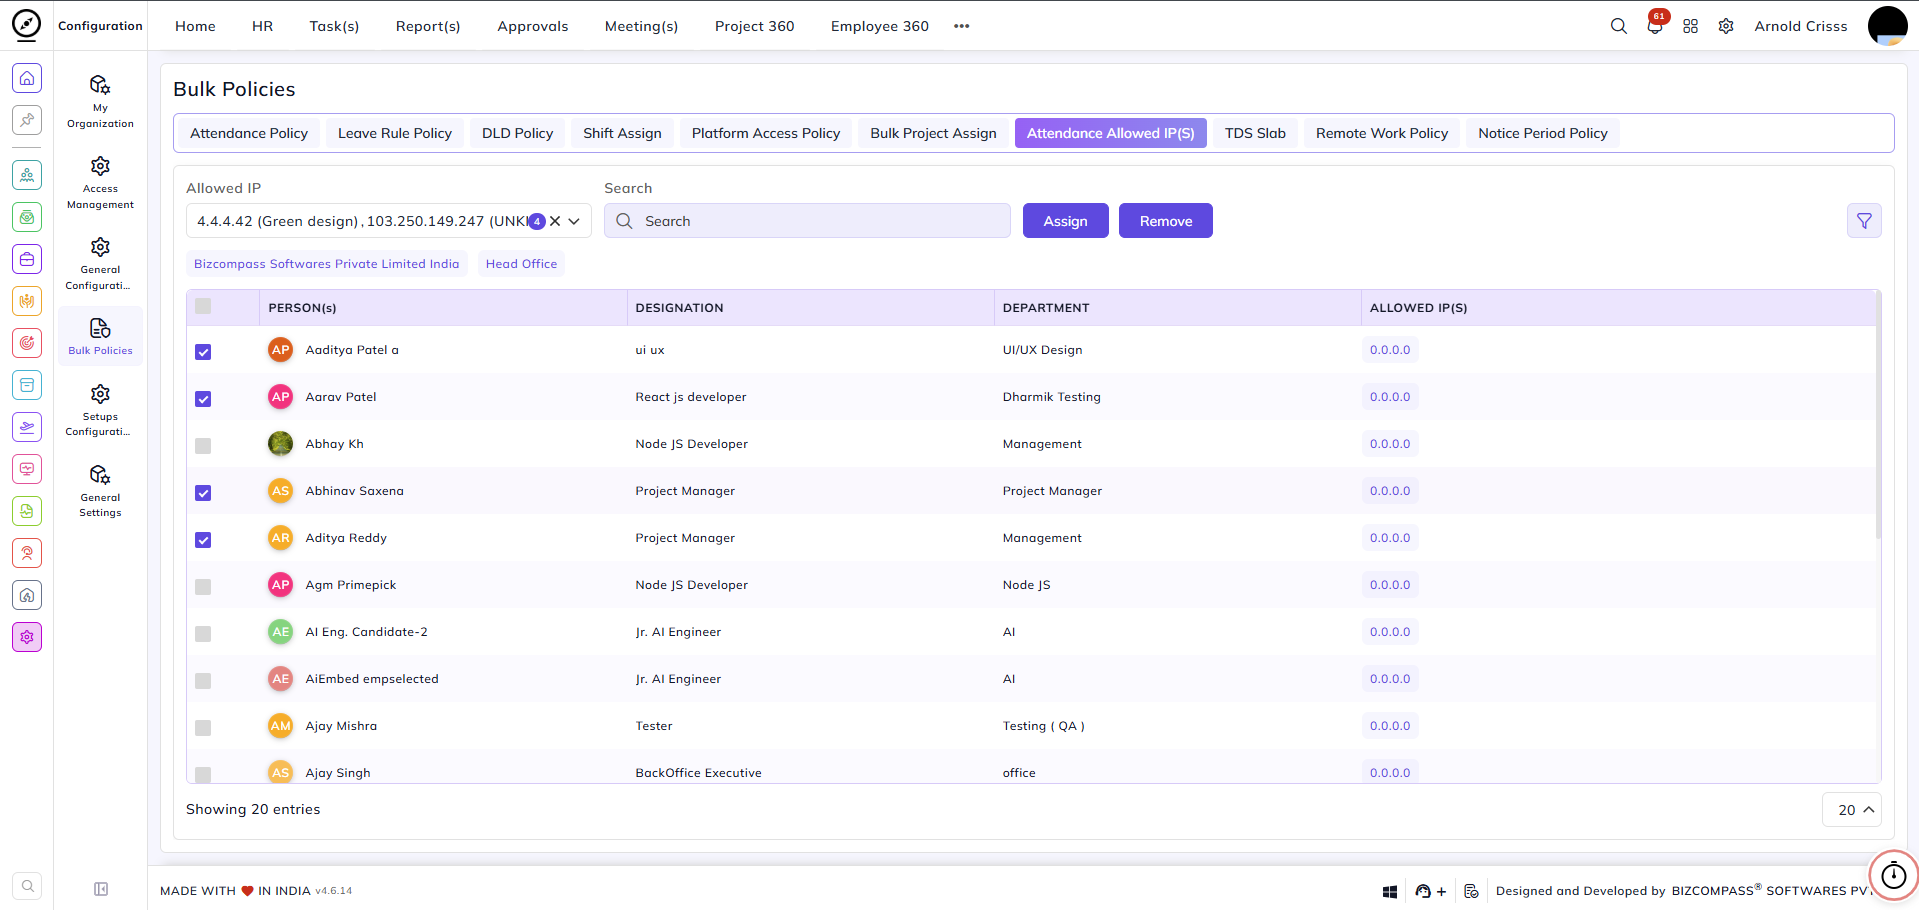
Then use the action buttons:
Assign:
When clicking Assign, a dialog will prompt you to choose between two options:
- Assign Additional IP — Adds the selected IP(s) to the employee's existing IP assignments without removing any previously assigned IPs. Click Yes to confirm.

- Replace & Assign IP — Replaces the employee's existing IP assignments with the newly selected IP(s). Click Yes to confirm, or Cancel to go back.

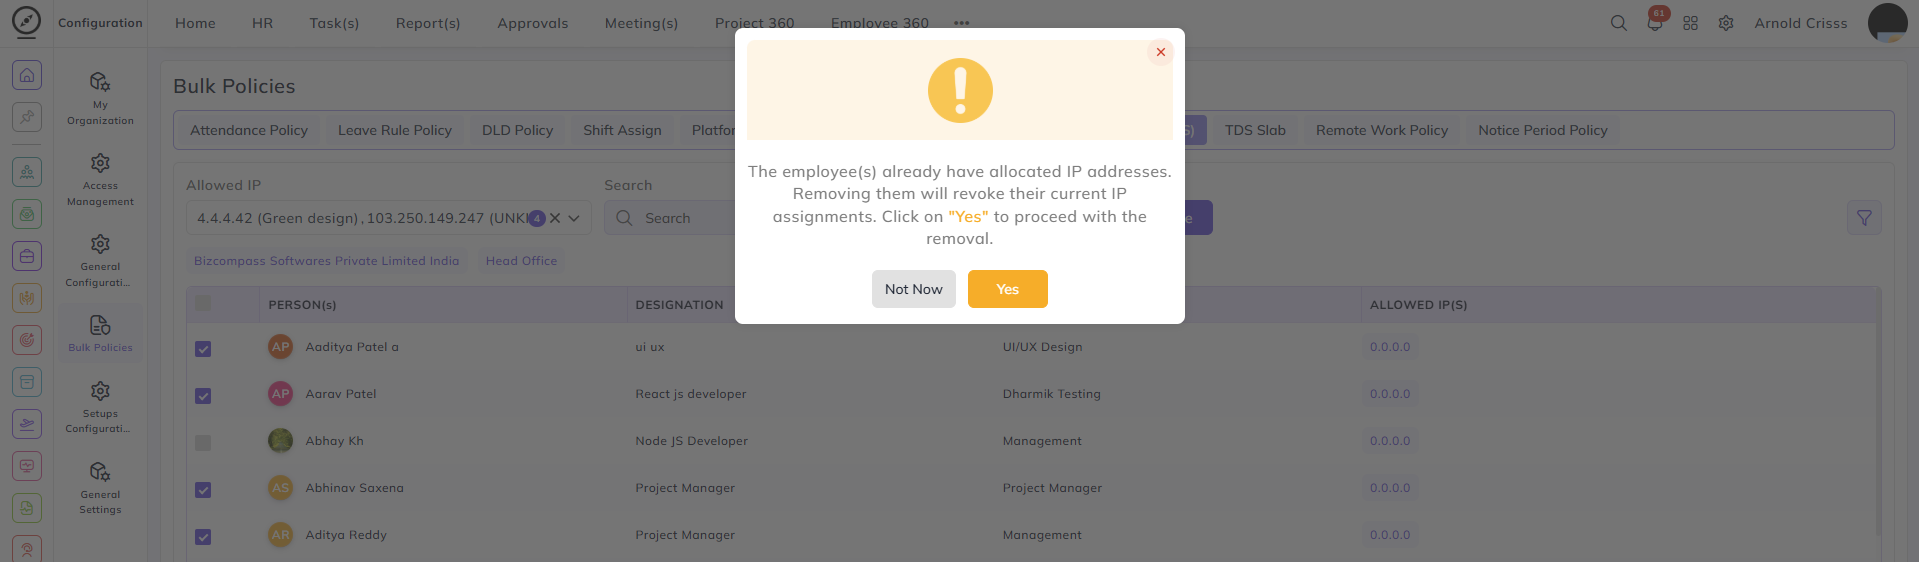
Remove:
Clicking Remove will prompt a confirmation dialog warning that the selected employees already have allocated IP addresses and that proceeding will revoke their current IP assignments. Click Yes to confirm the removal, or Not Now to cancel.