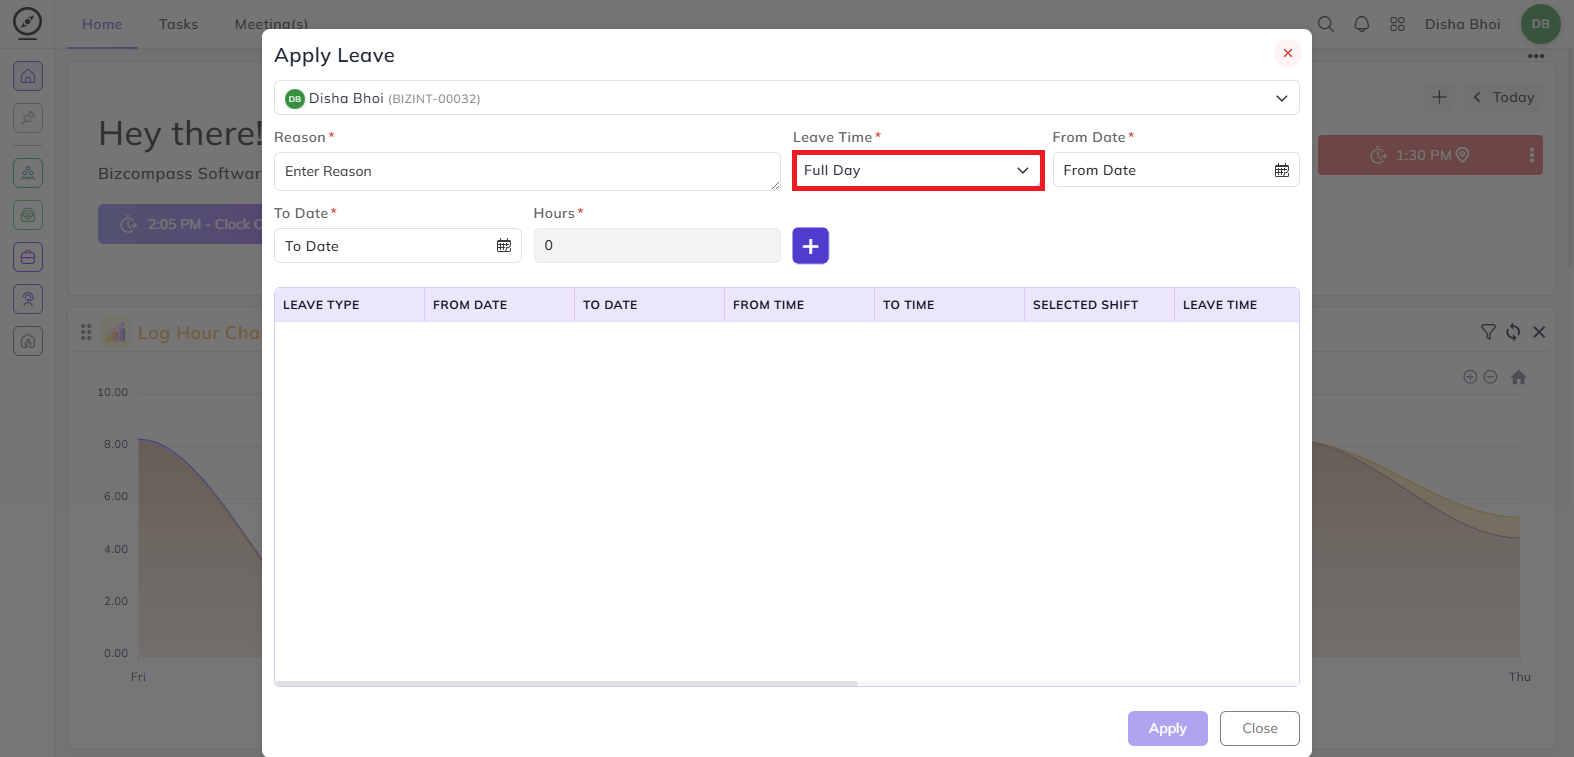
Apply Leave
You can apply for leave directly from the Home page by clicking the Apply Leave button. This opens the Apply Leave dialog where you can fill in your leave details.

Reason:
Enter the reason for your leave.
Leave Time:
Select the type of leave duration. The fields that appear next will change based on what you select here:
- Full Day — Select the From Date and To Date. Click the + button to add multiple leave entries if needed.
Don't Show Leave Time: If your organization has this option enabled while creating a Shift, it won't show the employee the leave time while applying for a leave. For e.g., if the employee applies for a full day leave, he/ she will only see Full Day Leave option, not 8.5 hours (employee shift hours) option.
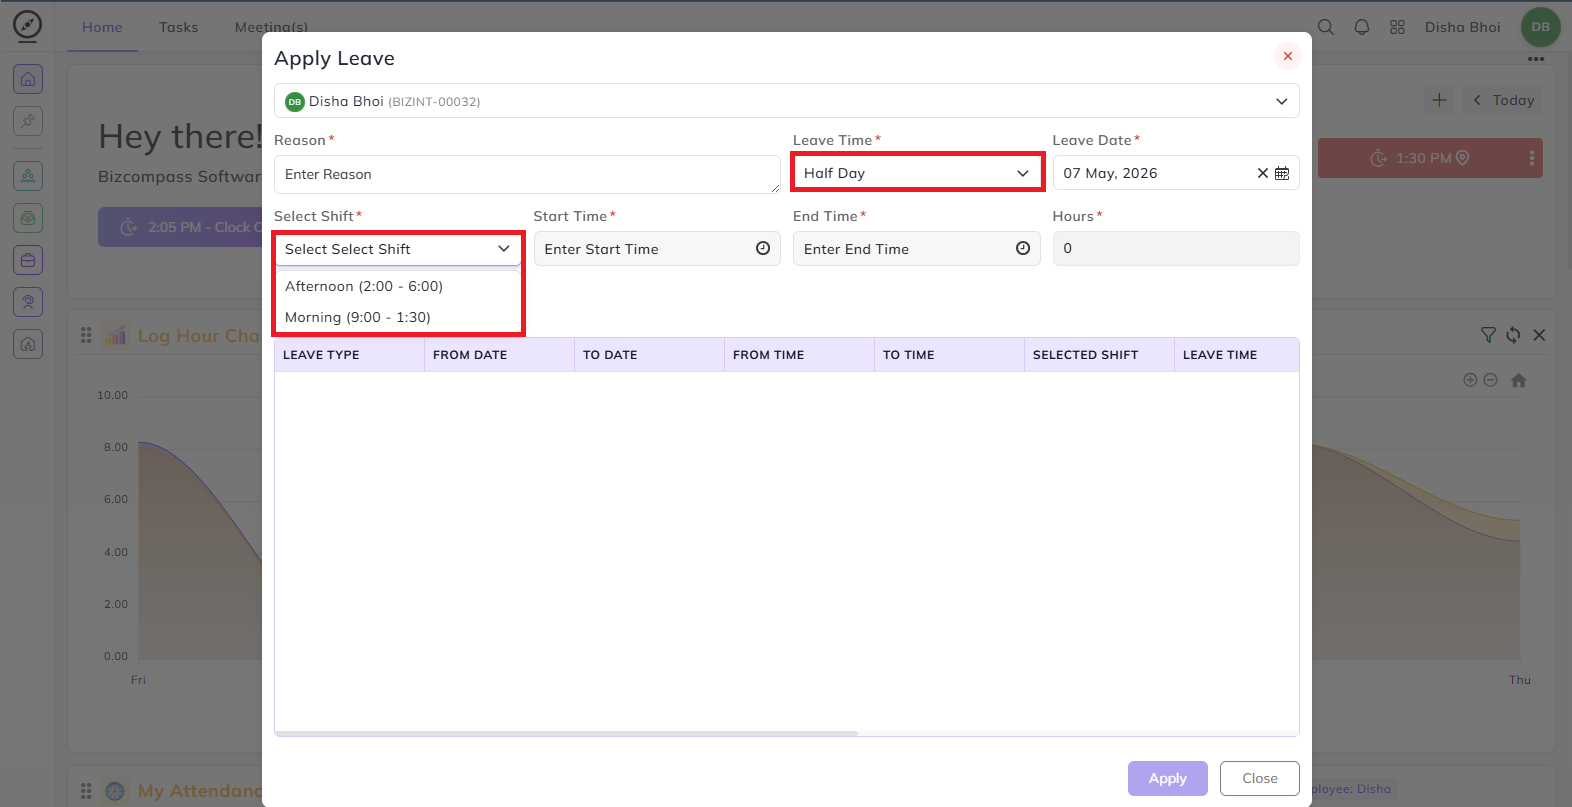
- Half Day — Select the Leave Date, then choose your shift (Morning or Afternoon) along with the Start Time and End Time. The hours are calculated automatically based on the shift selected.
- Hourly Based — Select the Leave Date and enter the Start Time and End Time manually. The hours are calculated based on the time range entered.

Leave Type:
Select the type of leave you are applying for — Casual Leave, Sick Leave, or Compensatory Leave.
Note: Leave Types won't be visible if your paid leaves are exhausted. An organization can do this by enabling the Restrict Leave Application and Fully Restrict Leave Application. In Restrict Leave Application, if you have even 0.1 paid leave left for instance, leave type will be shown. But in Fully Restrict Leave Application, you will be fully restricted to apply for any leaves if your paid leaves are exhausted.
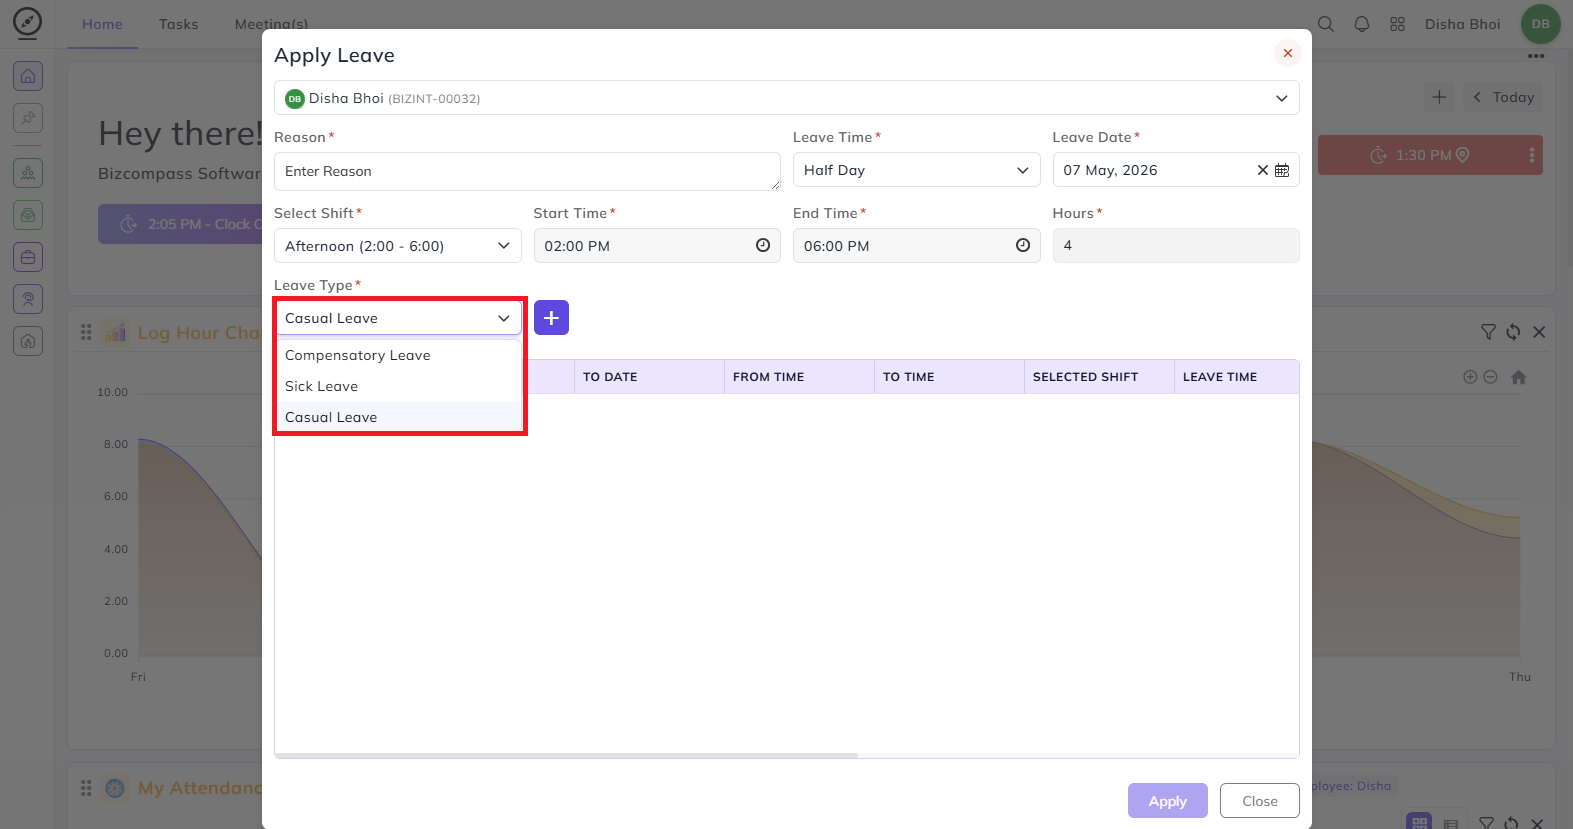
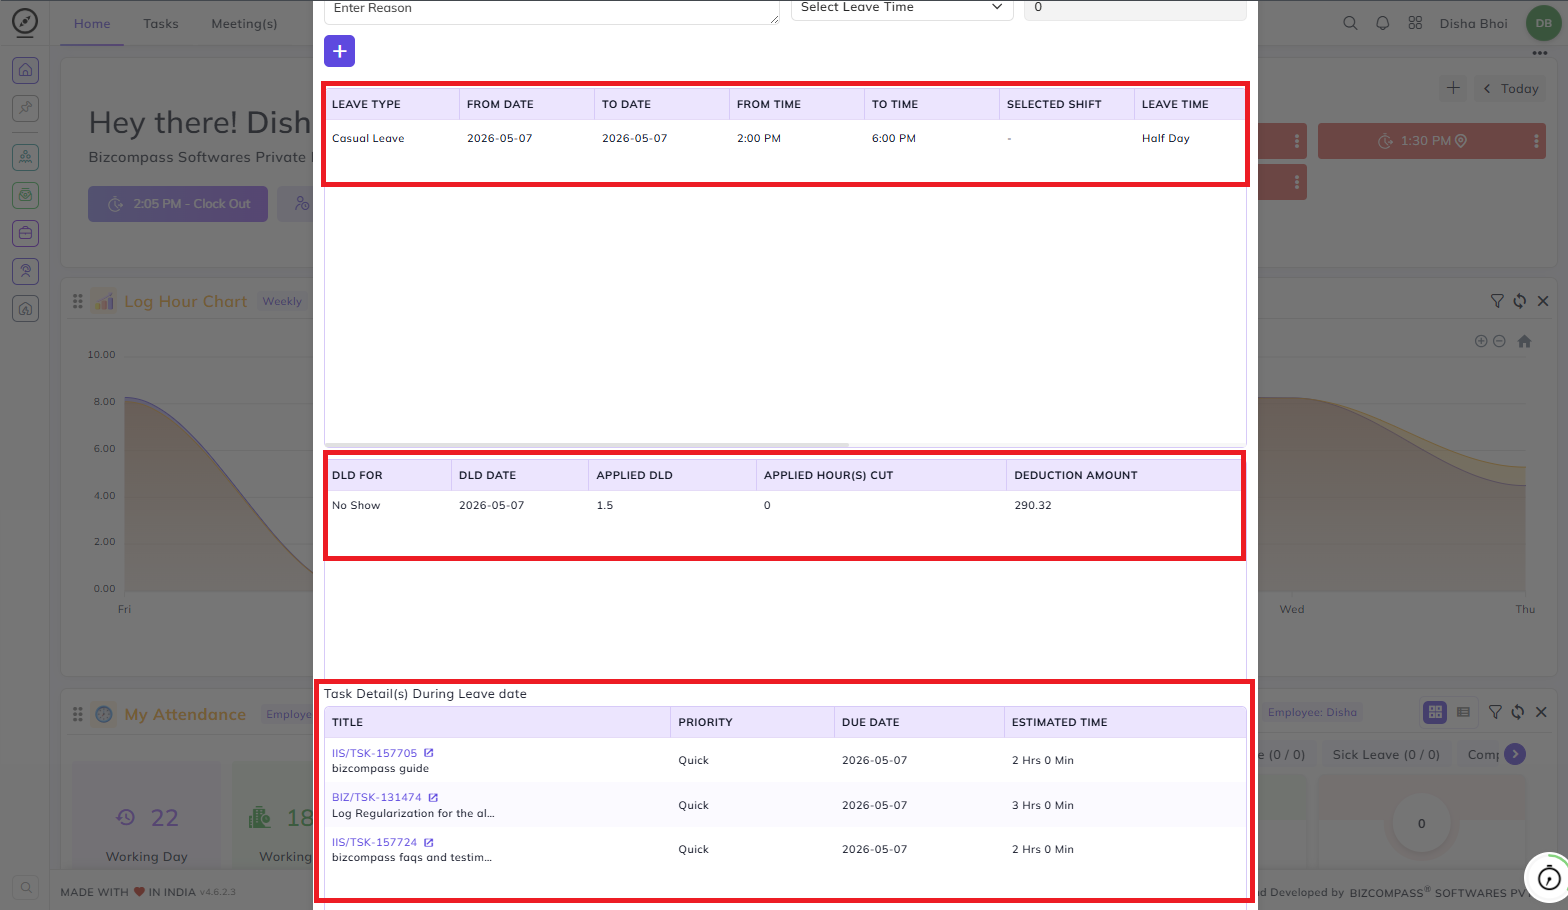
Once you have filled in the details, click + to add the entry to the leave table below, which shows a summary of all leave entries you have added including the leave type, from and to date, from and to time, selected shift, and leave time. Click Apply to submit your leave request.
When applying leave, the form also shows two additional information sections:
- DLD (Daily Loss Deduction) — If a deduction is applicable for the leave date, it is shown here with the DLD date, applied DLD value, hours cut, and deduction amount.
- Task Detail(s) During Leave Date — Any tasks assigned to you that are due on the leave date are listed here with their title, priority, due date, and estimated time, so you are aware of pending work before submitting.
Suppose if a reporting person (or any higher authority person) has "All" rights for Apply Leave page configured in the User Rights, he/ she can apply leave for all people below him/ her in the user role hierarchy.
Apply Leave Page:
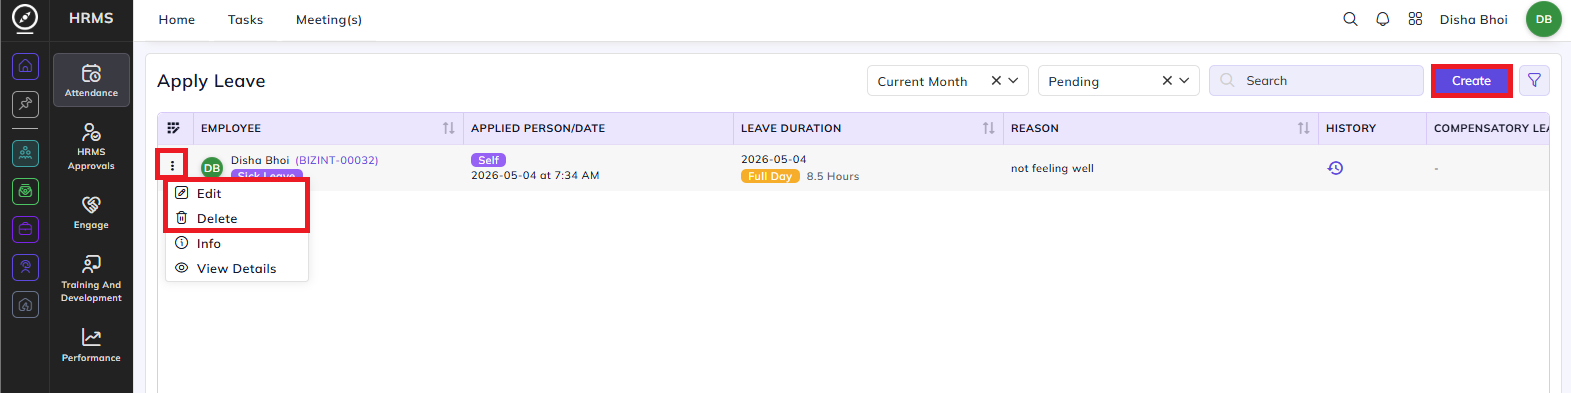
You can also access all your leave requests from HRMS->Attendance->Apply Leave. This page lists all submitted leave requests with the employee name, applied date, leave duration, reason, and history. You can filter by month and status (e.g., Pending).
Click the three-dot menu on any leave entry to access the following options:
- Edit: Modify the details of an existing leave request.
- Delete: Remove a leave request. You can only delete a leave if it's not approved yet.
You can also submit a new leave request directly from this page by clicking the Create button at the top right, which opens the same Apply Leave form.
If you applied for a leave and it is approved, you can cancel it till the leave date arrives. After the leave date has passed, only the admin can cancel the leave.
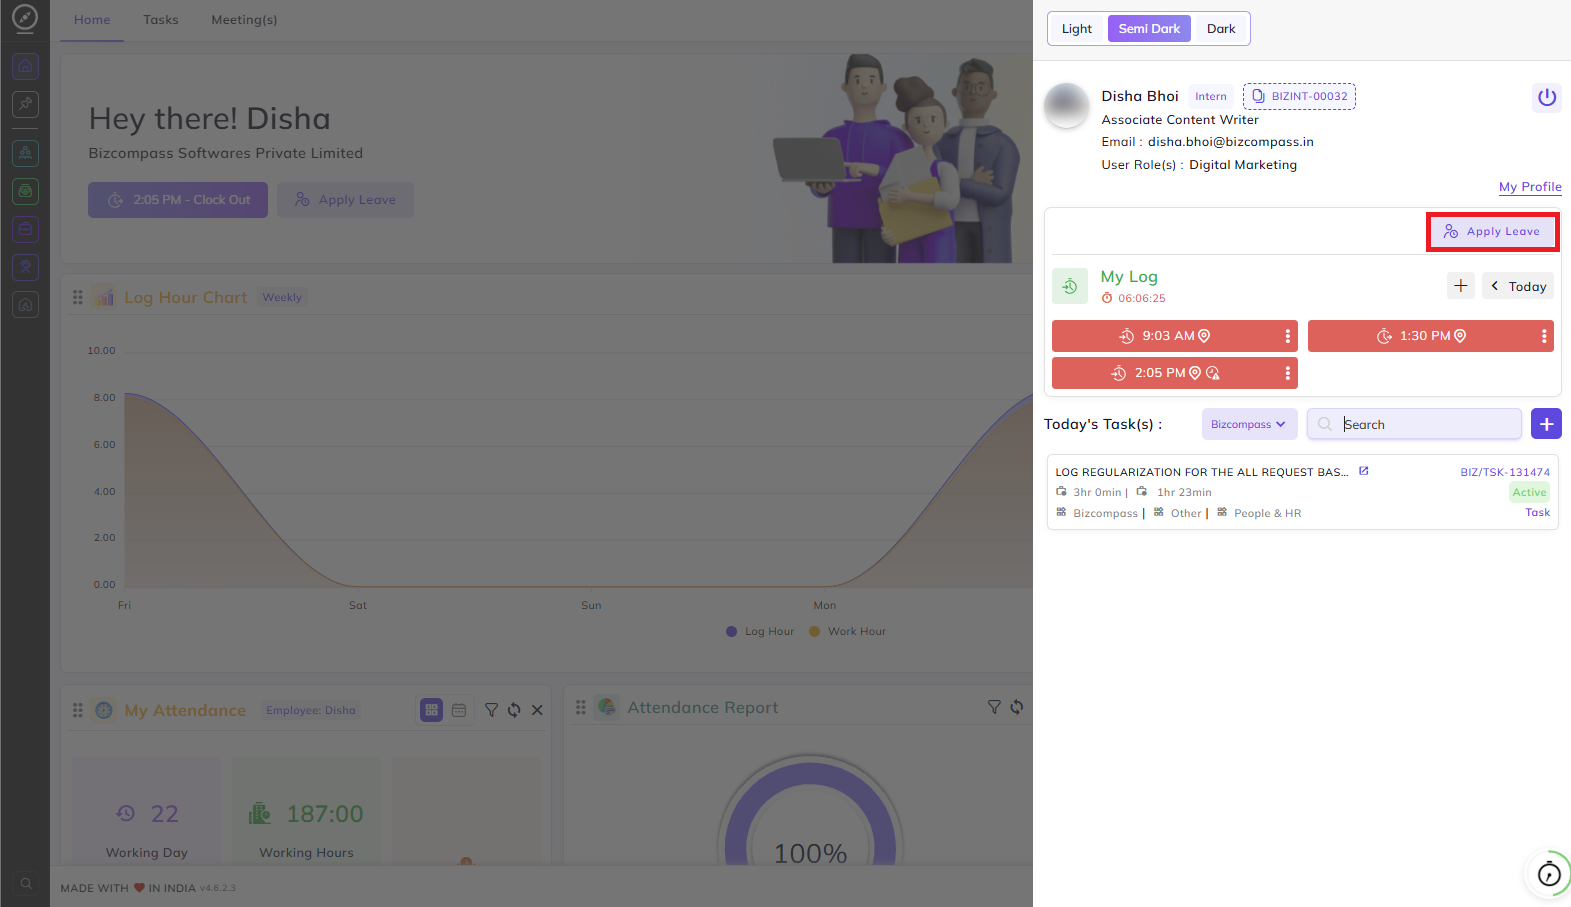
Additionally, Apply Leave can be accessed from:
- Profile Quick Panel — Click your profile icon at the top right of any page to open a side panel showing your profile details, today's logs, and today's tasks. An Apply Leave button is available directly within this panel for quick access without navigating away from your current page.
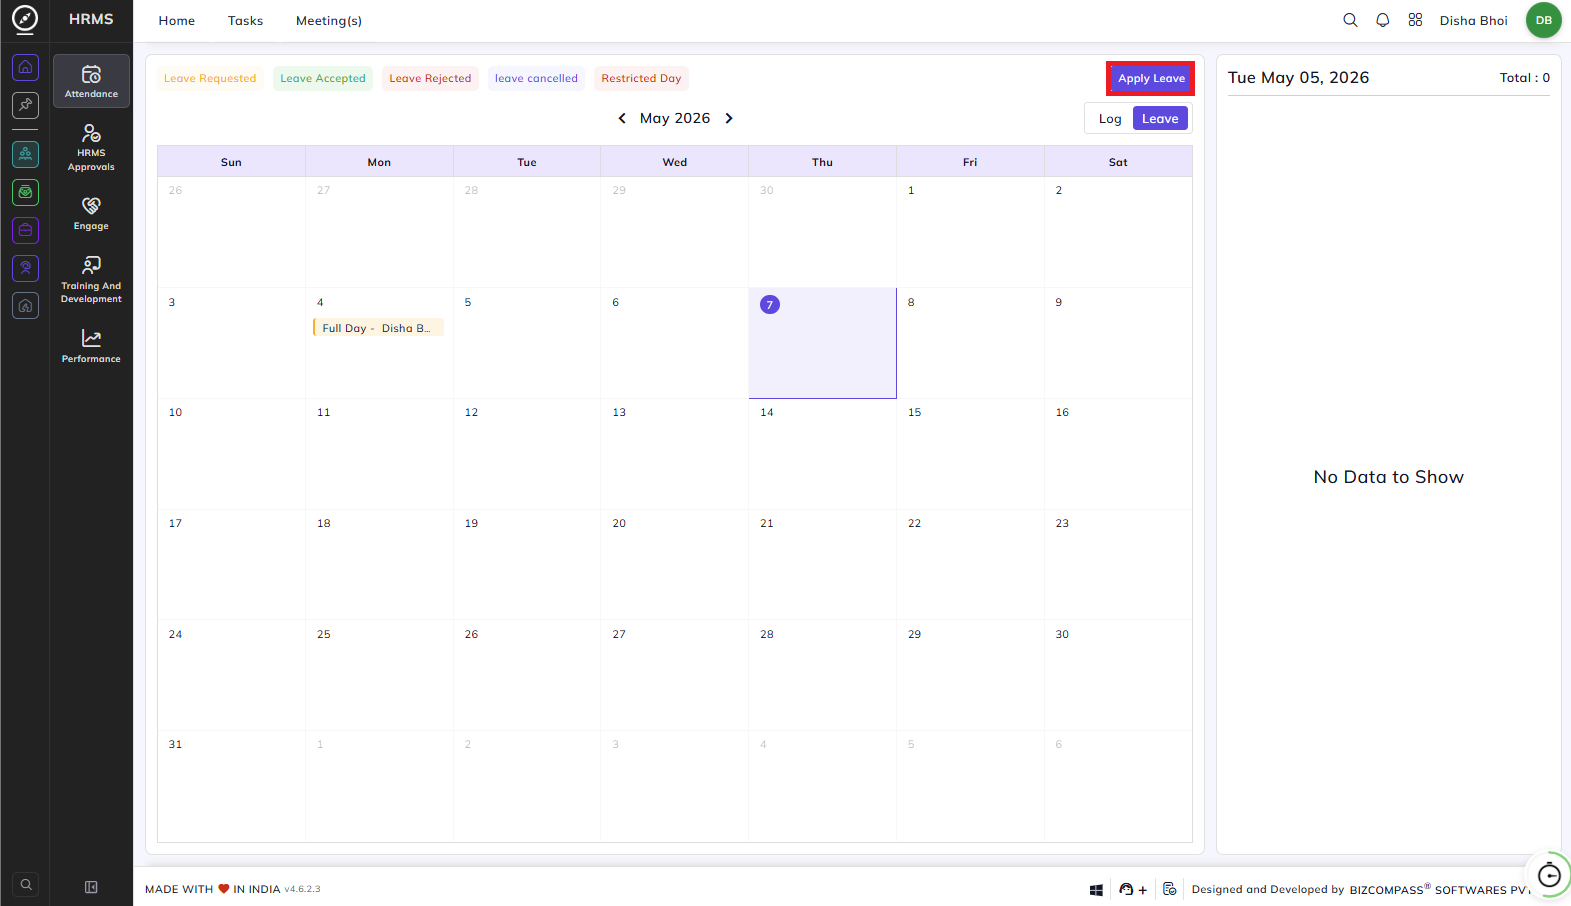
- Attendance Calendar (Leave Tab) — From HRMS->Attendance page, click the Leave tab to switch to the leave calendar view. An Apply Leave button is available at the top right of this view, allowing you to submit a leave request directly from your attendance calendar.