Creating Employee
An employee is created from the Employee Management page. To create an employee, you only need to fill the Overview and Residential Detail(s) sections initially. All other sections can be filled later on. There are two ways for creating an employee:
1) The first way is by clicking the button of Upload File and selecting Import Employee in it. This feature is mostly used when you want to add employees in bulk.
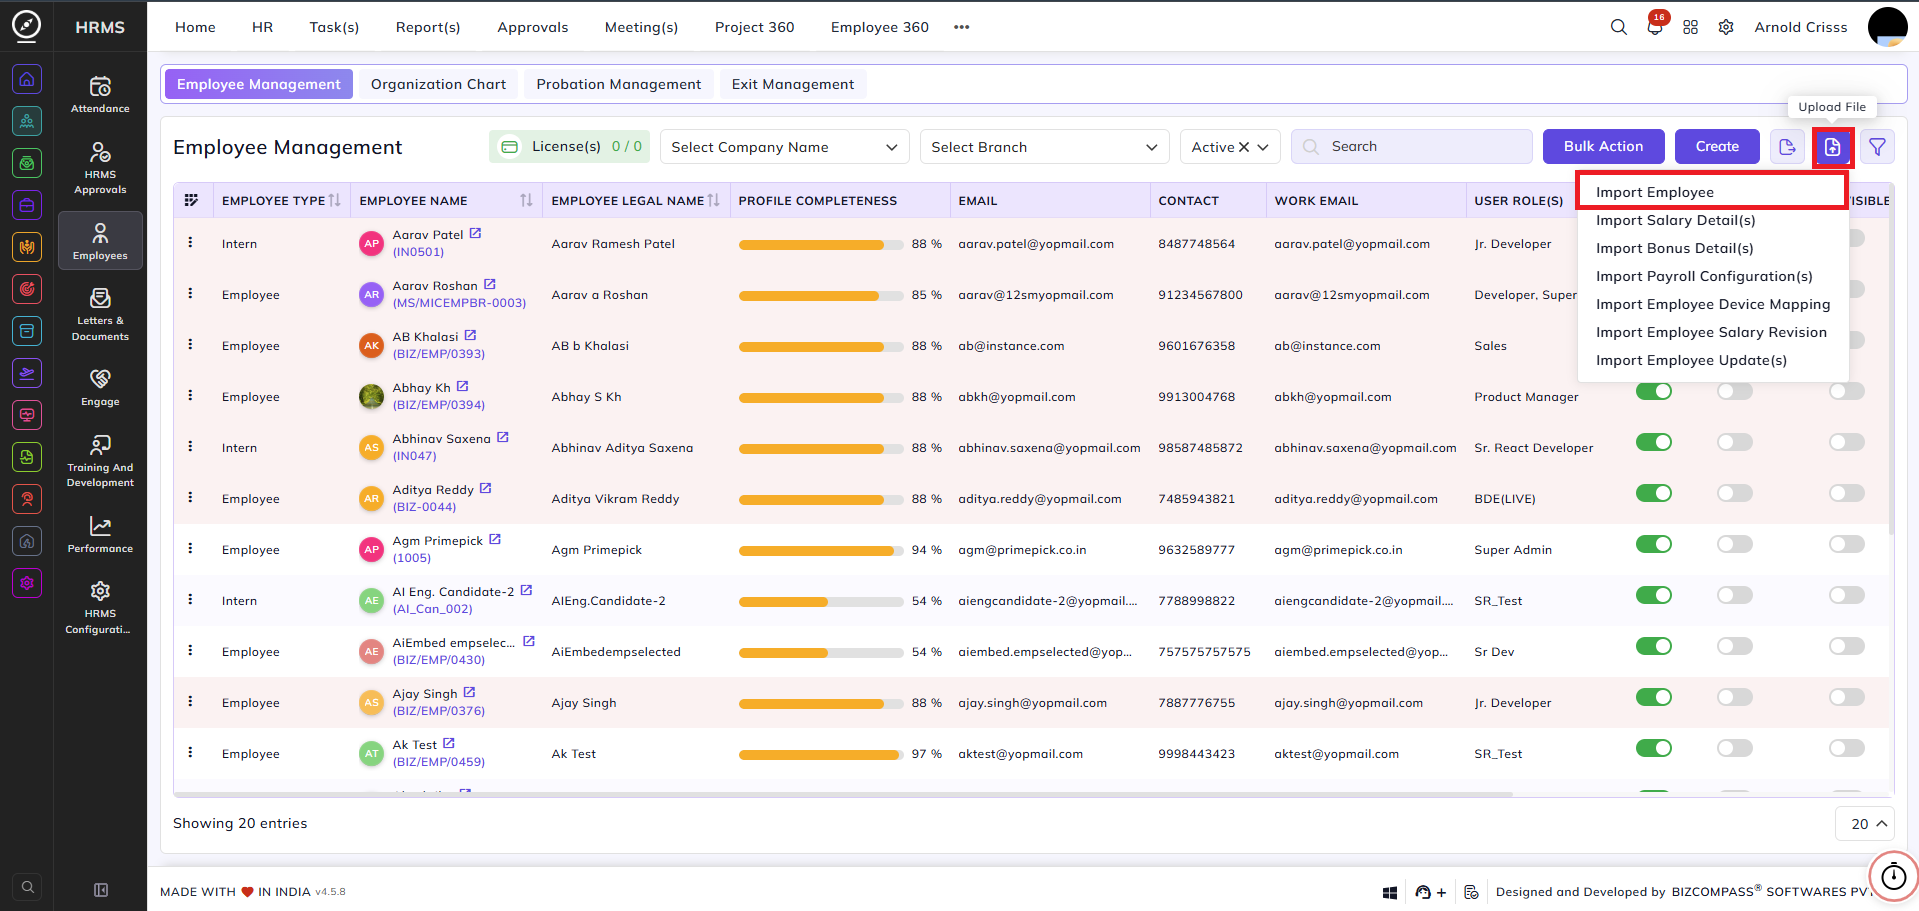
2) The second way is by clicking on the Create button and adding all the details manually.
- The Employee Configuration which was set Default will automatically be added in the top right corner and its details (i.e. password and user role) will be filled. These details can be edited also.
Overview:
- Select the Company Name, Type, Branch, and Payroll Branch.
Note: Employees can be in more than one Branch but they can only be in one Payroll Branch.
- Enter the Probation Period Month(s) & Date(s) and the select the Joining Date.
- Enter the Name, Display Name and Gender of the employee.
- Enter the Password, Contact info, and Email of the employee.
- Select the Department, Sub-Department (optional), Designation, Division (optional), User Role, Reporting To person, Approve To person, and Employment Type.
- Choose the Employee Status (Active/ Inactive).
- Select the Date Of Birth and optionally add Religion, Blood Group, Profile Picture, Pay Grade, and Cost Center.
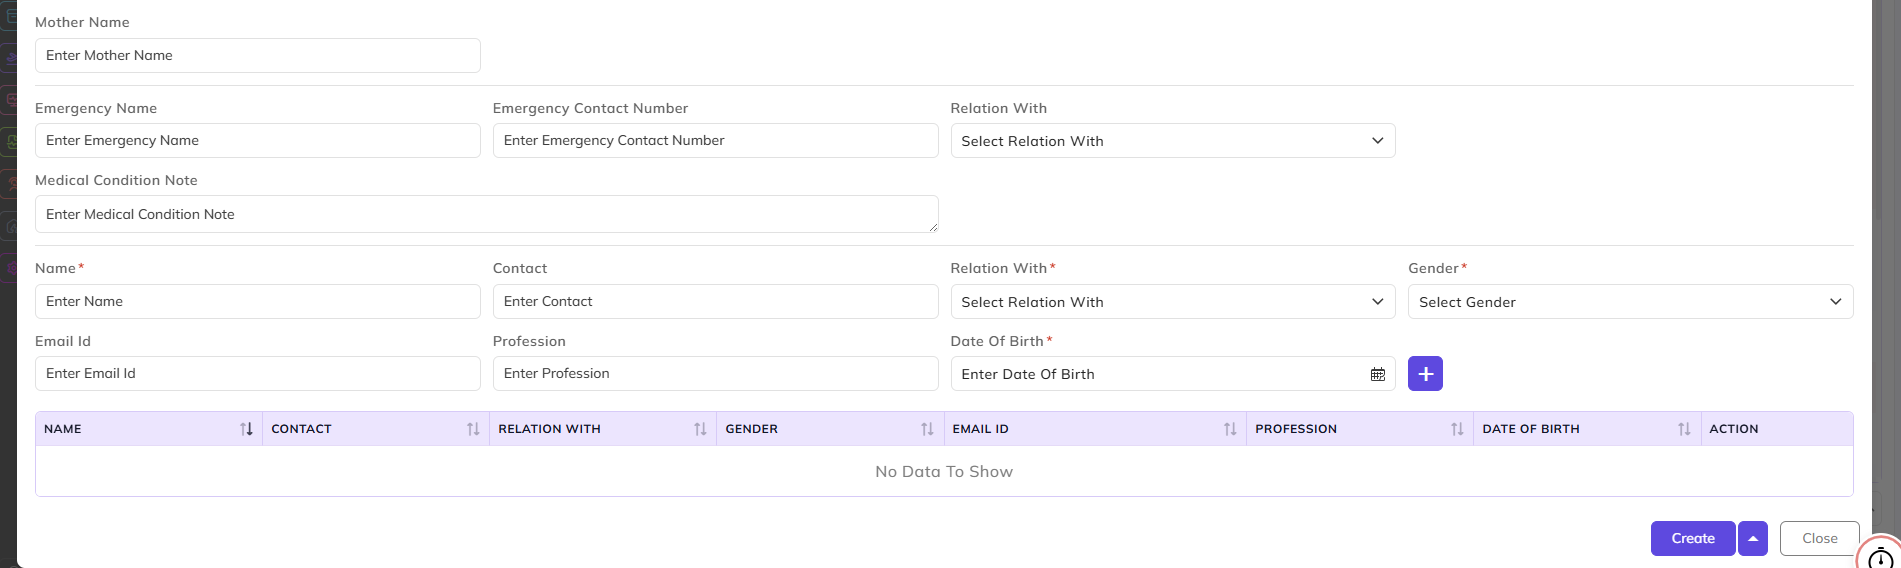
- Optionally add the Emergency Contact details.
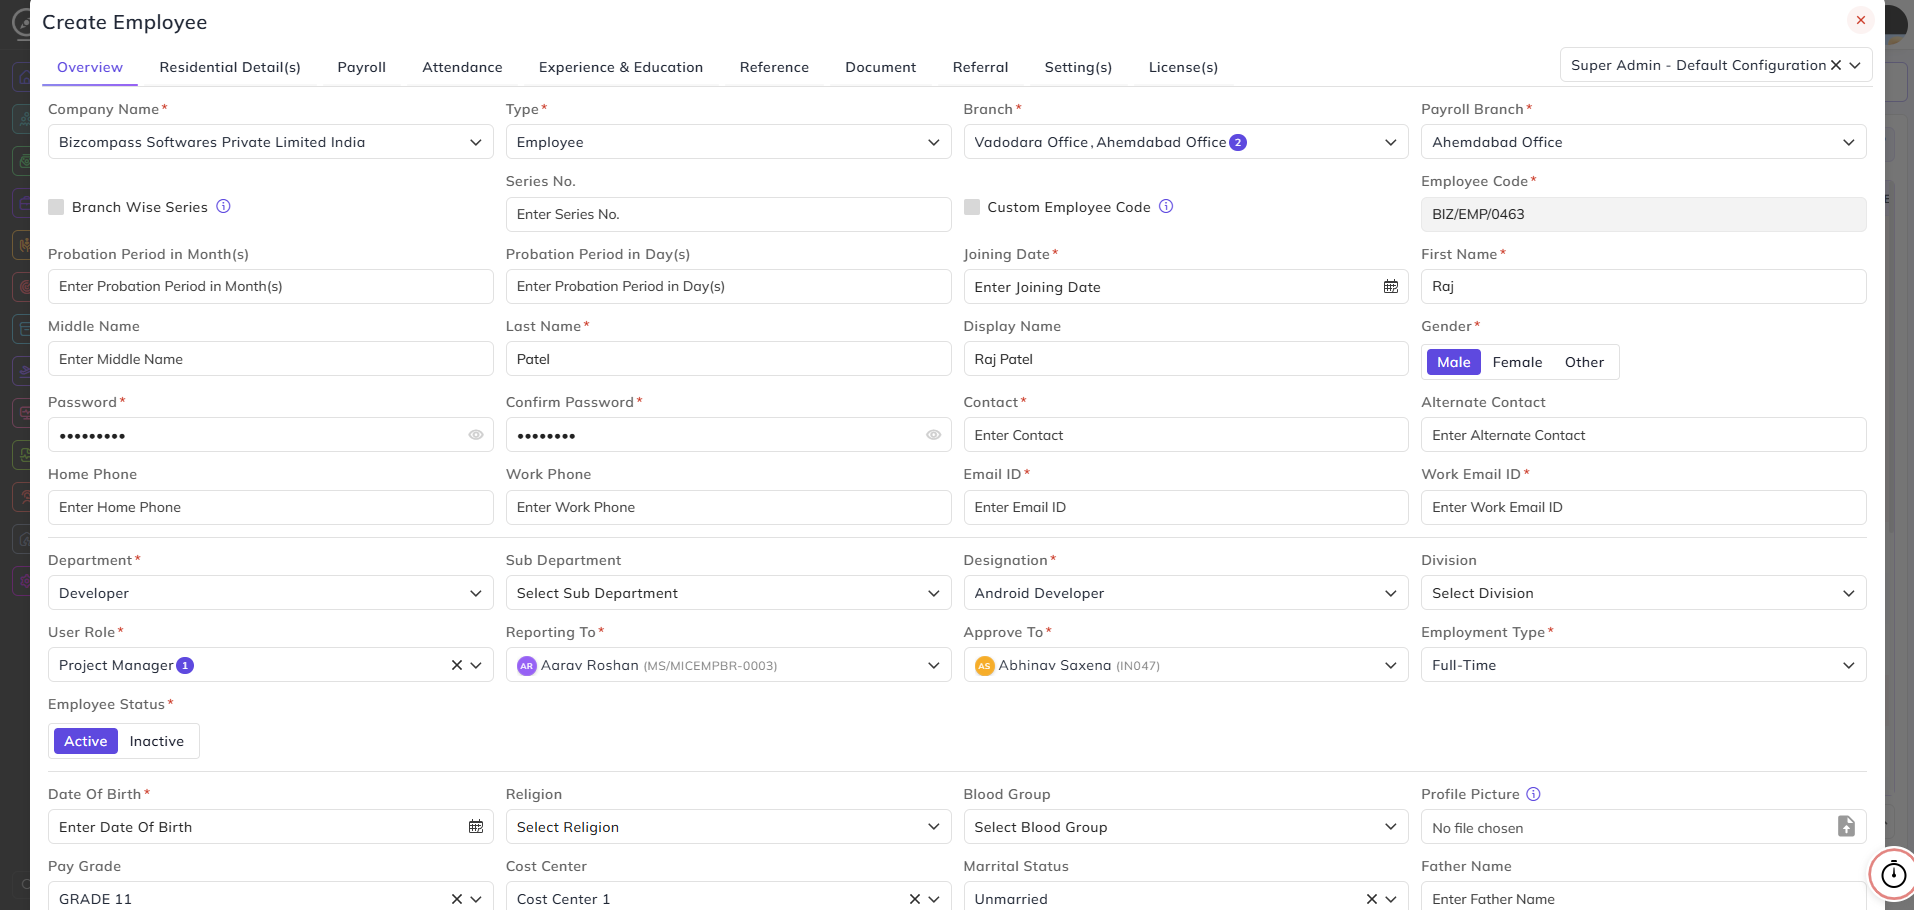
- Initially, if the Branch Wise Series option is disabled, the Employee Code will be generated based on the Company Wise Series configured.
- If the Branch Wise Series option is enabled, the Branch Series dropdown will appear and you can select the Branch Series configured for that specific company branch from there.

- If you want to edit the Series Number in the Employee Code, just type the series number. It will be updated in the Employee Code.

- Enable the Custom Employee Code option if you want to customize the full Employee Code.

Residential Detail(s):
- In this section, add the Current and Main Address of the employee.
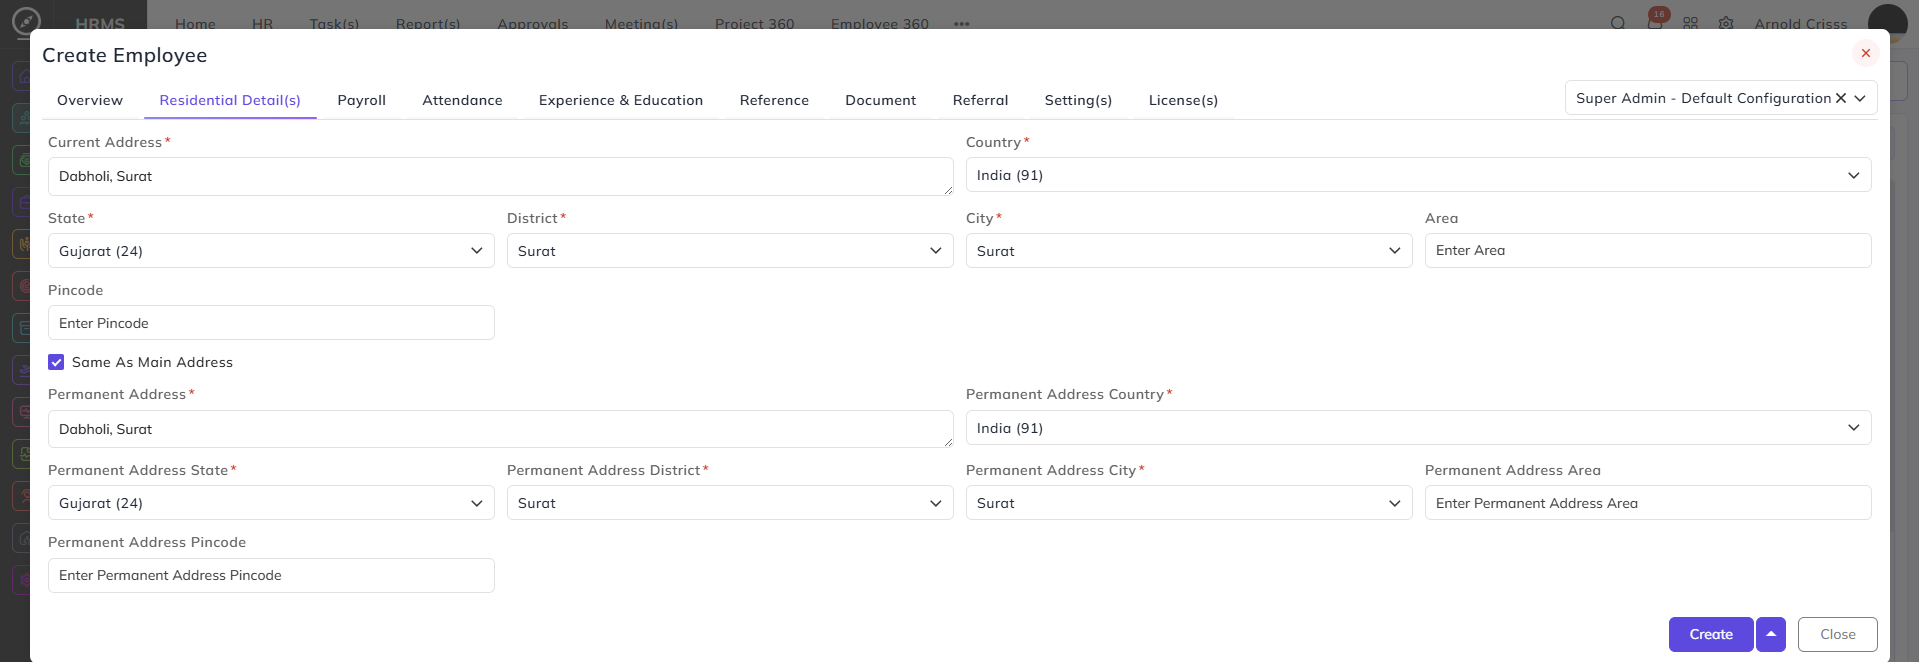
Adding these two sections will let you create the employee.
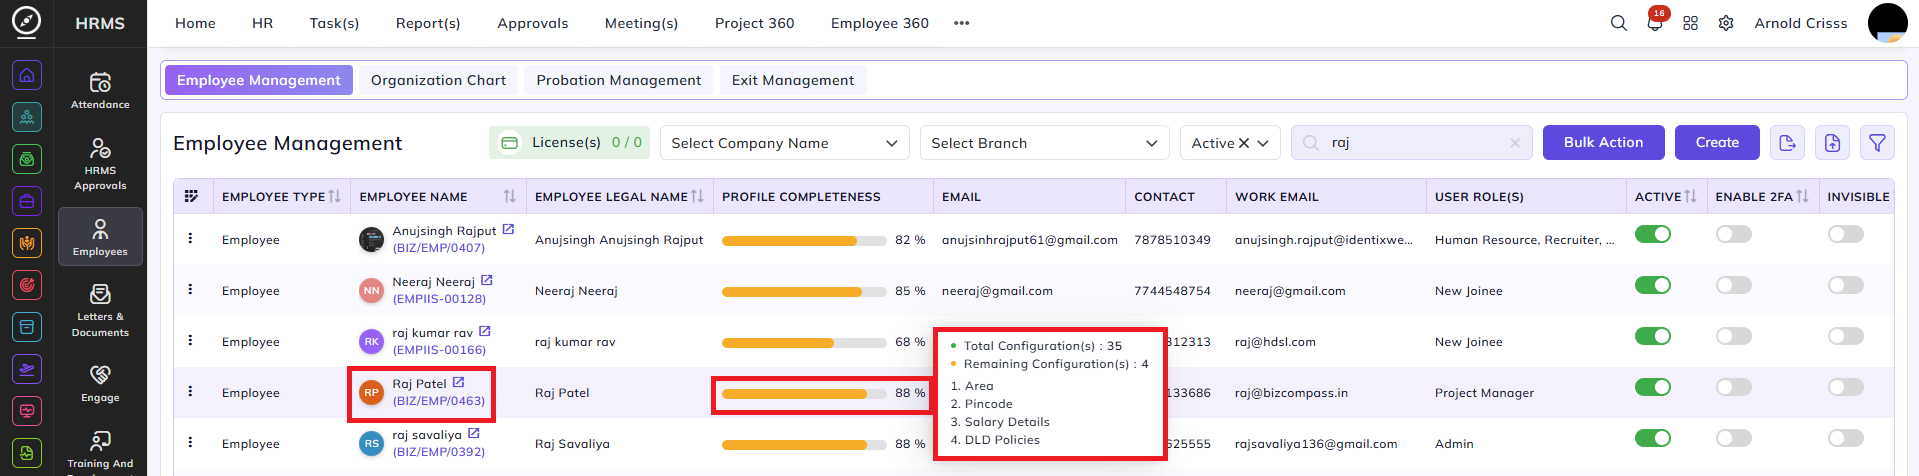
- Once the employee is created, you can see the remaining configurations of the employee profile by clicking on the Profile Completeness column button of that employee.
The Bulk Action button allows you to delete multiple employee profiles at once, streamlining the management process.