Shift Roster
The Shift Roster page gives administrators a monthly calendar view of an employee's shift schedule and allows them to assign special shifts, convert week-off days into working days and vice versa, restrict specific dates, and manage shift changes for one or multiple employees at a time.
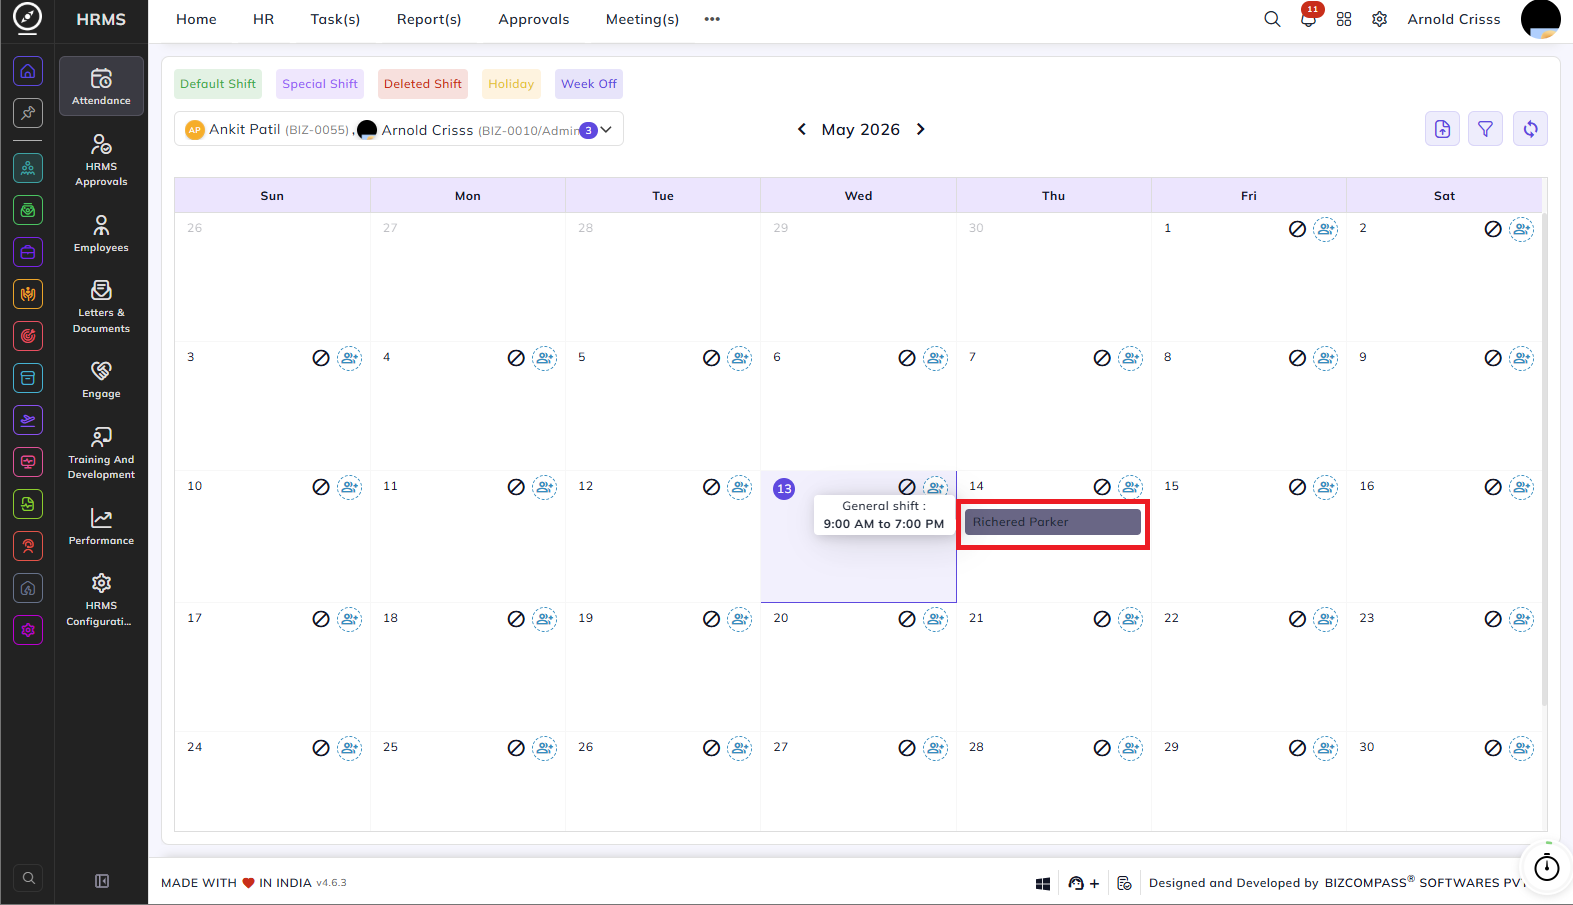
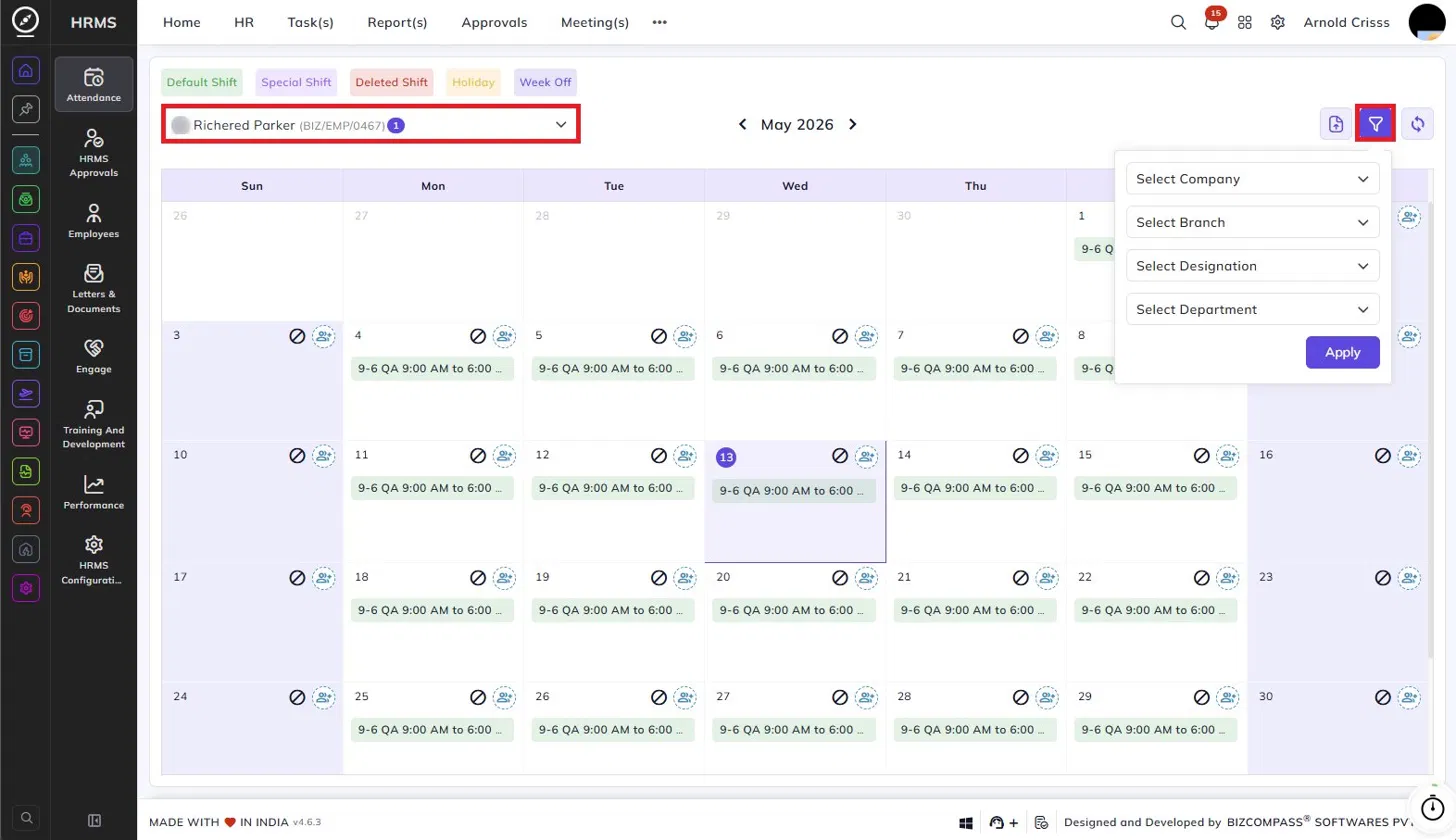
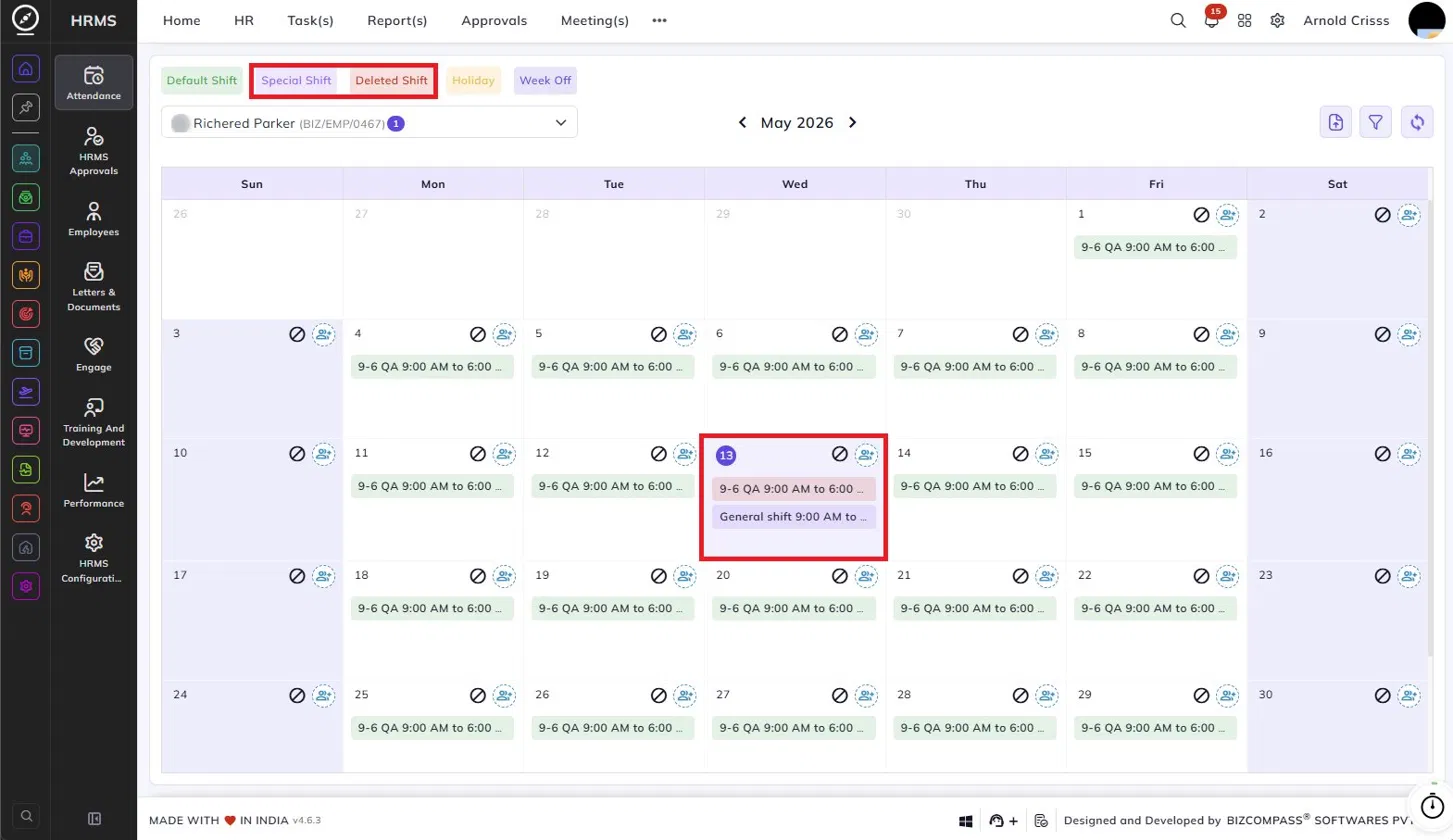
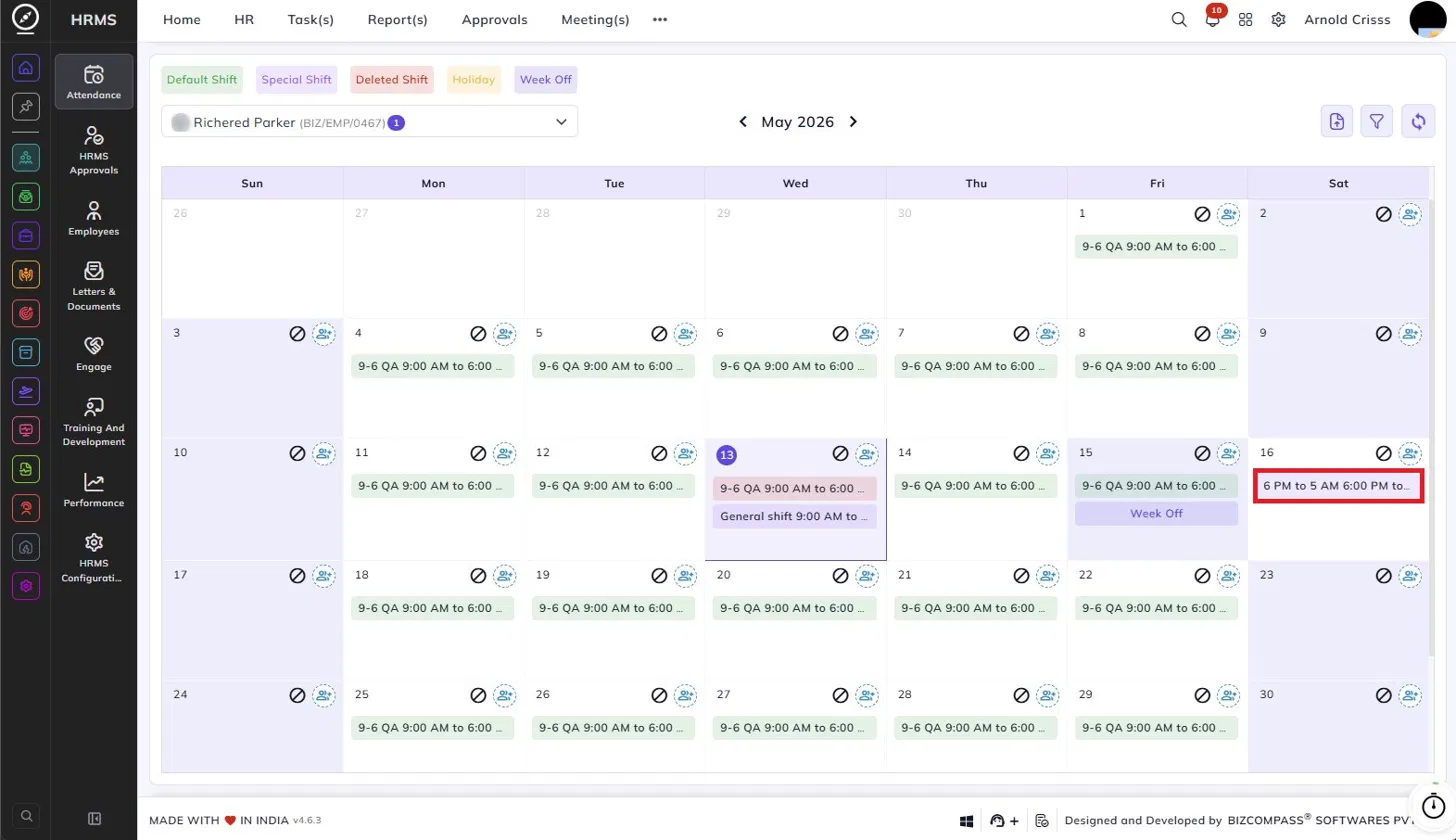
Select the employee(s) from the dropdown at the top to load their shift calendar. You can also filter by Company, Branch, Designation, and Department using the filter icon. The calendar displays each day's assigned shift with its start and end time. The legend at the top shows the different types of entries — Default Shift, Special Shift, Deleted Shift, Holiday, and Week Off.
Assigning a Special Shift:
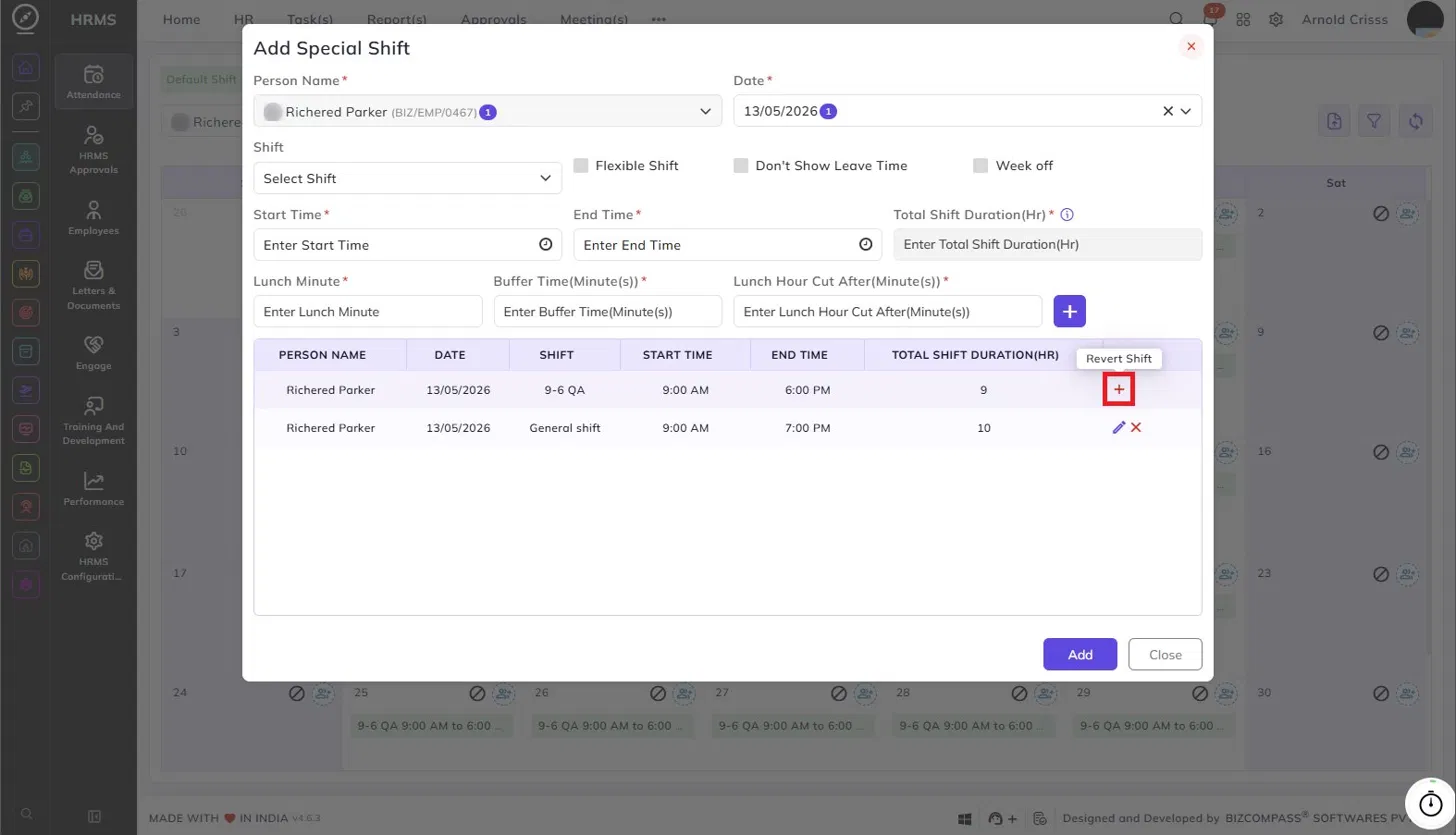
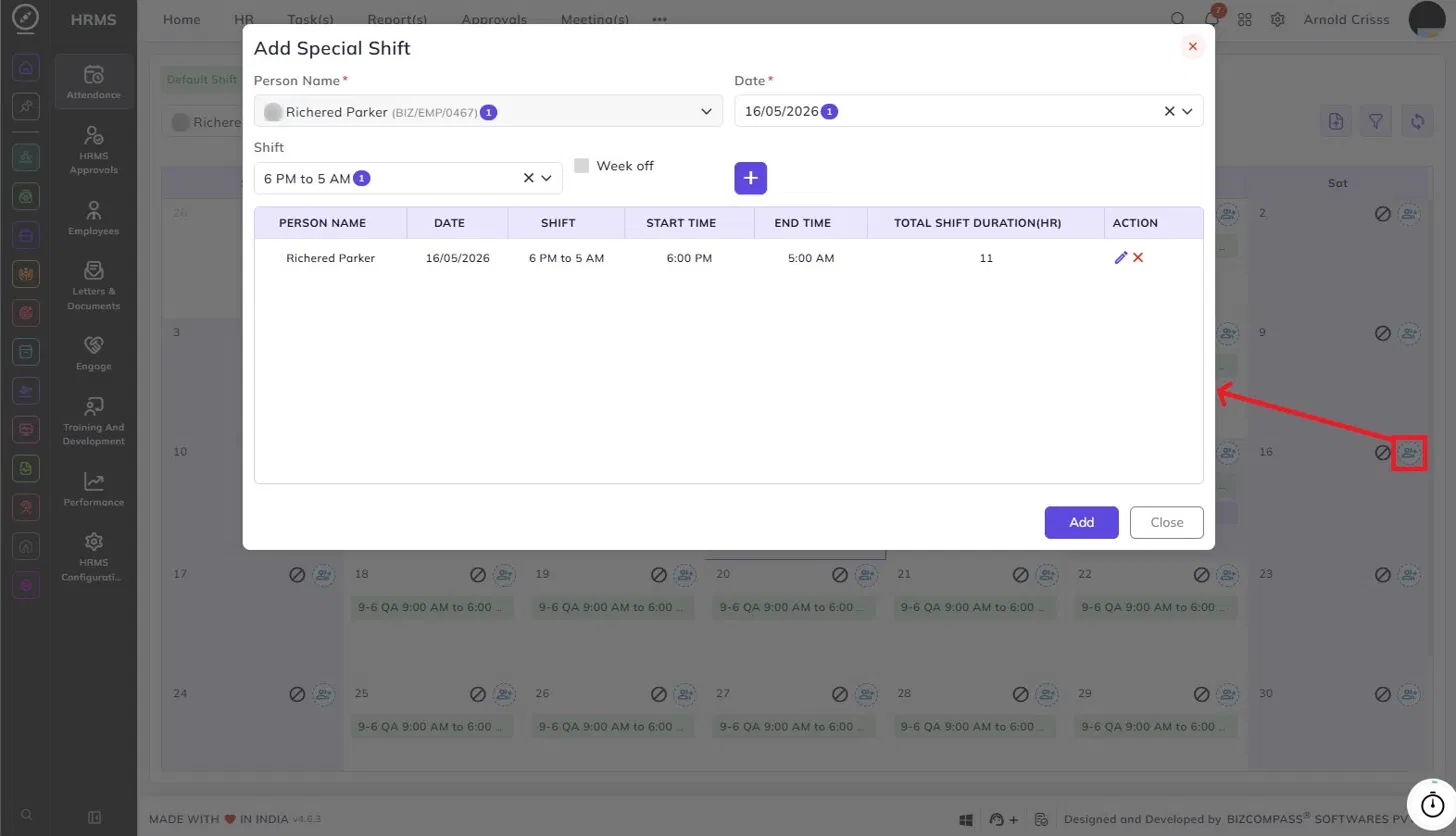
Click the shift icon on any date to open the Add Special Shift dialog. This shows the employee's currently assigned shift for that day along with its start time, end time, and total shift duration. Remove it (by clicking on the cross icon in Action column) to add a special shift.
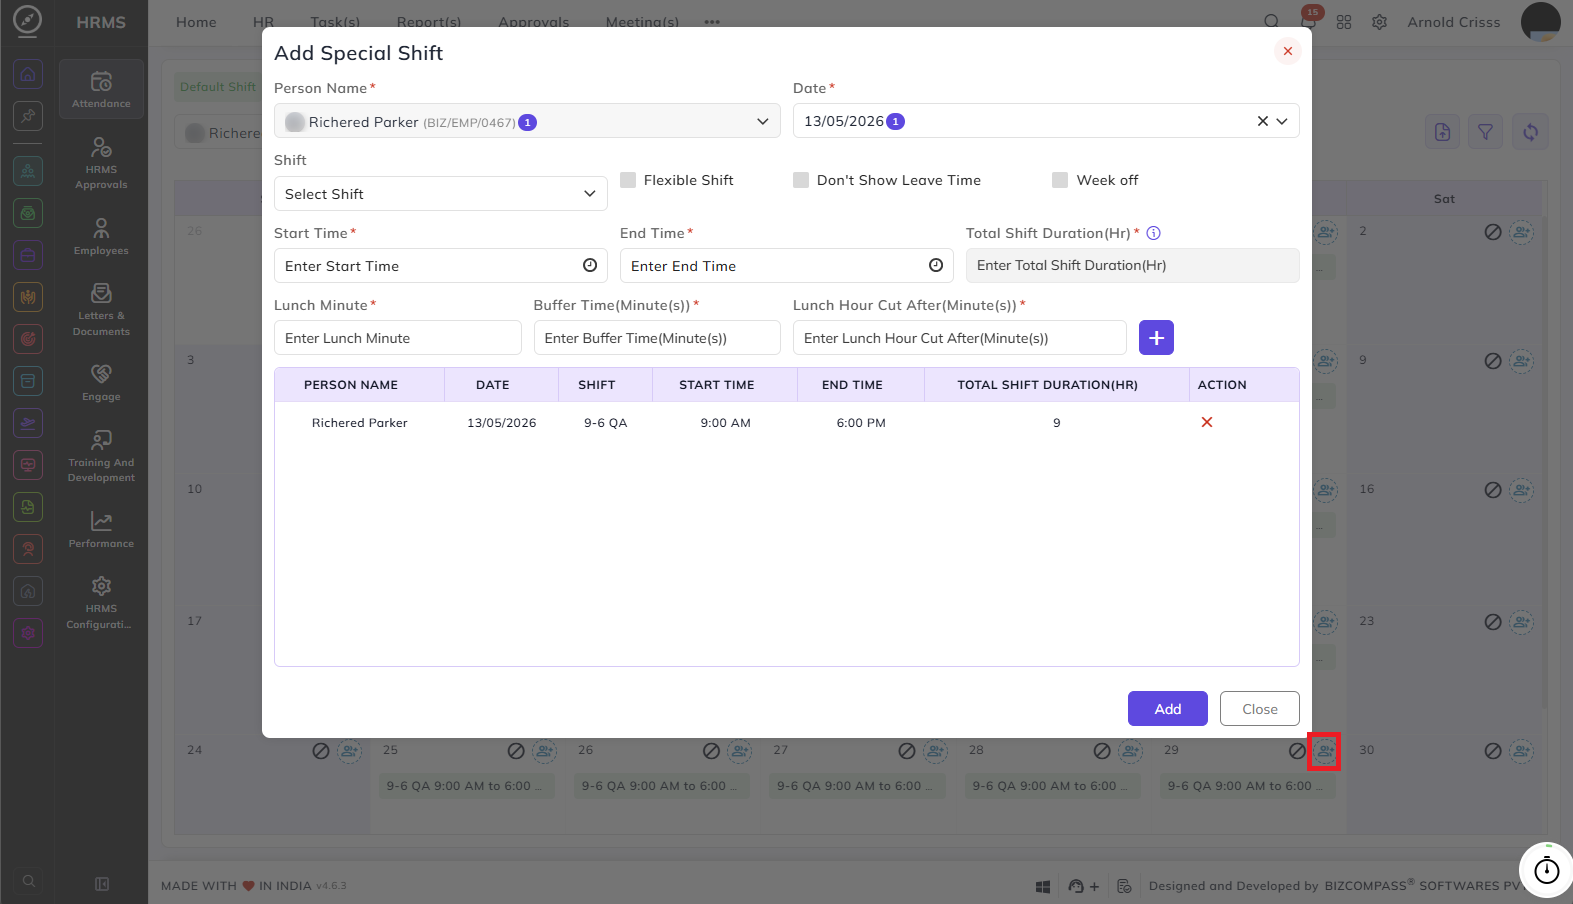
To assign a new shift, fill in the following:
Person Name:
The selected employee(s) are pre-filled.
Date:
The selected date is pre-filled.
Shift:
Select a shift from the list. If you select a shift, the start time, end time, and total shift duration are auto-filled based on the shift configuration. You can also manually override the start time, end time, lunch minutes, buffer time, and lunch hour cut after if needed.
Flexible Shift:
Enable this to manually edit the Total Shift Duration (Hr.) instead of using the auto-calculated value.
Don't Show Leave Time:
Enable this to hide leave time for this shift.
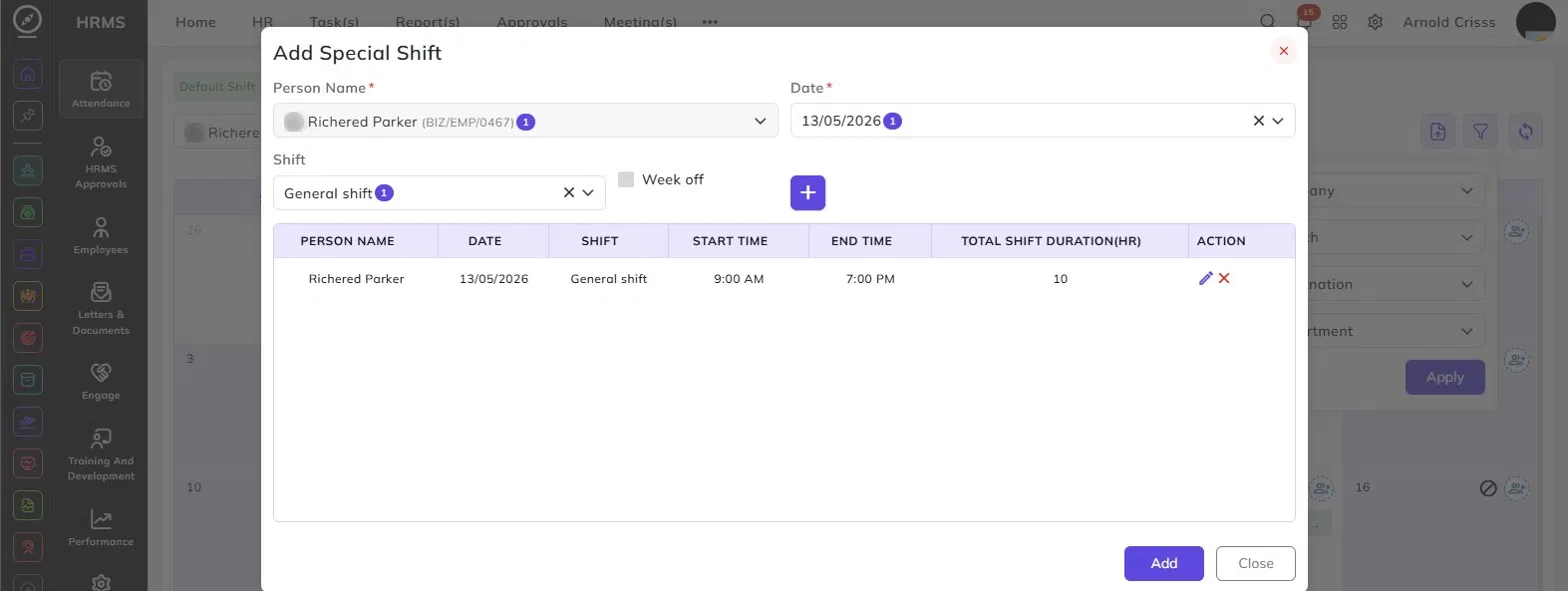
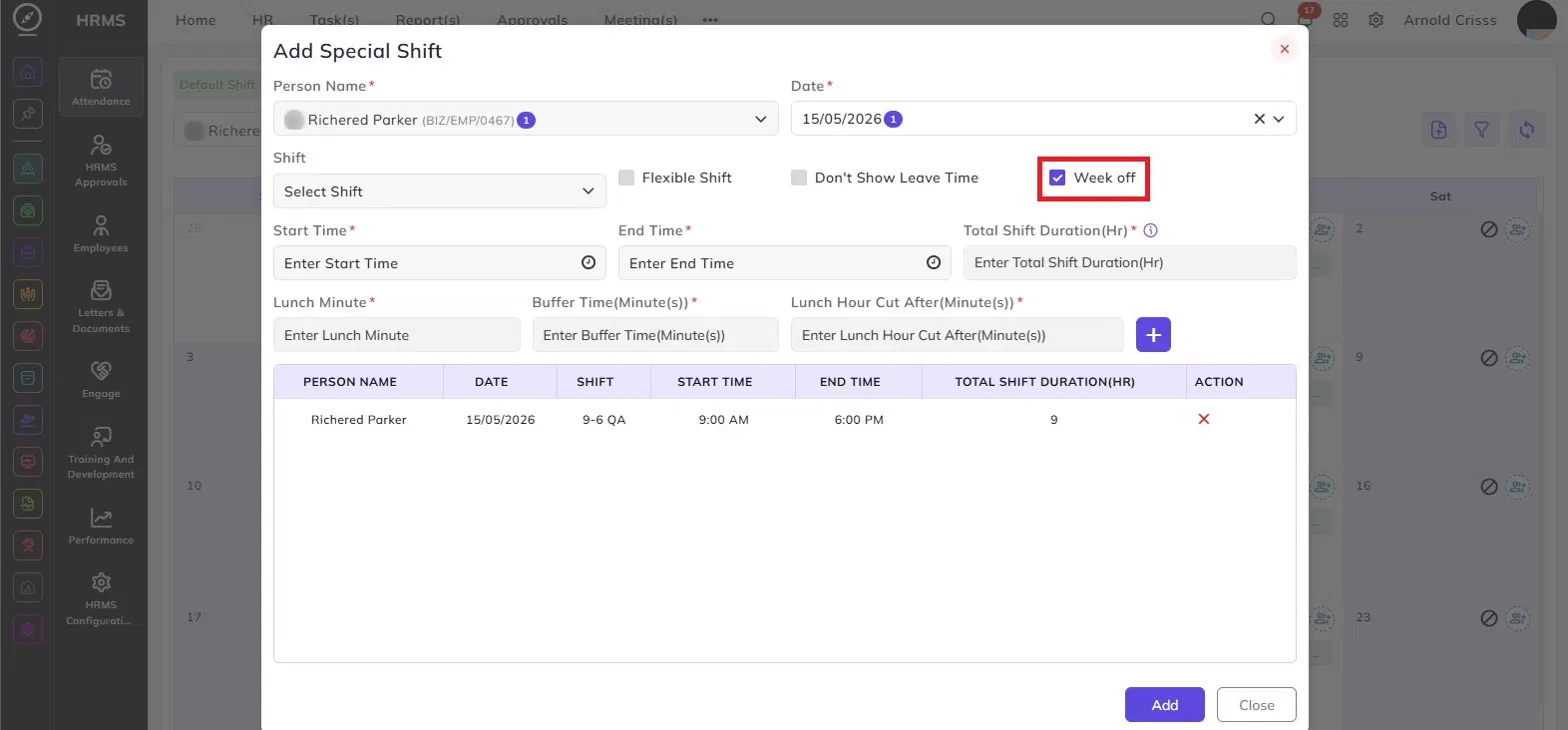
Week off:
Enable this to mark the selected day as a week off for the employee. When enabled, the shift fields are removed and the day is saved as a week off.
Click + to add the entry to the table. Each entry in the table shows the person name, date, shift, start time, end time, and total shift duration. You can edit or remove entries before saving. Click Add to apply the changes.
The assigned special shift and default employee shift (which was deleted) will be visible as shown below color-coded.
Reverting to Default Shift:
If a special shift has already been assigned to a date, clicking the shift icon again will show both the default shift and the special shift in the table. The default shift row will have a Revert Shift button. Click it to remove the special shift and revert back to the employee's original default shift.
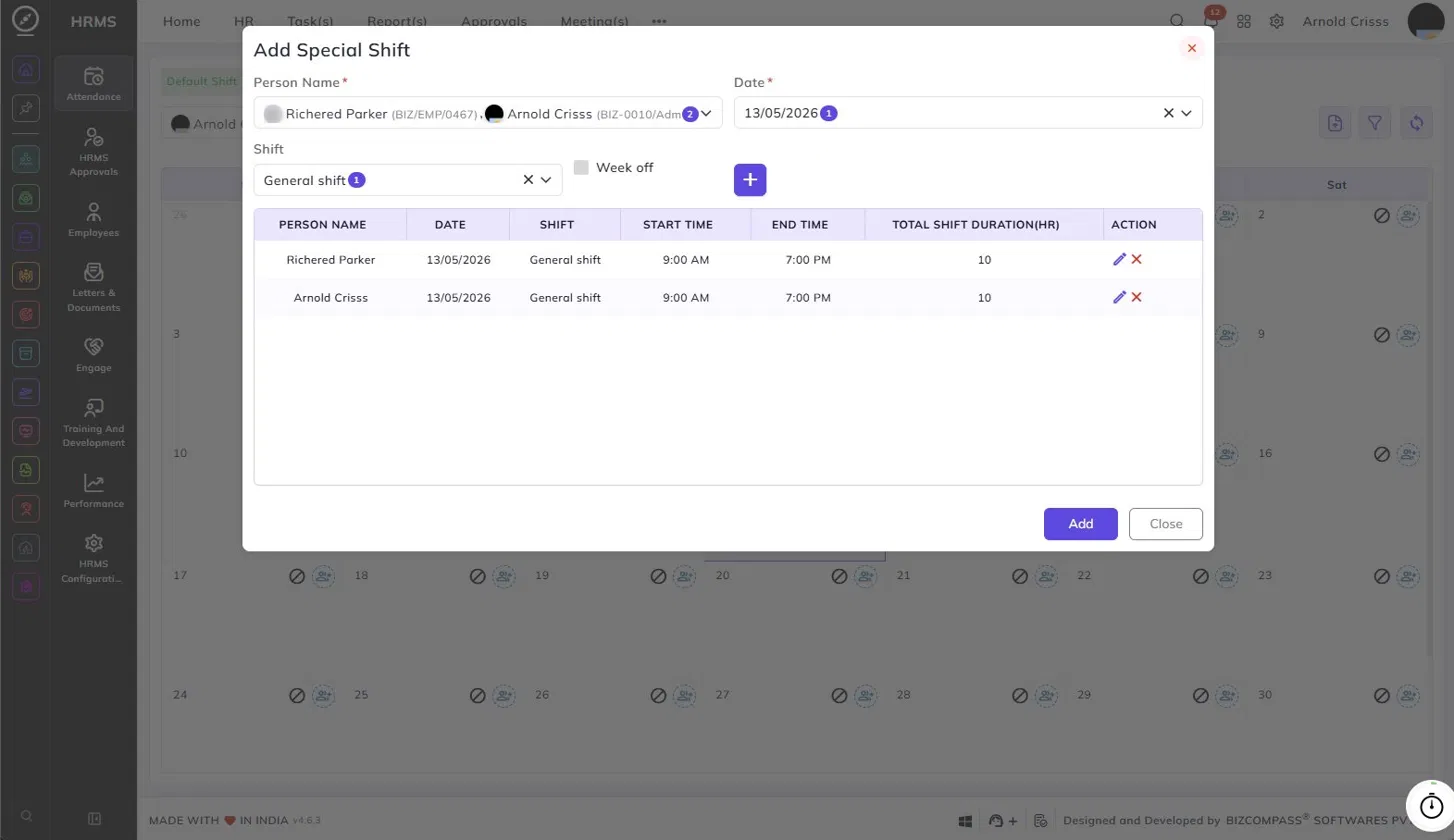
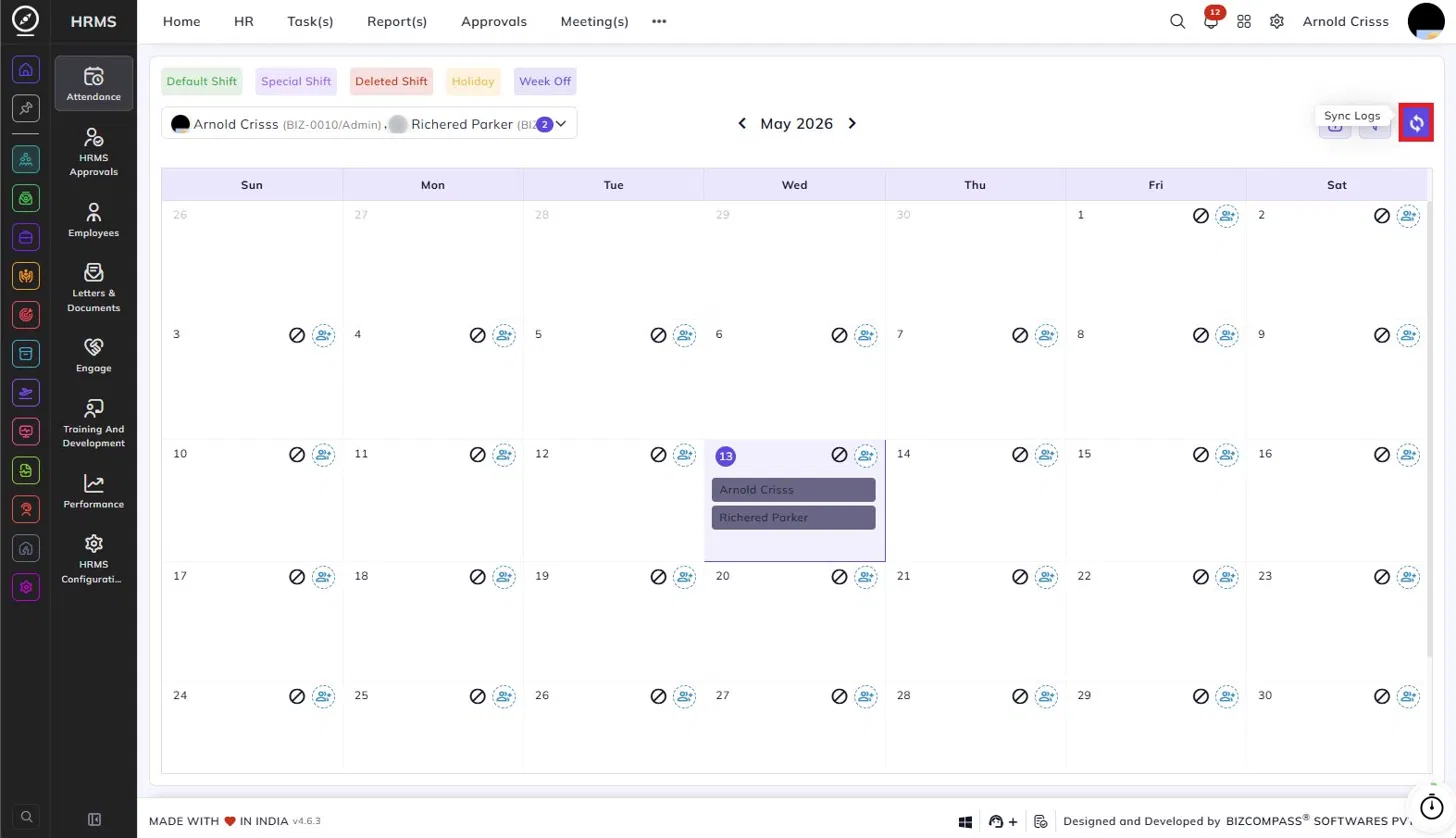
Assigning Shifts to Multiple Employees:
You can select more than one employee from the dropdown at the top.
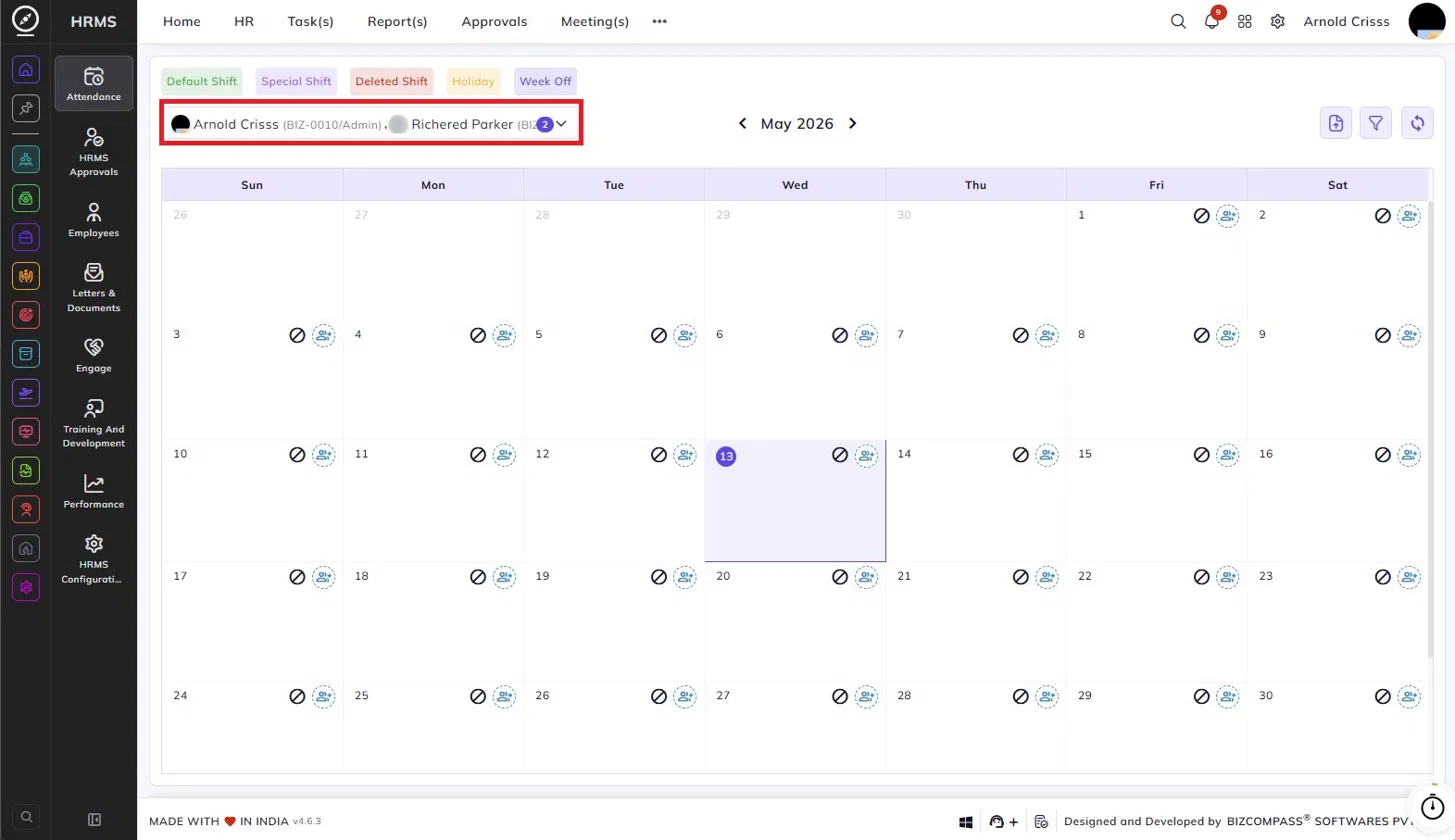
When multiple employees are selected, clicking the shift icon on a date will show each employee's current shift in the table.
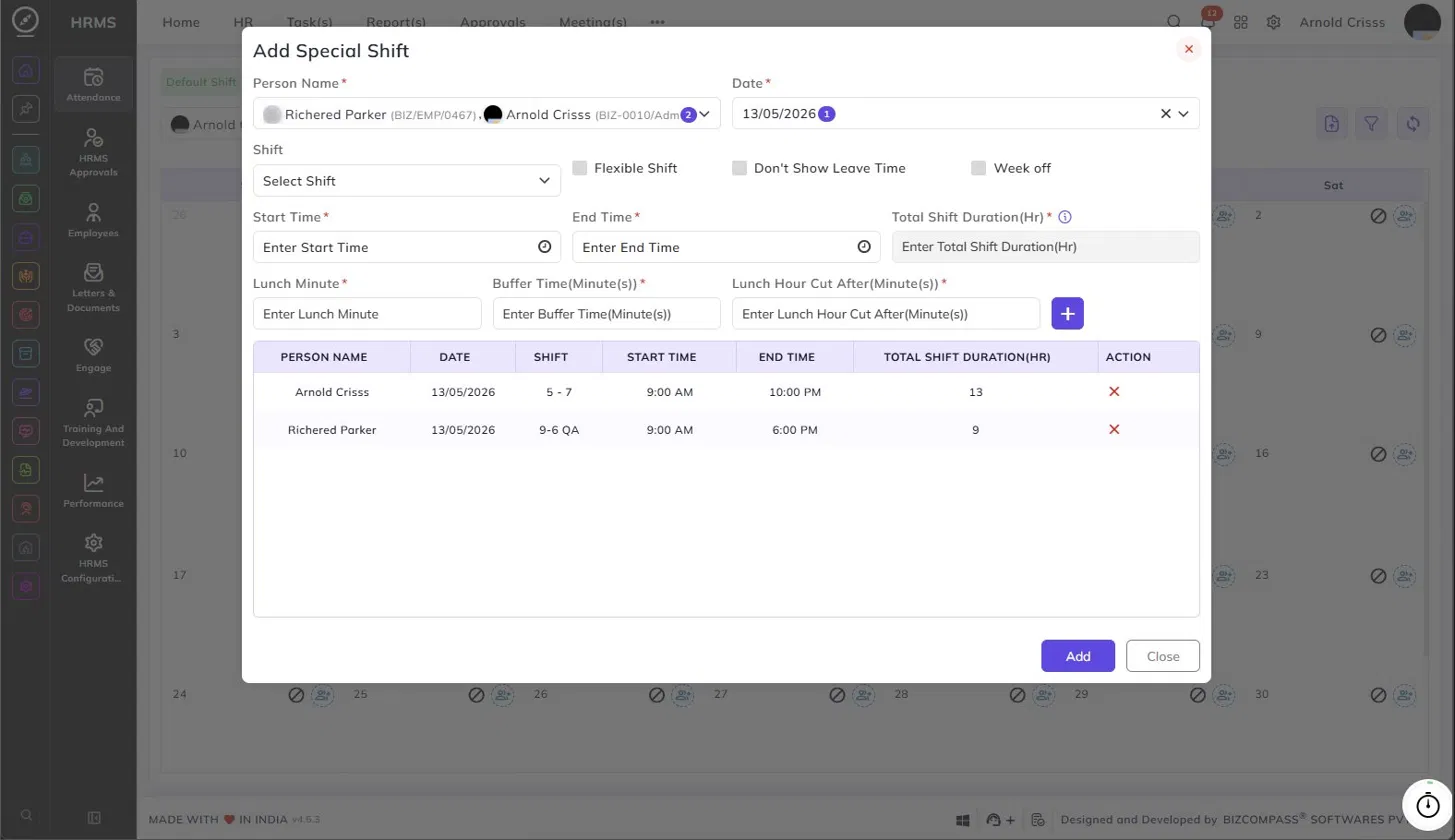
You can remove individual shifts and assign a new common shift to all selected employees at once.
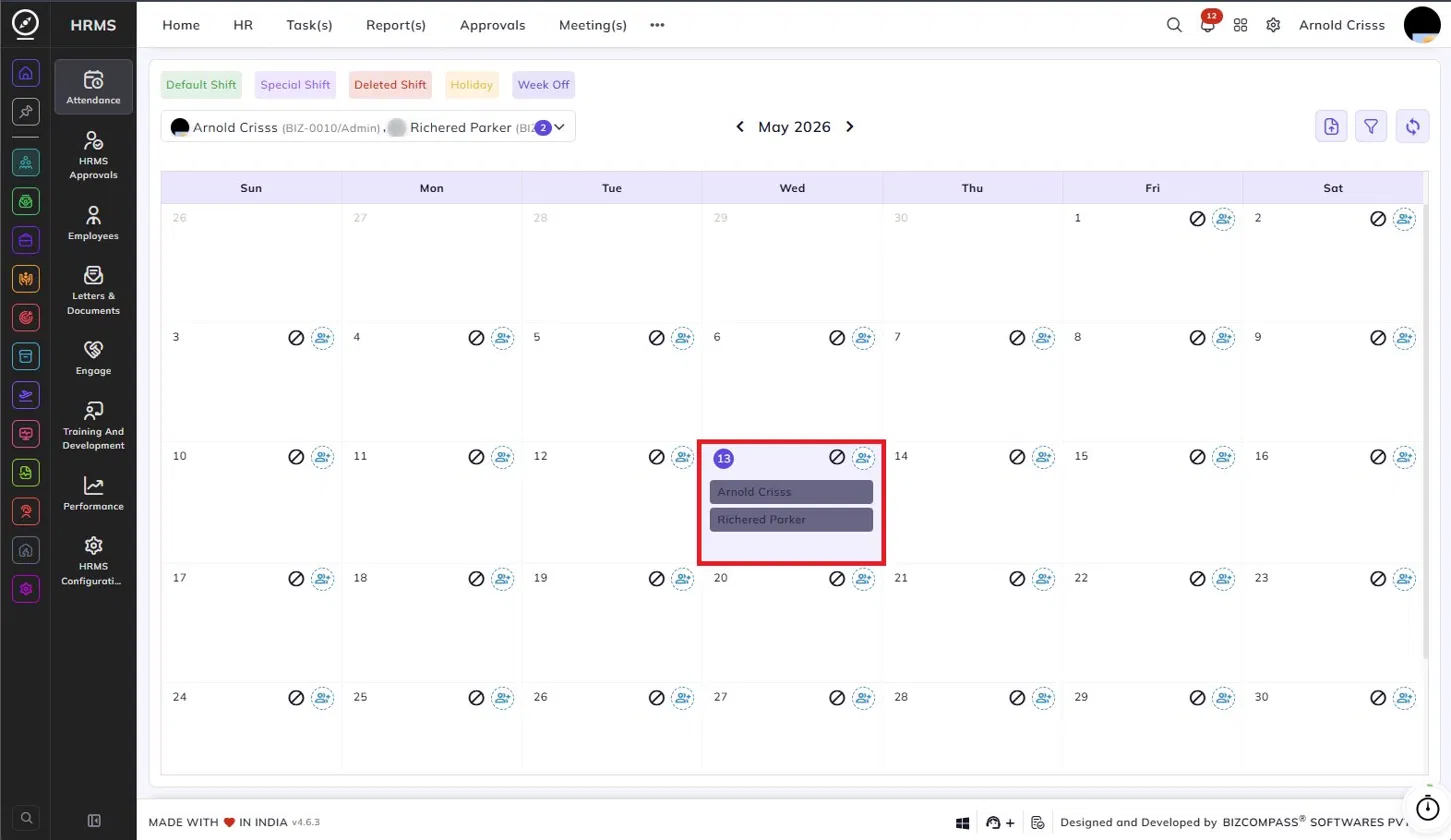
The special shift assigned to both the employees will be visible as shown below:
Marking a Day as Week Off:
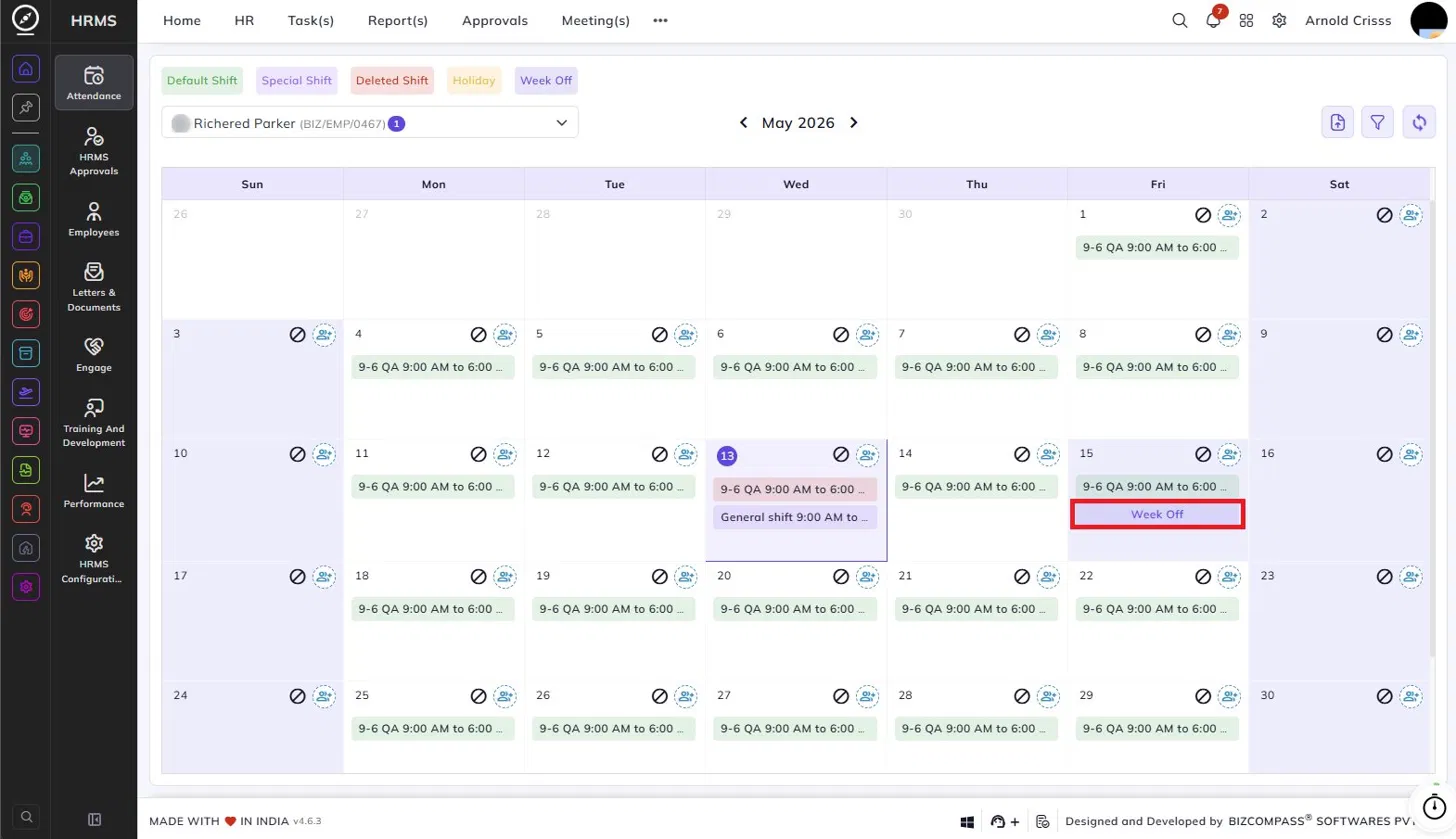
To convert a regular working day into a week off, click the shift icon on that day, enable the Week off checkbox, and click Add. The day will be marked as Week Off on the calendar.
To assign a shift on a day that is already a week off, click the shift icon on that day, select the shift, and click Add. The week off will be replaced with the assigned shift.
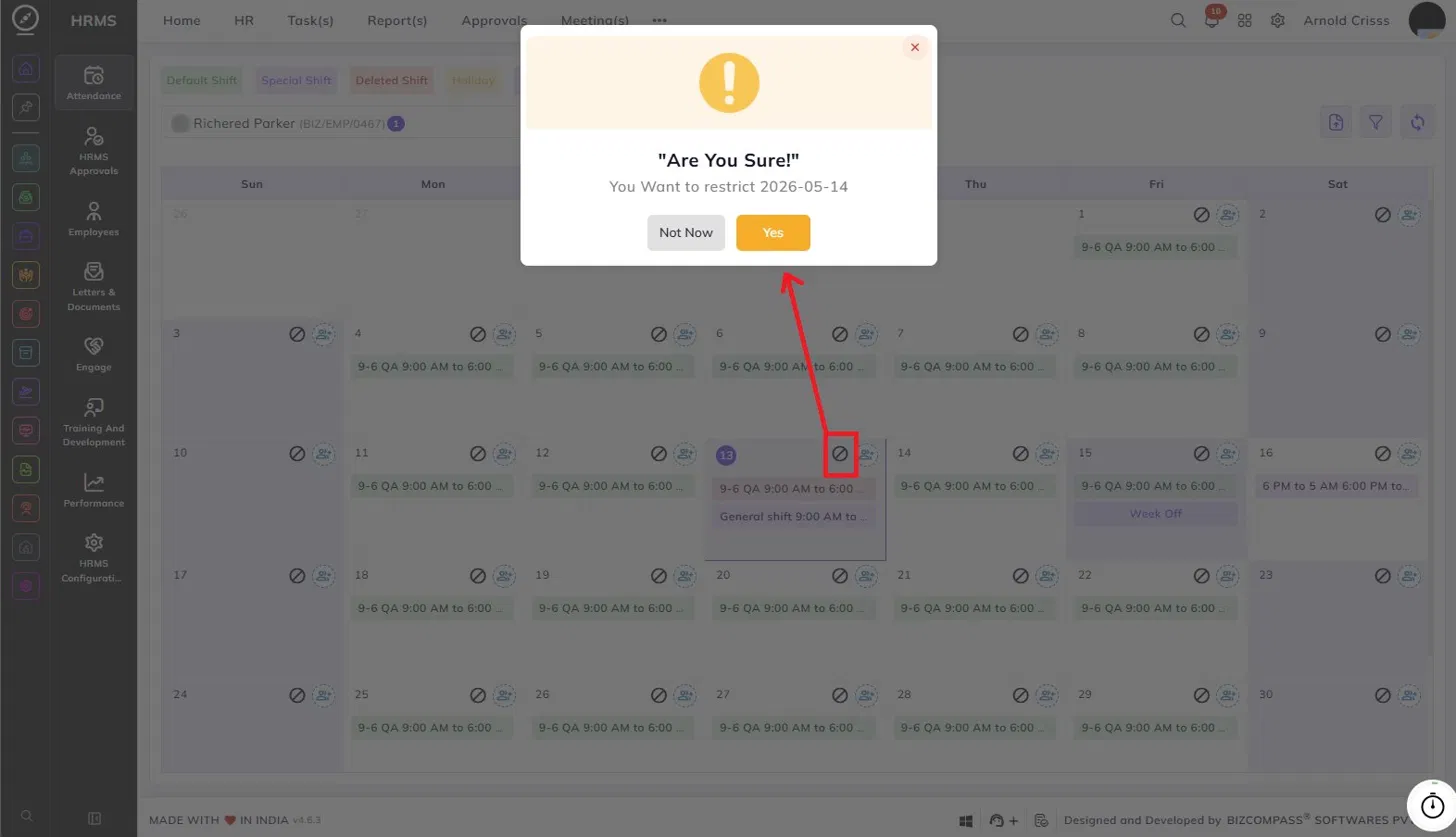
Restricting a Day:
Click the restrict icon on any date to restrict that day. A confirmation dialog will appear asking you to confirm the restriction. Click Yes to proceed. If an employee applies for leave on a restricted day, that leave will be treated as unpaid leave.
Sync Logs:
After making any changes to shifts on the roster, click the Sync Logs button at the top right to ensure that the attendance logs are updated to reflect the new shift assignments.
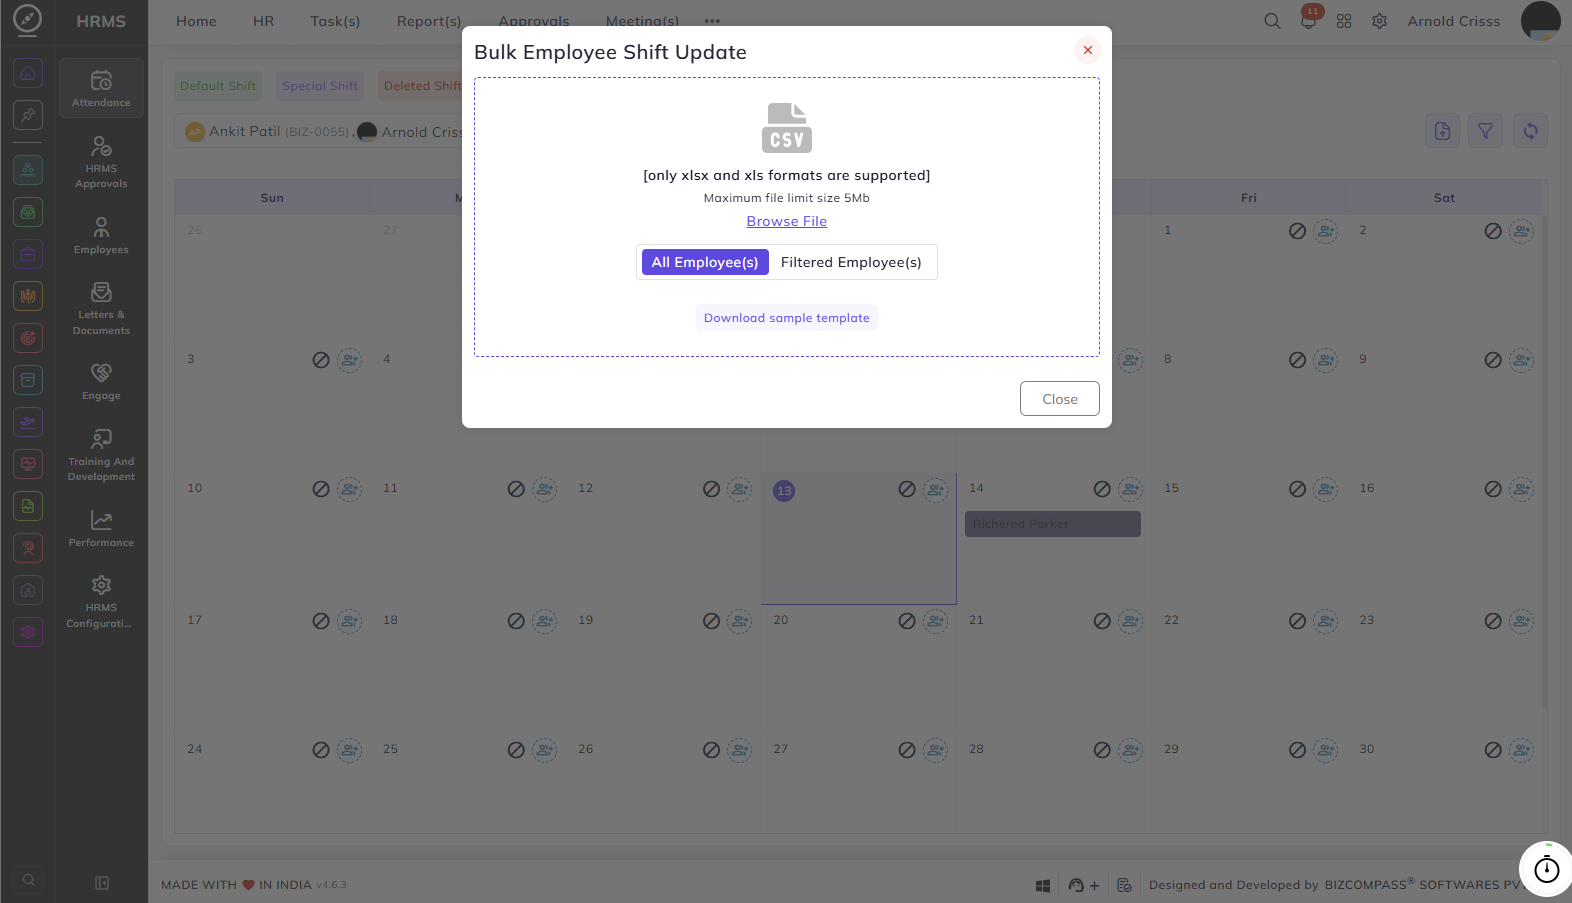
The Upload File feature allows administrators to update shift assignments for multiple employees at once by uploading an Excel file, instead of manually editing each employee's schedule on the calendar.
To access this, click the Upload icon at the top right of the Shift Roster page. This will open the Upload File dialog.
Downloading the Sample Template:
Before uploading, download the sample template by clicking the Download sample template link in the dialog.
- All Employee(s) – Download the sample file for all employees.
- Filtered Employee(s) – Download the sample file only for the employees you've selected from the top left in the calendar.
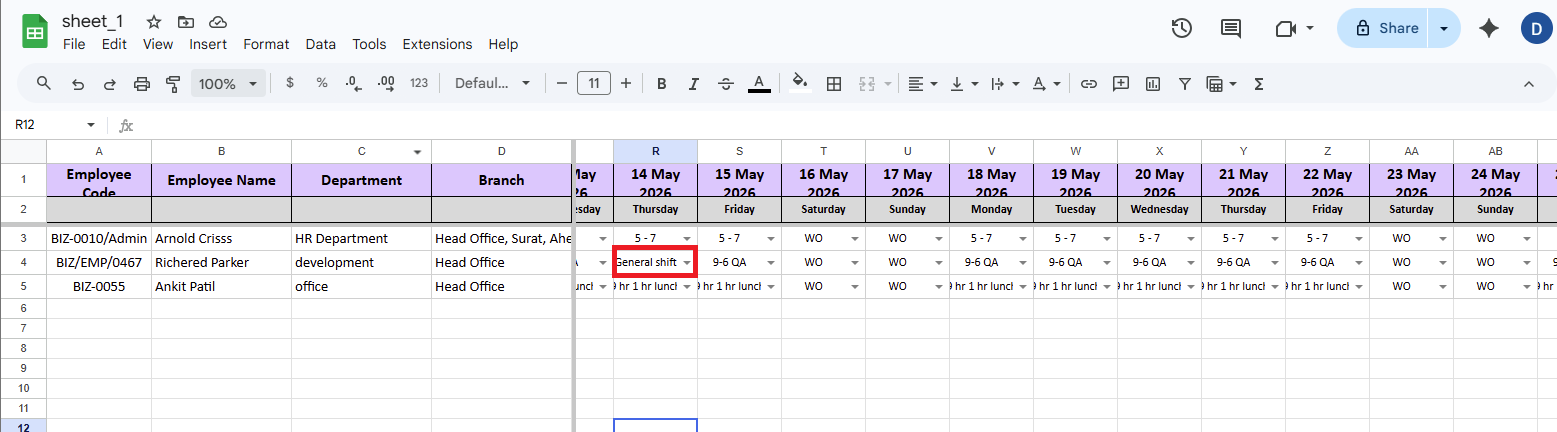
This will provide an Excel file with two sheets:
- Employee_Update – The main data sheet where you fill in shift assignments. It contains the following columns:
- Employee Code – The unique code of the employee.
- Employee Name – The name of the employee.
- Department – The department the employee belongs to.
- Branch – The branch the employee is assigned to.
- Date Columns – Each subsequent column represents a date (e.g., 01 May 2026, 02 May 2026, and so on). For each employee row, enter the shift value for the corresponding date (e.g., 9-6 QA, WO for week off, KP GS SHIFT, etc.). Leave a cell blank if no change is needed for that day.
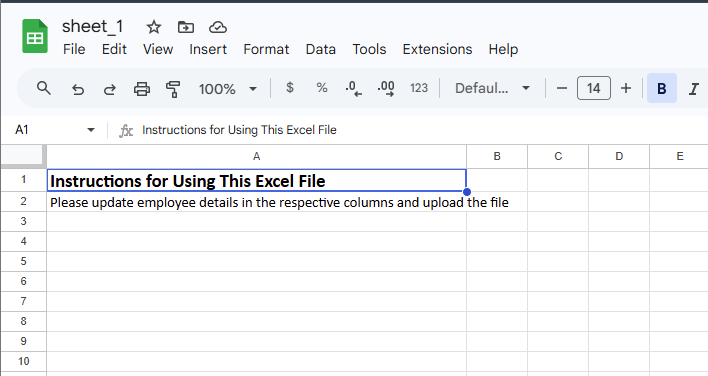
- Instructions – A reference sheet that explains how to fill in the Employee_Update sheet.
Uploading the File:
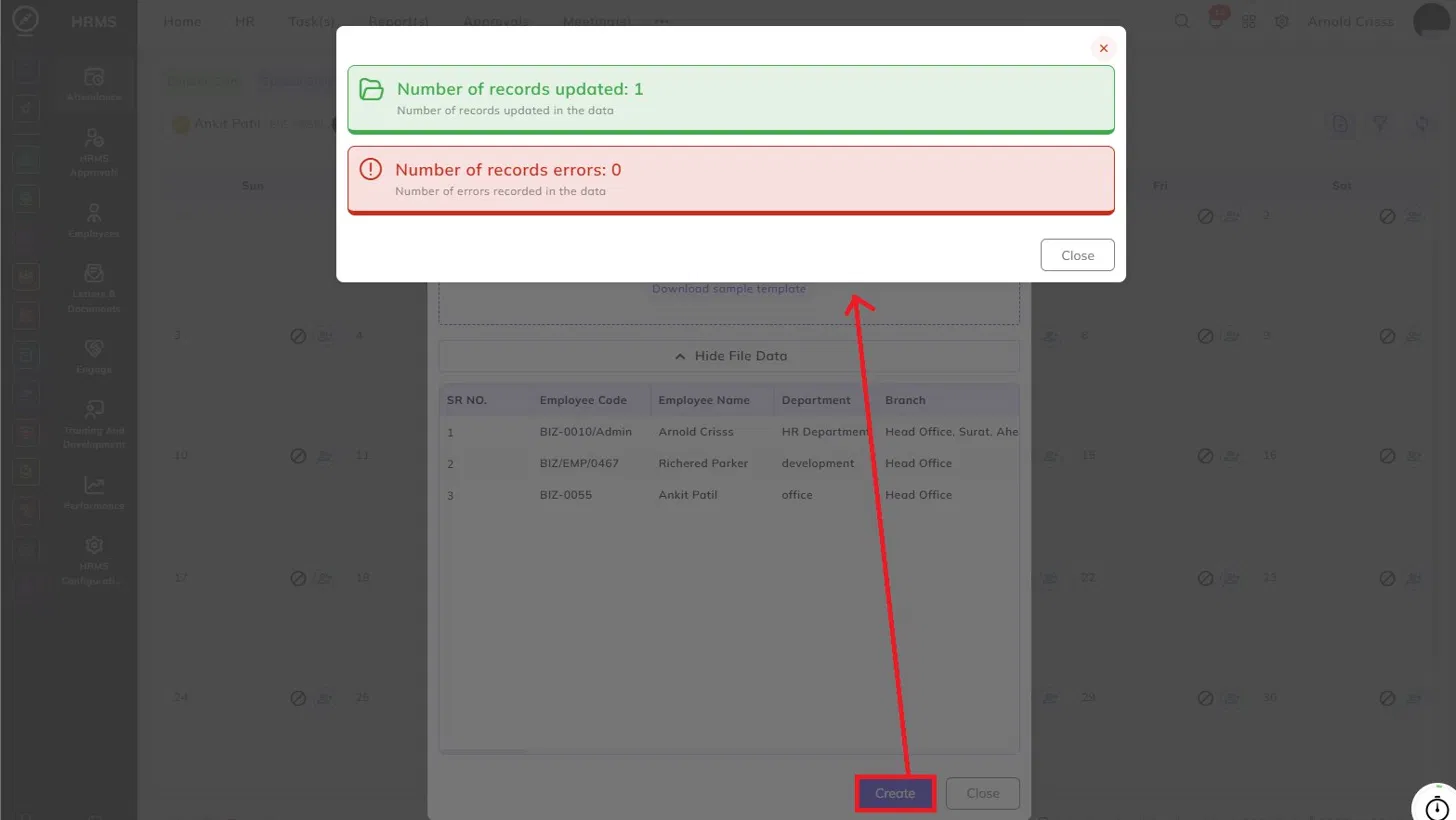
After selecting the file, the dialog will display a preview of the uploaded data under Show File Data, listing all employees from the file along with their Employee Code, Employee Name, Department, and Branch. You can verify the data before proceeding. If you need to upload a different file, click Remove & New to replace it.
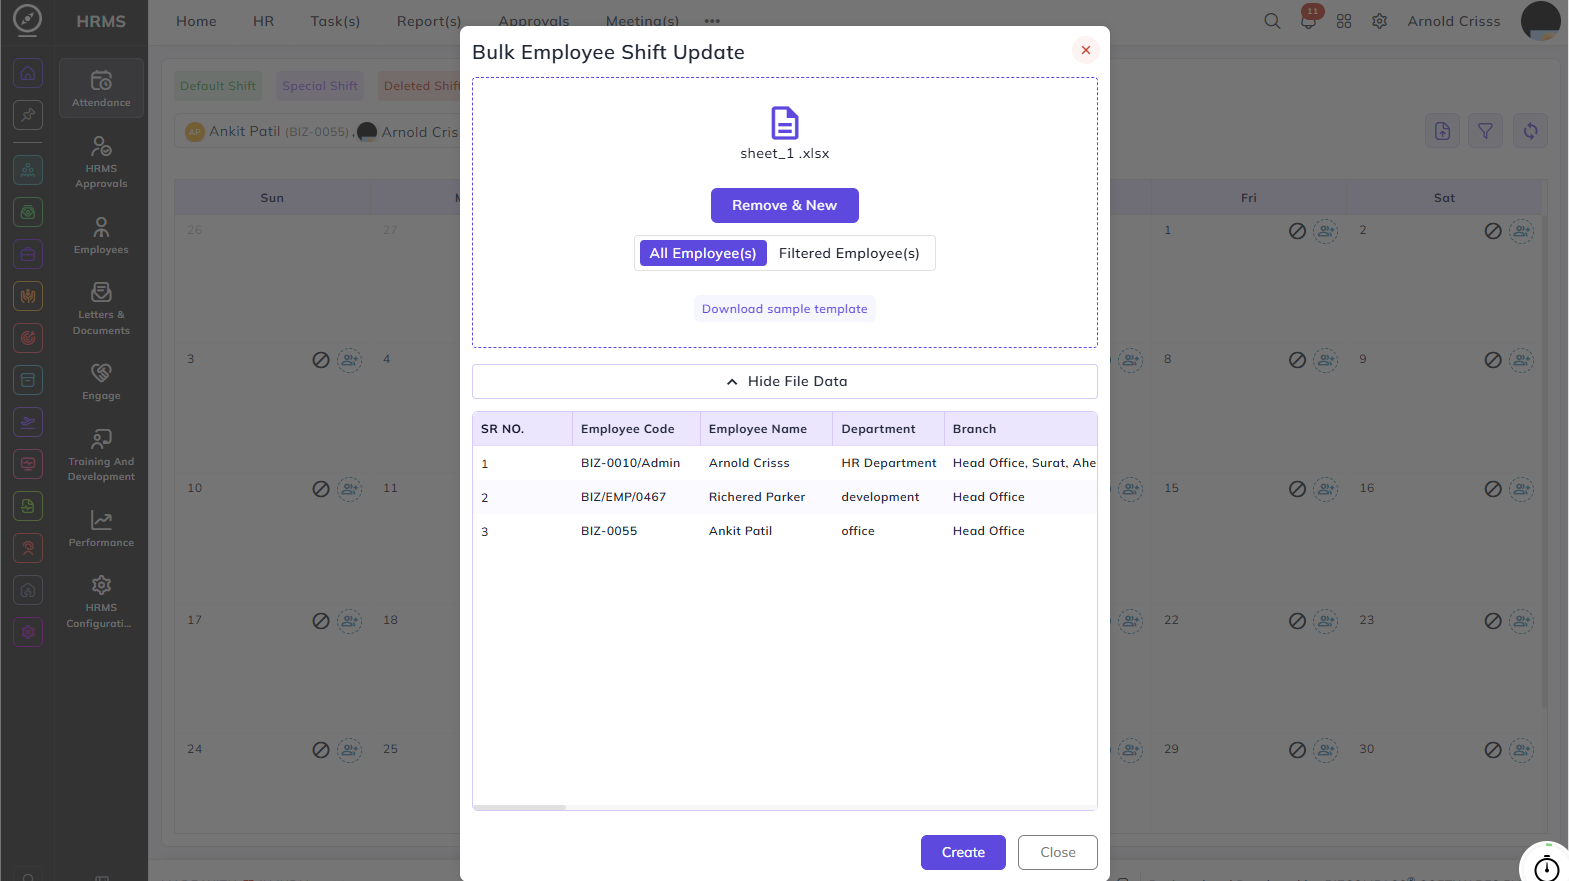
Once verified, click Create to process the upload. The system will display a summary showing:
- Number of records updated – The total number of shift entries successfully updated.
- Number of record errors – The number of entries that could not be processed due to incorrect or missing data.
Note: After a file upload, click the Sync Logs button to ensure attendance logs are updated to reflect the newly assigned shifts.
The changes made will be seen in the shift roster like below: