Opening (Joining Procedure)
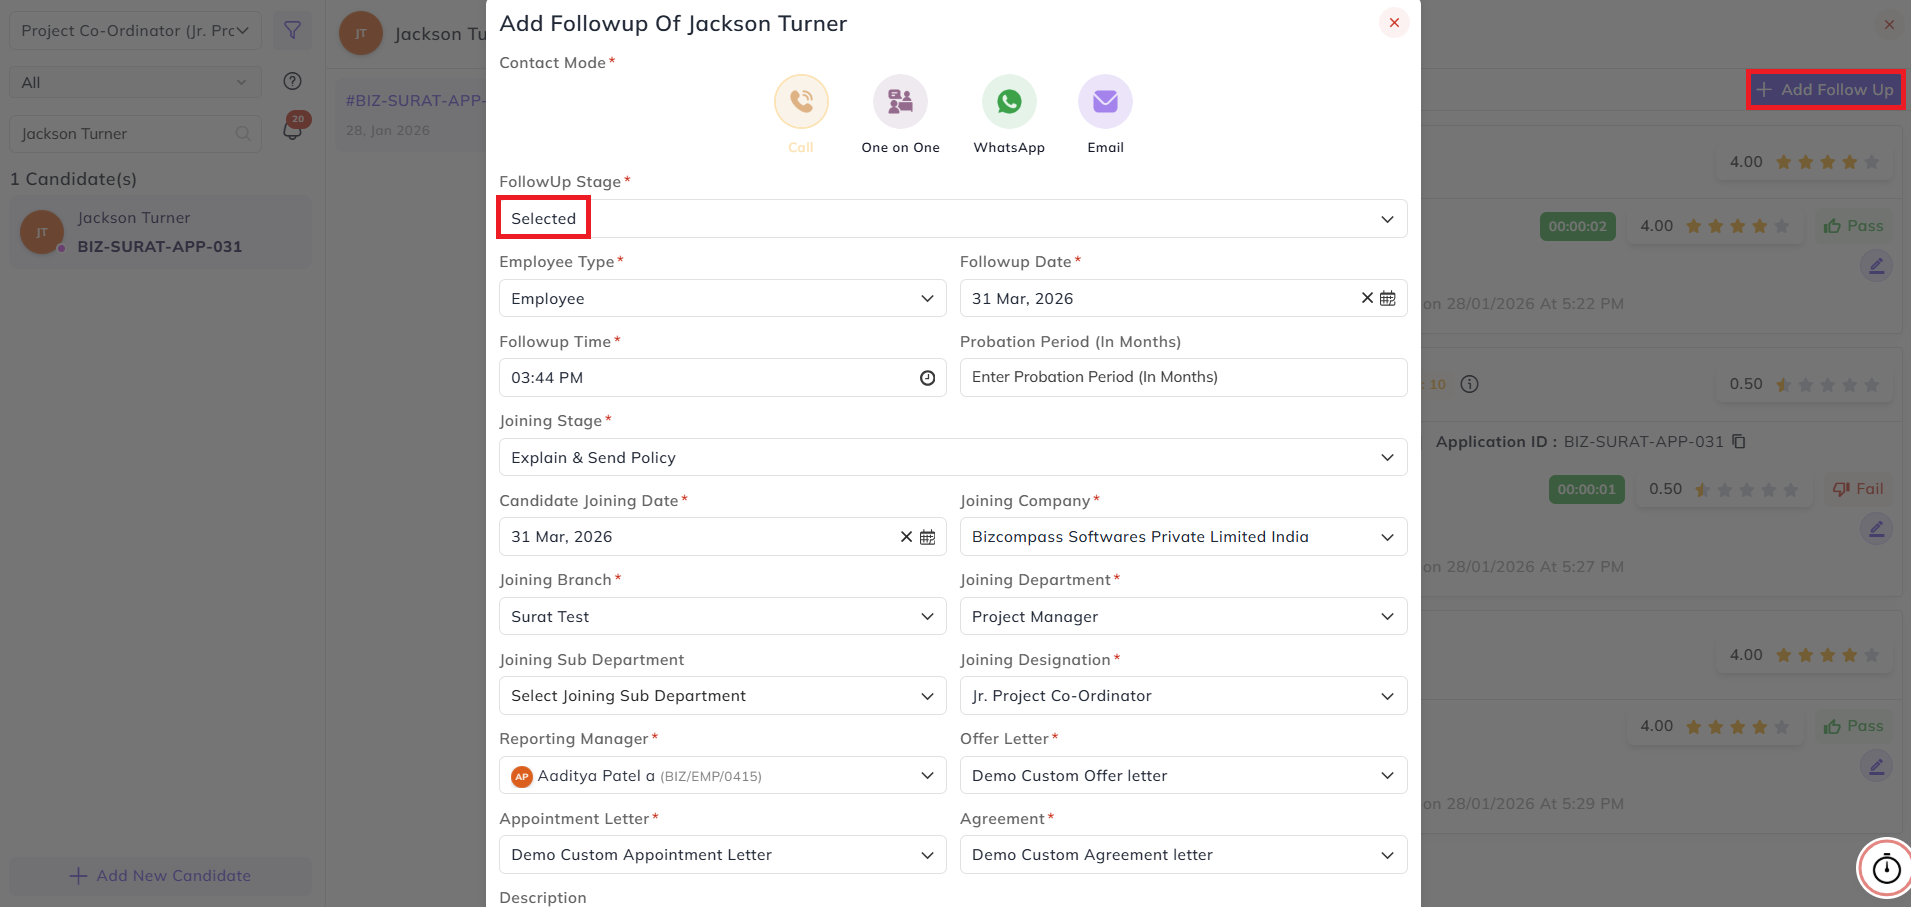
To start the joining/ onboarding procedure of a candidate, first add the follow-up/candidate status as Selected after completing the interview.
- Select Employee Type (Intern or Employee). Based on the type that type of flow will be executed.
- Add the Follow Up Date and Time.
- Select the Joining Company, Branch, Department, Sub-Department, Designation, Reporting Person, and the Letters that we will generate during the flow.
Note: Letters will be selected by default which are configured during the flow.
- Add description if want to add for the follow up.
Once this status/follow-up is added the tab for the On-Boarding Procedure will be visible, from there based on the organization’s on-boarding flow created at joining procedure flow, all the stages will be visible.
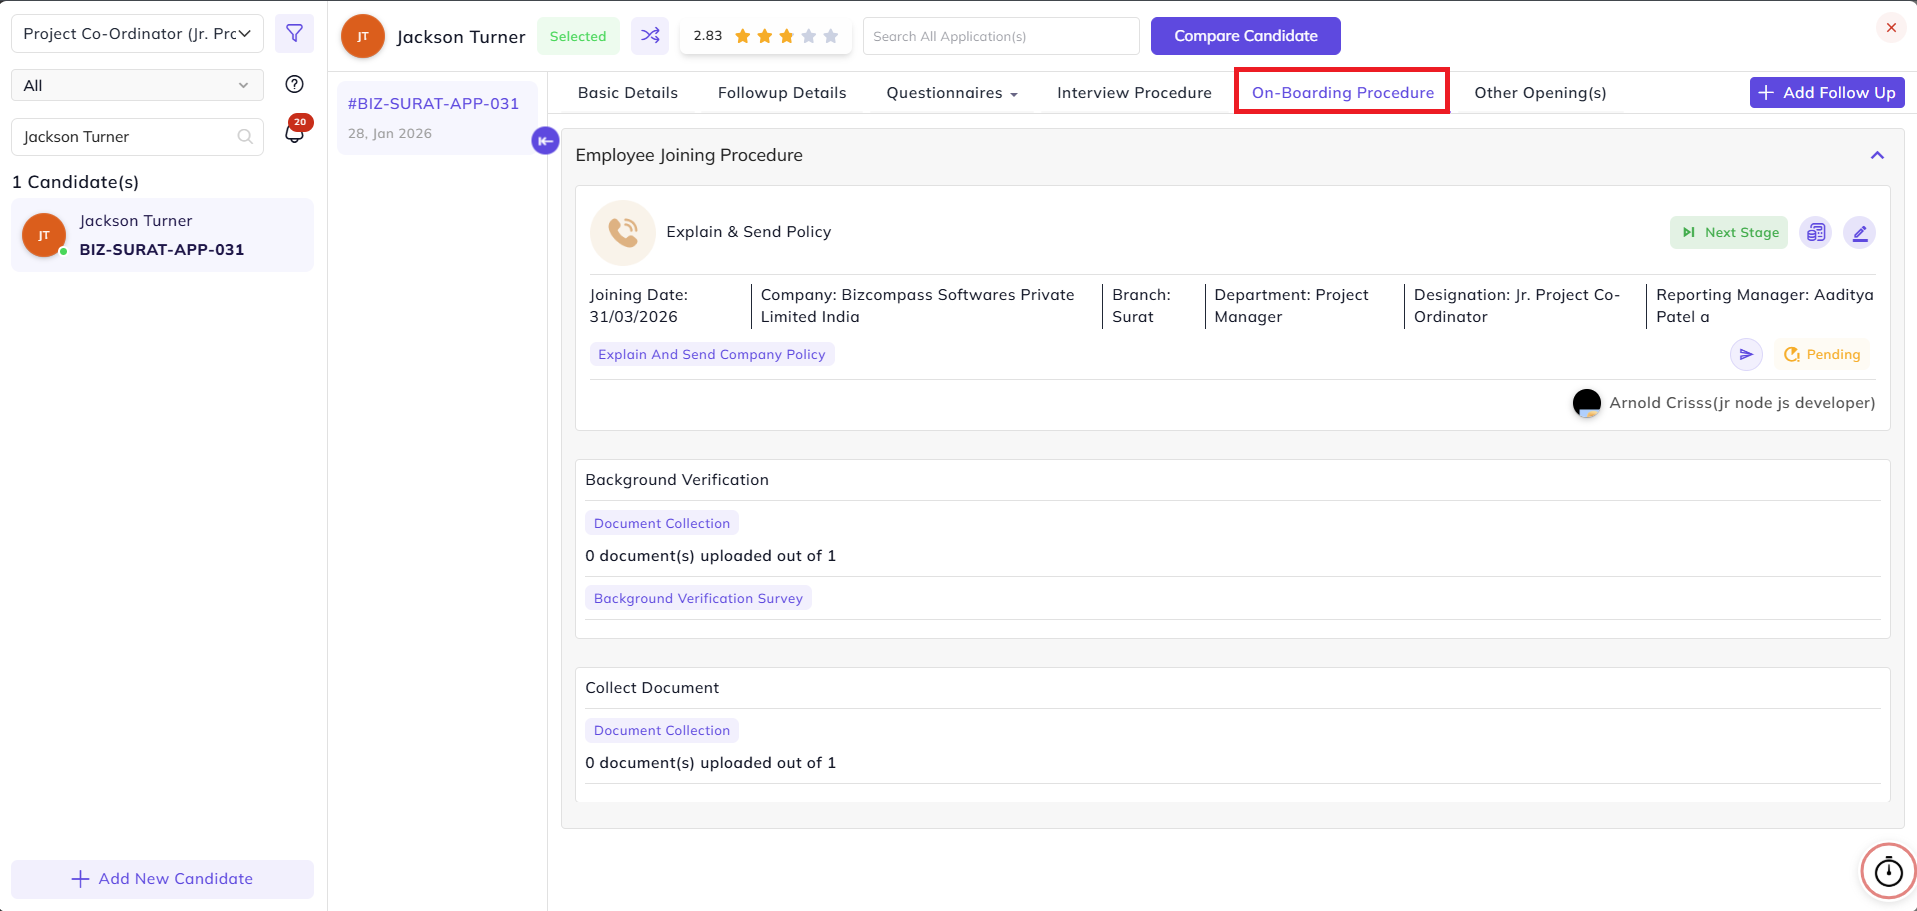
Note: For Every nth stage the configuration and process happens ate n-1 stage.
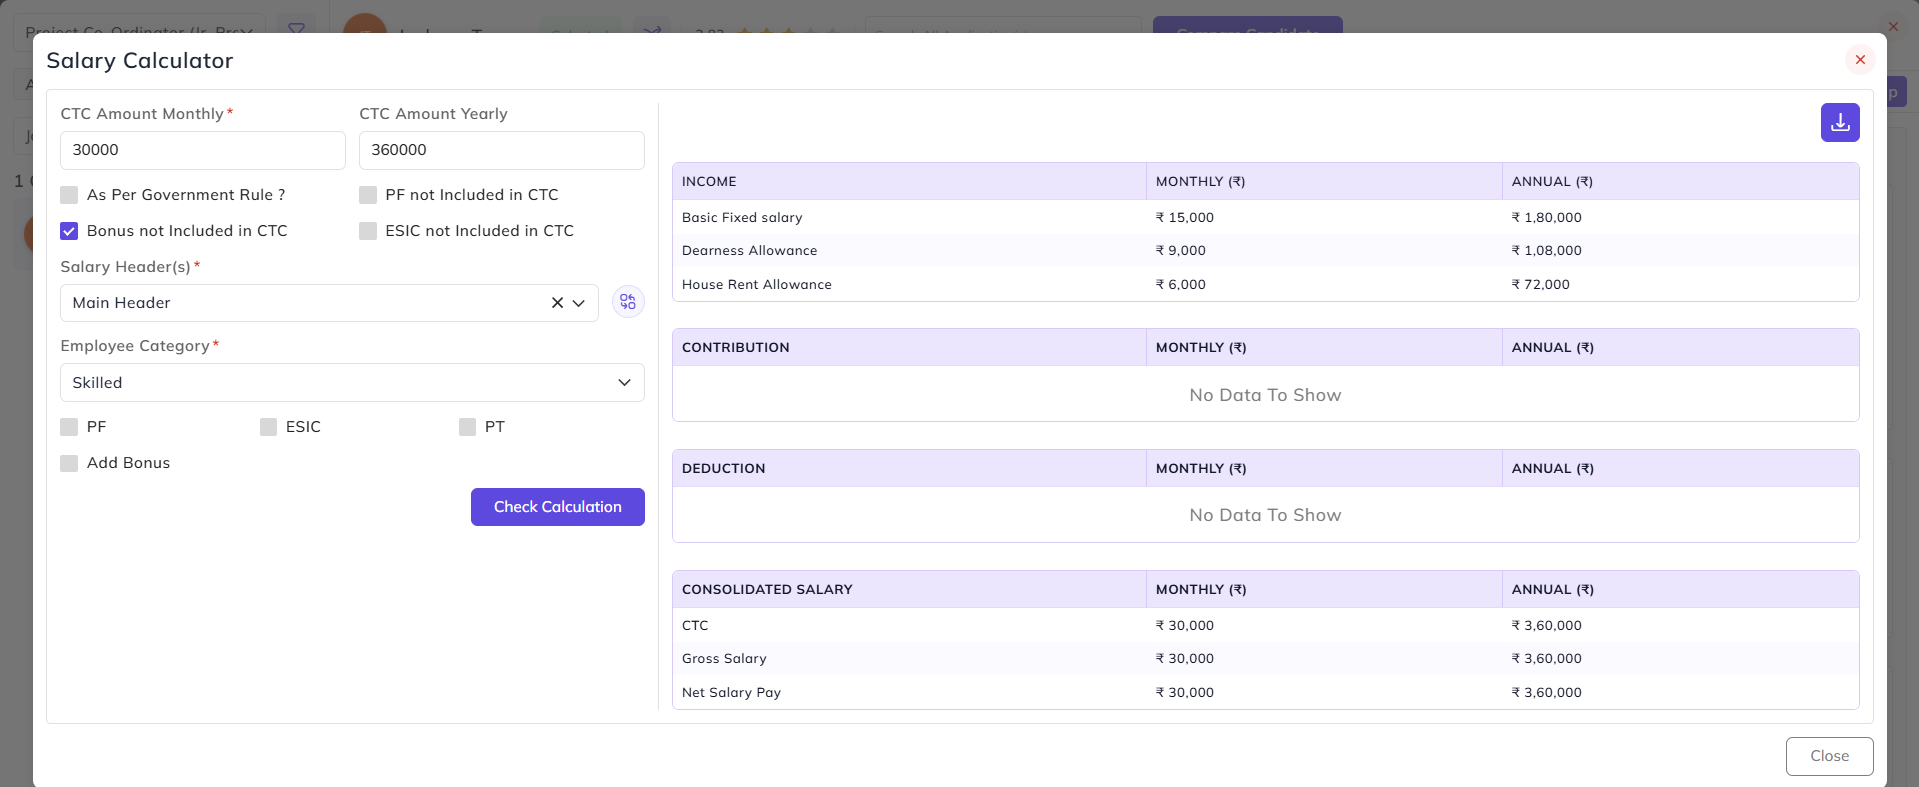
Salary Calculator:
In any flow, for the first stage there will be a Salary Calculator. Using that, we can create the structure and salary breakup for the candidate and download it.

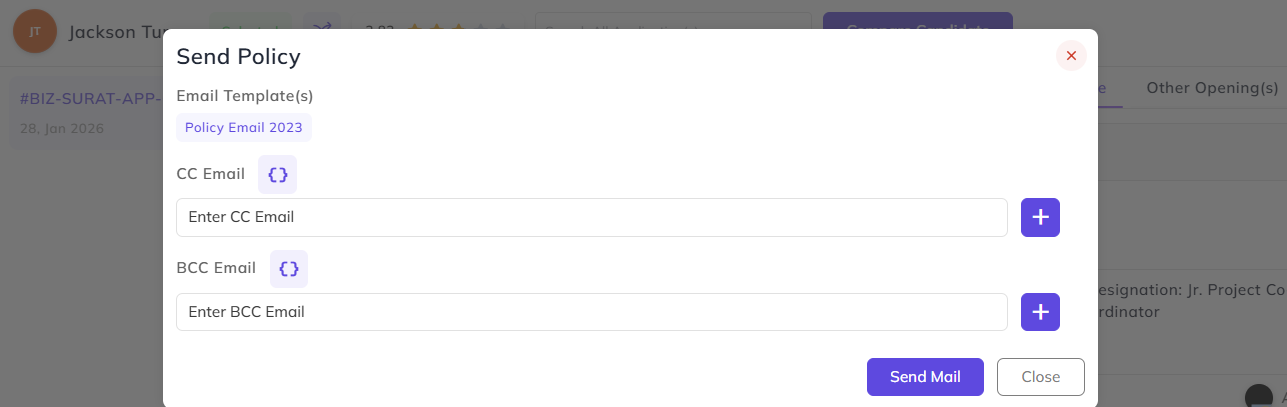
Policy Stage:
For the Policy Stage there is a button to send policy configured earlier in the joining procedure flow where we can also select the person whom we can add in CC or BCC.
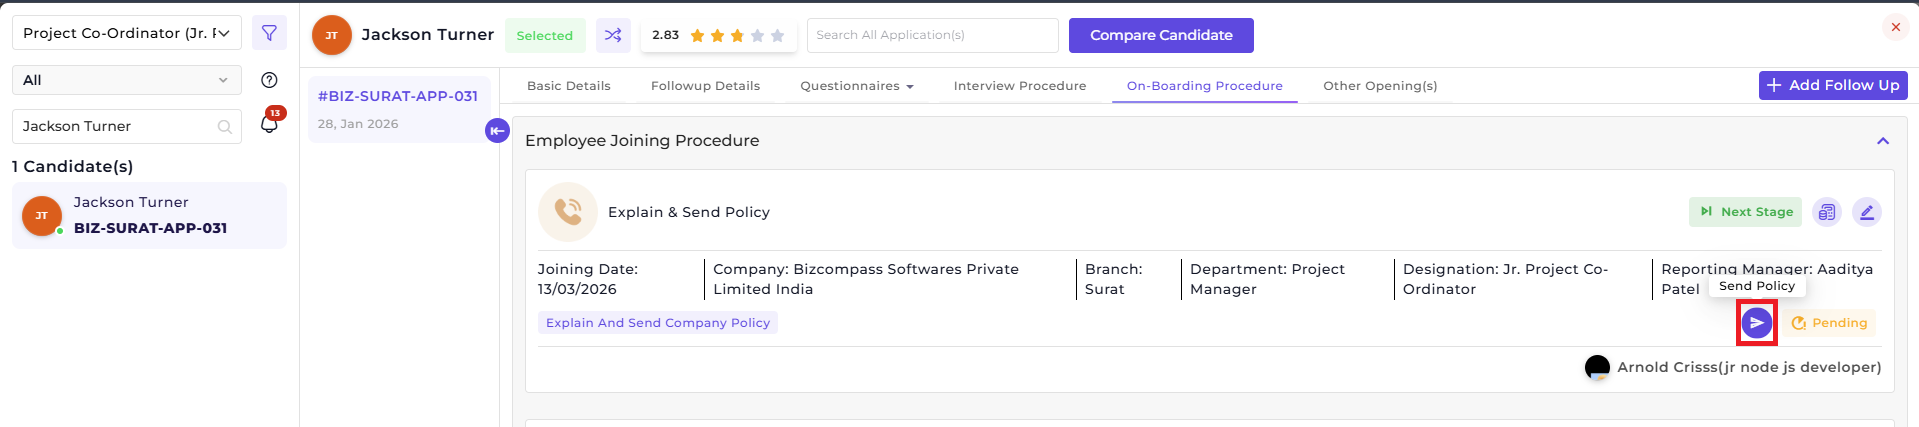
For moving on to the next stage, click on the Next Stage button after completing a stage.
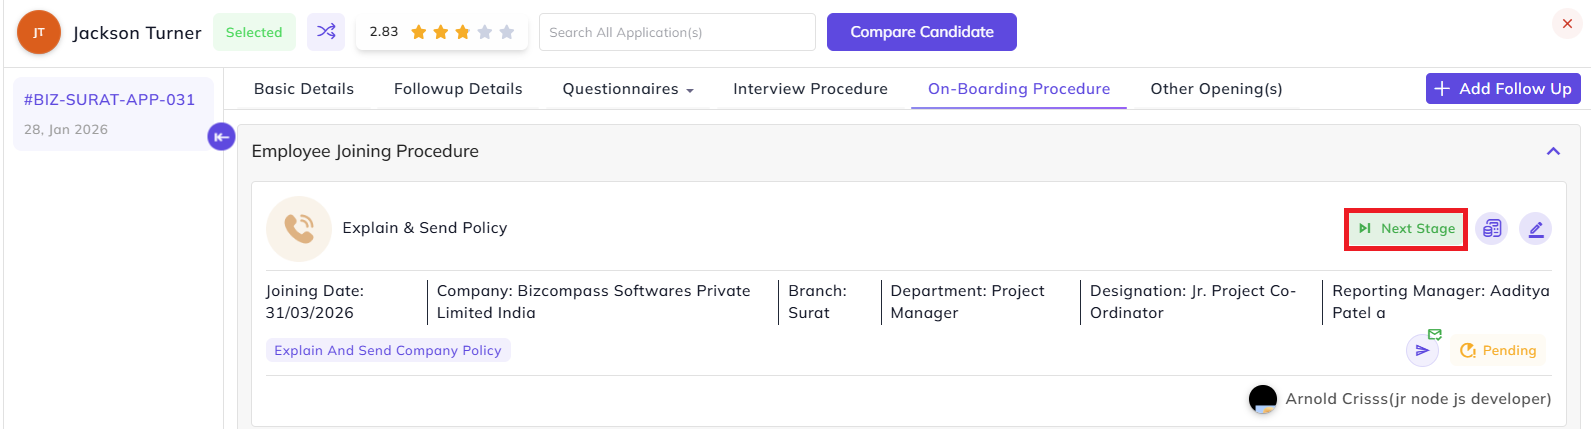
Background Verification:
For this stage, click on Send Document Upload Mail button for the Background Verification stage.
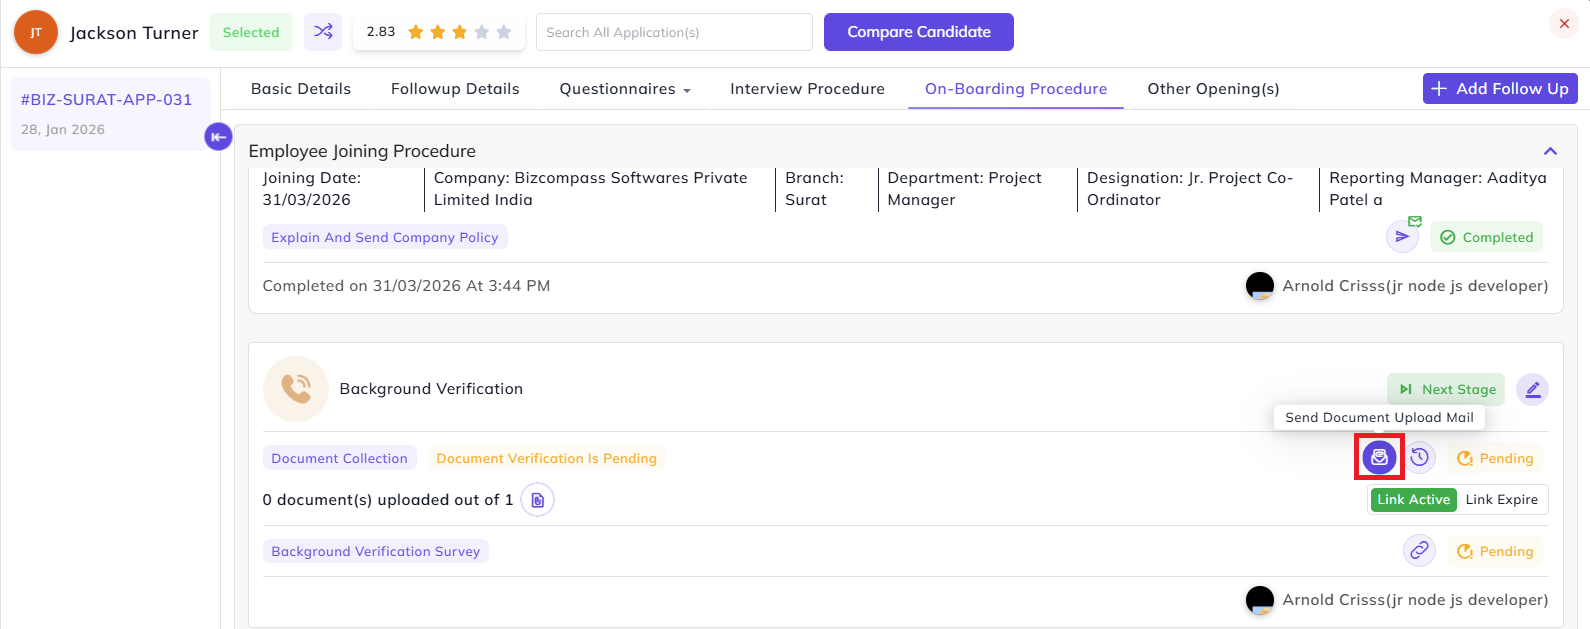
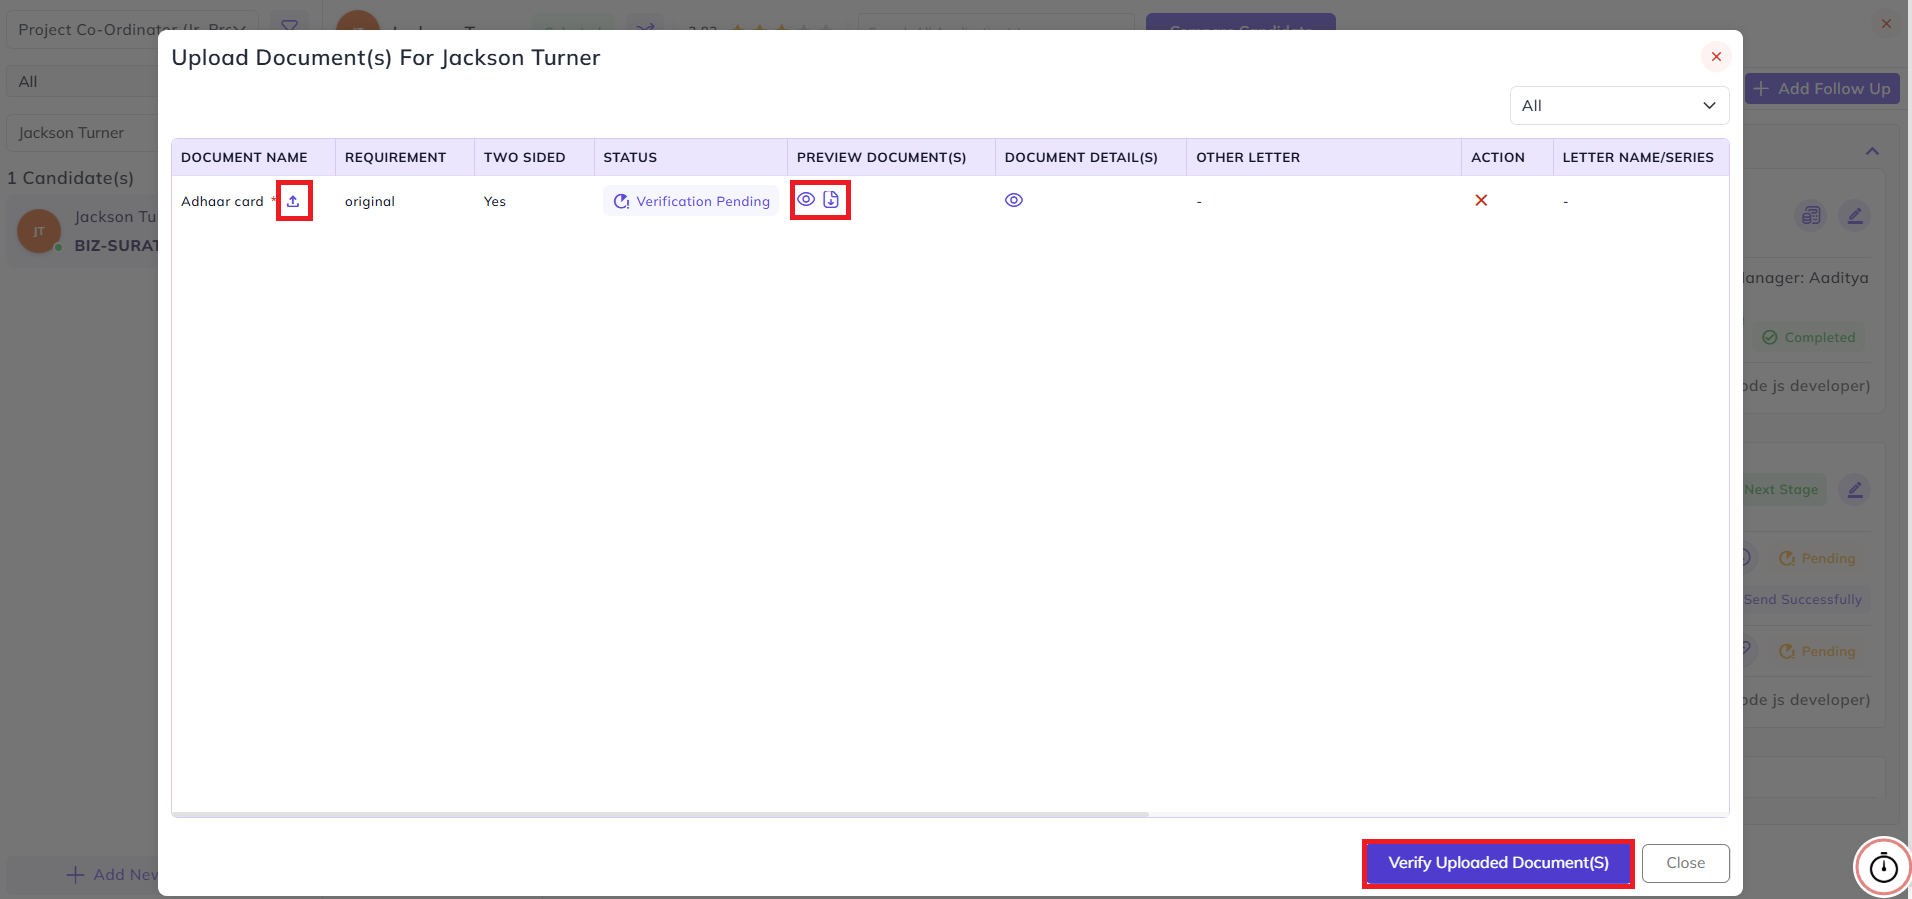
The candidate will receive the mail with the login credentials for uploading the documents. Once he/she uploads the document(s), it will be visible to the recruiter for verification.
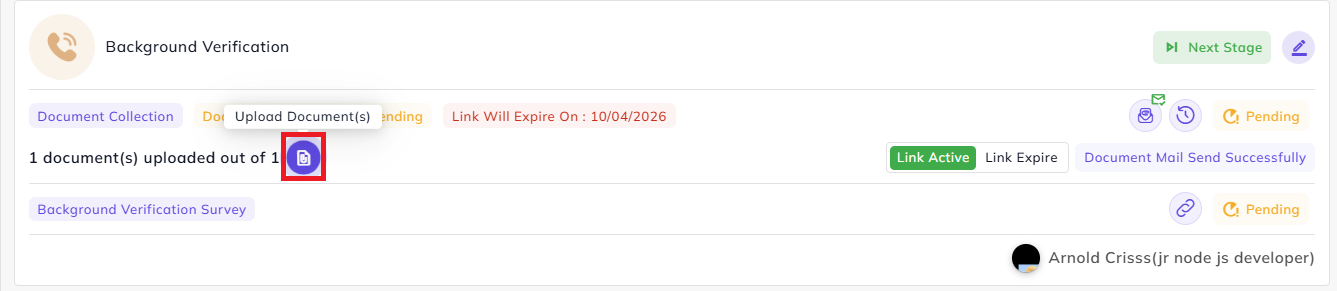
From here, you can preview and download the document, then you have to upload and verify it.
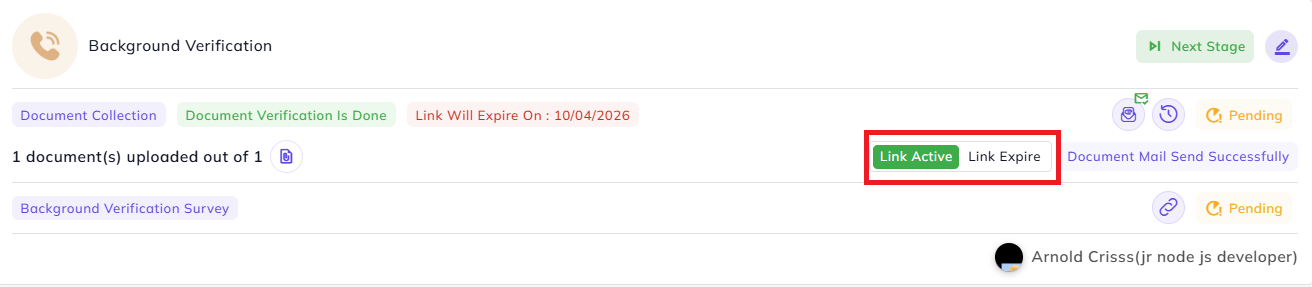
The link will automatically expire once its expiry date has passed. However, by clicking on the Link Expire button, you can manually make the link expire before the scheduled date. Moreover, you can re-active a link after it has been expired by clicking on the Link Active button.
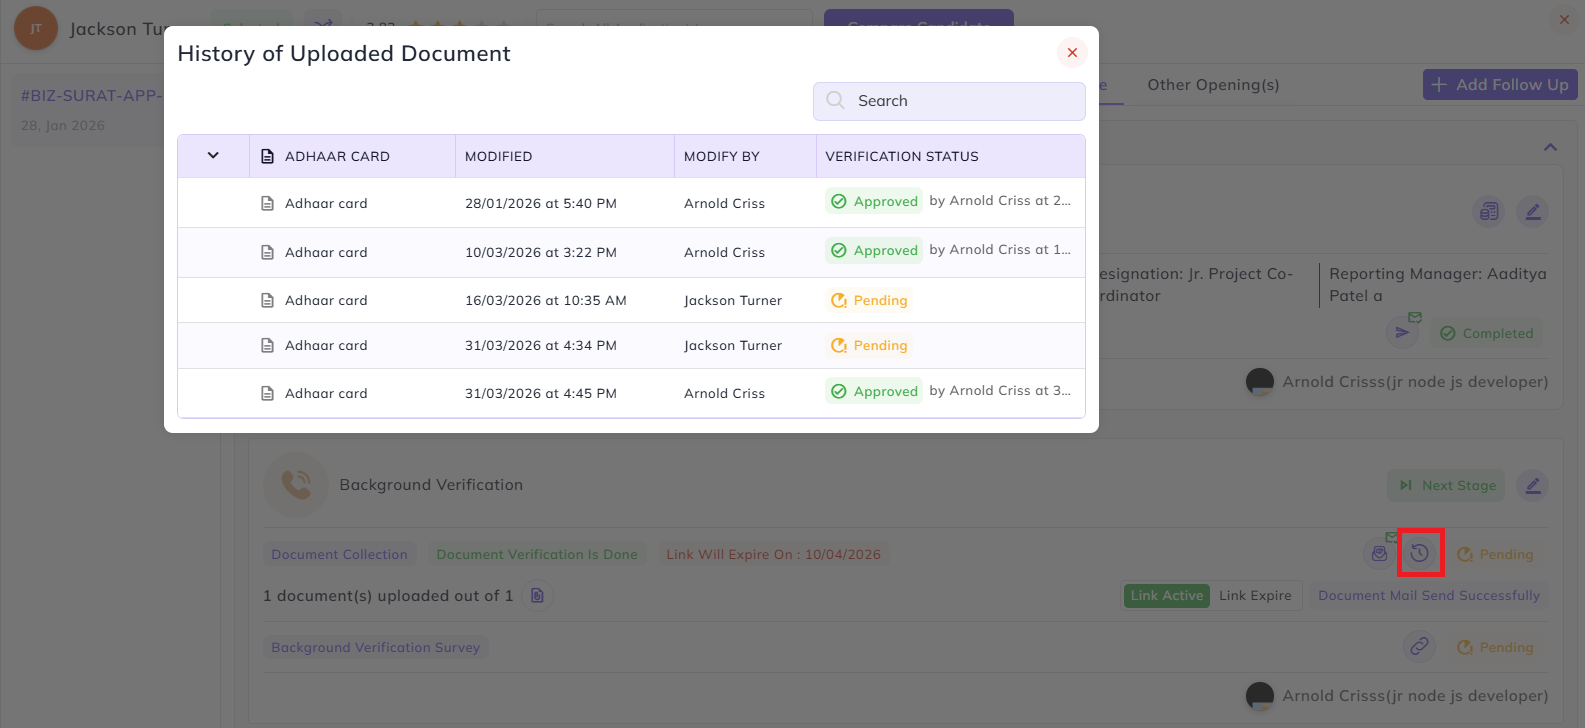
By clicking on the below showed button, you can view the history of uploaded document(s).
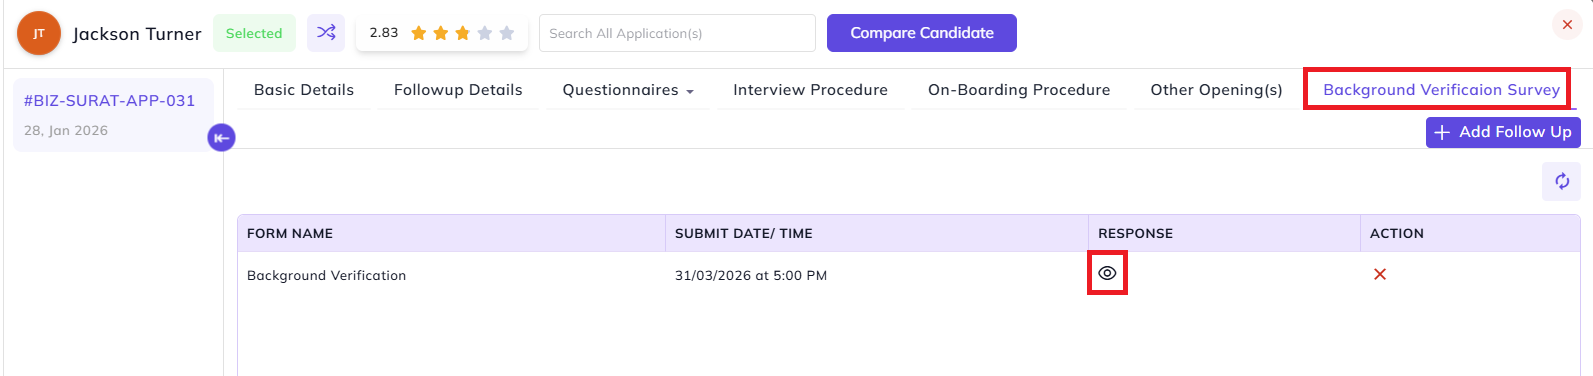
If you have selected and configured the Survey button while creating the Background Verification joining stage (or any other joining stage), you'll see the link for the selected survey form.
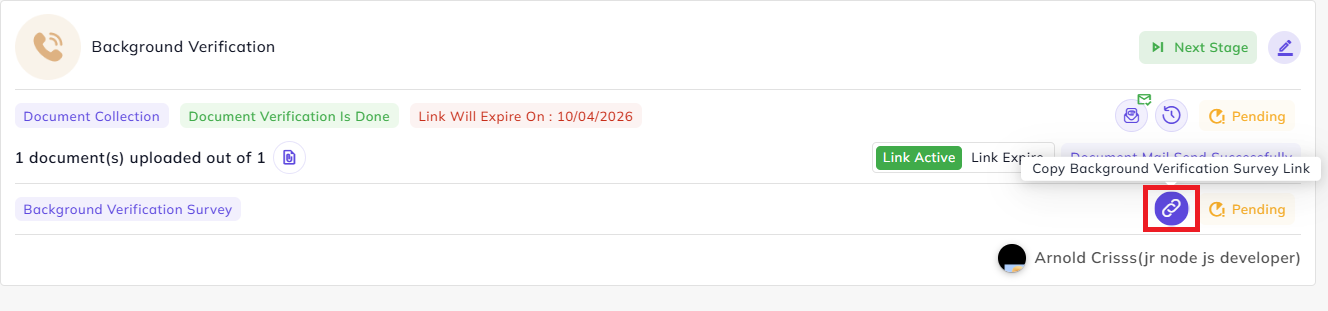
Once the form is filled and submitted, a new tab Background Verification Survey will be visible next to the Other Opening(s) tab. From here, you can view the form response.
Collect Document:
Similar to the Background Verification stage's document upload, you have to send Document Upload Mail to the candidate in this stage. The candidate will receive the mail with the login credentials through which he/ she can upload the documents.

Once the documents are uploaded from the candidate's side, you'll be able to preview, download, upload and verify it the same way as the previous stage.
Letters Stage:
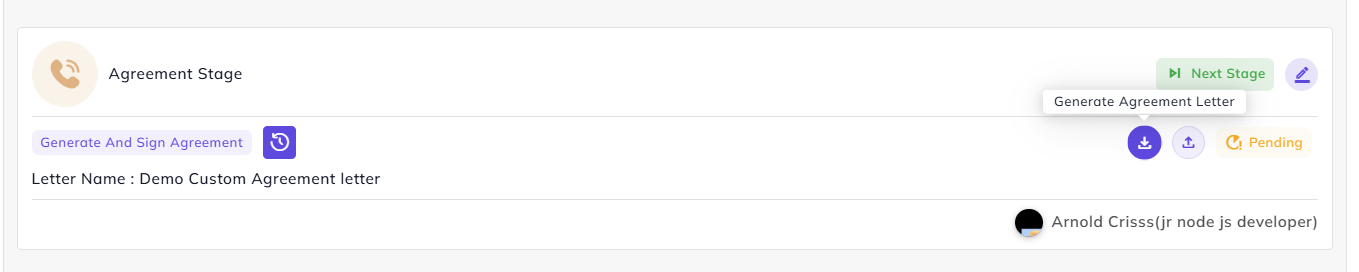
For the letter generation stages (Agreement Stage, Appointment Letter Stage, and Offer Letter Stage) there will be options to generate a letter or upload a letter.
Note: Only the Agreement Letter type will have an option to collect documents too in that stage. If the button of Document Collection is selected while creating the Joining Flow, documents can be collected from the candidate in this stage.
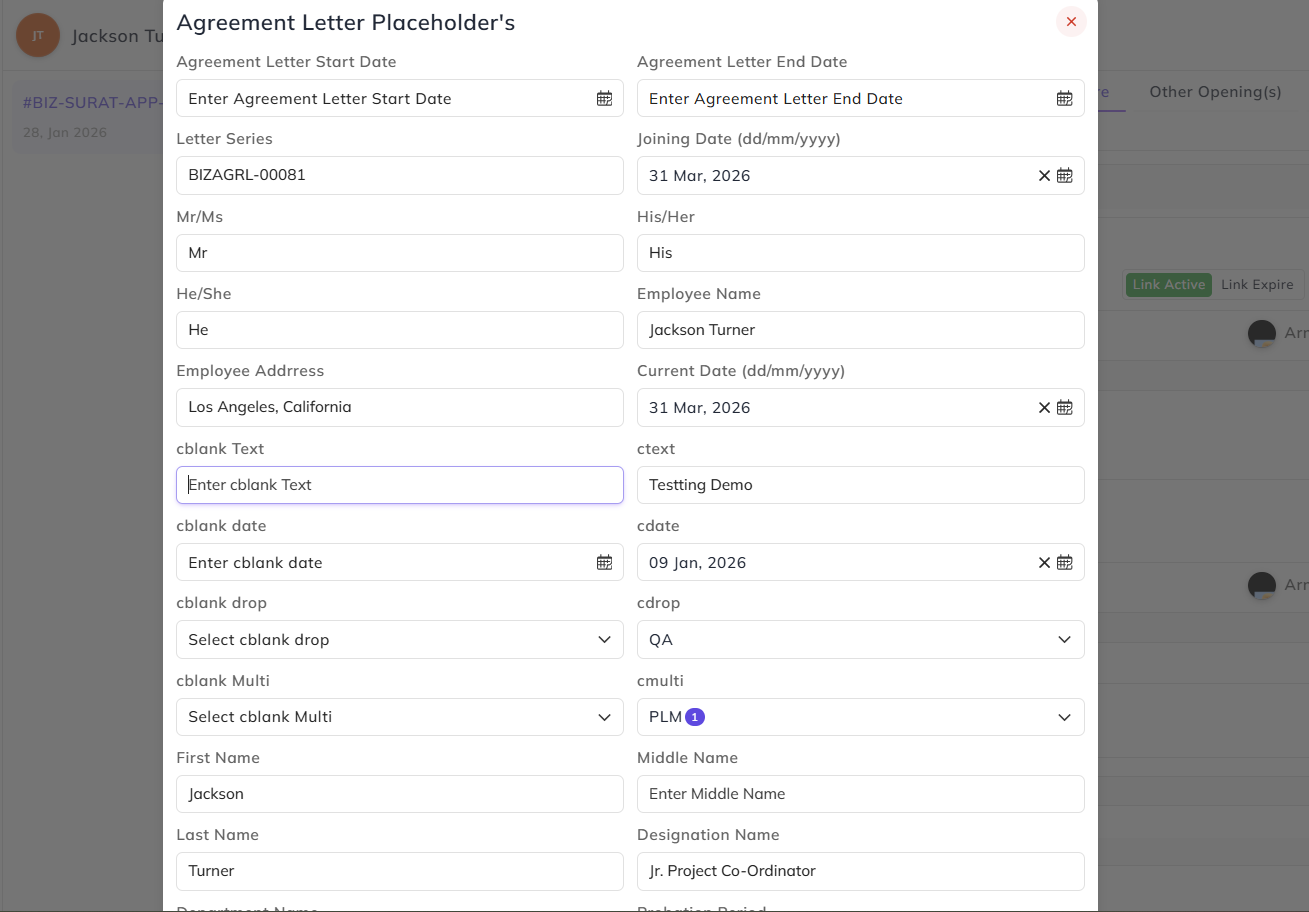
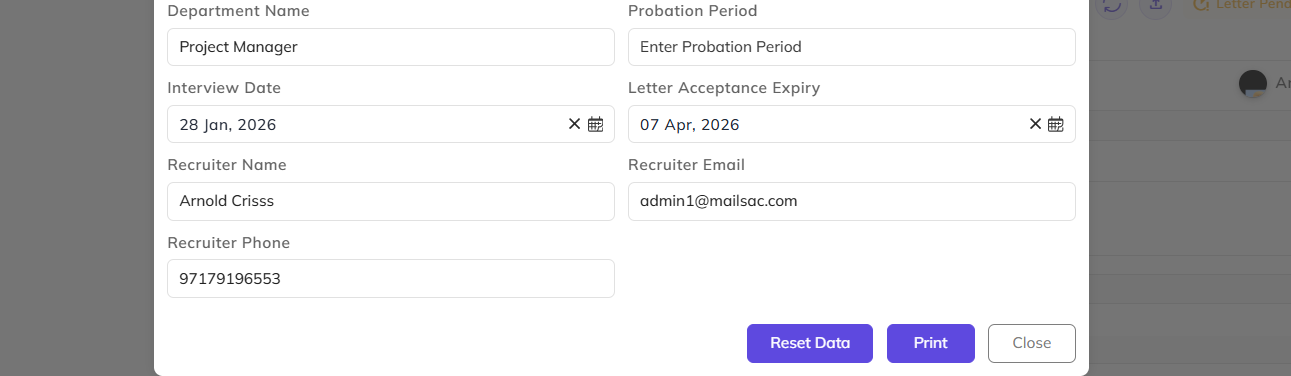
After clicking on generate letter, the tags will be visible with the replaced or the actual values and if custom tags are present in the letter then we can also change values for those tags.
Once Letter Has generated if approval is required then it will go for the approval and the status will be visible over there
After the letter is generated, it is sent for approval (if Approval Required box was checked while configuring it) according to the approval hierarchy created for it.
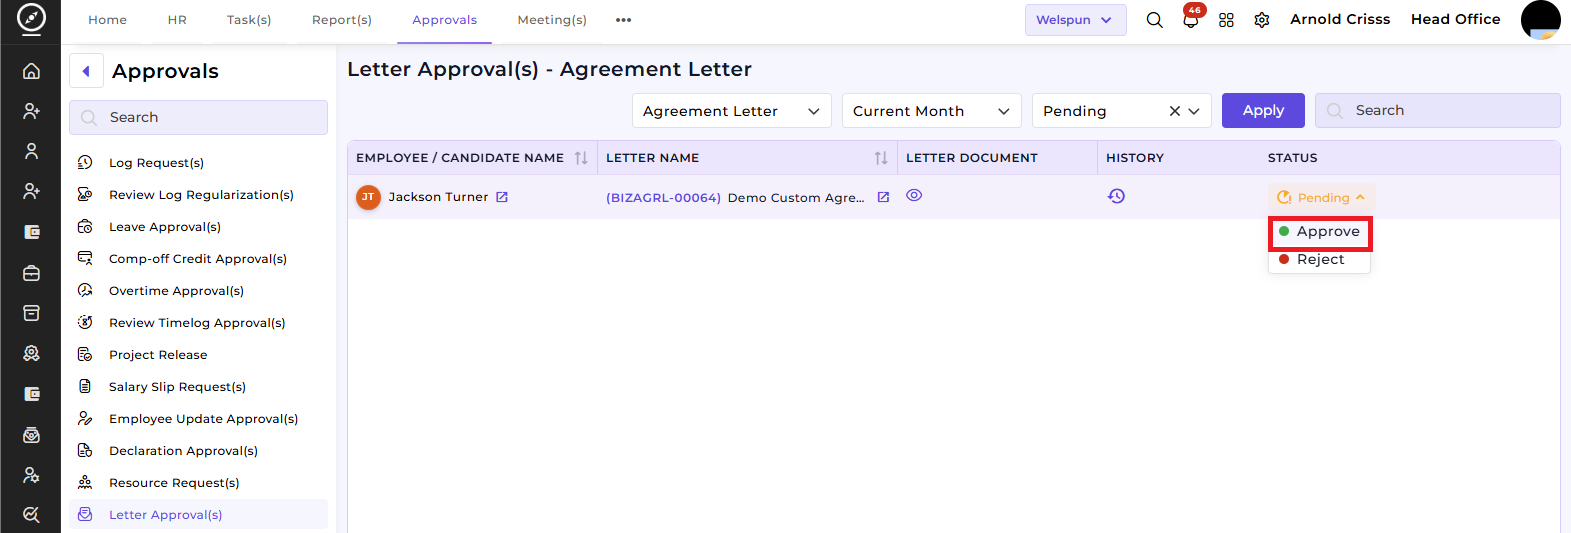
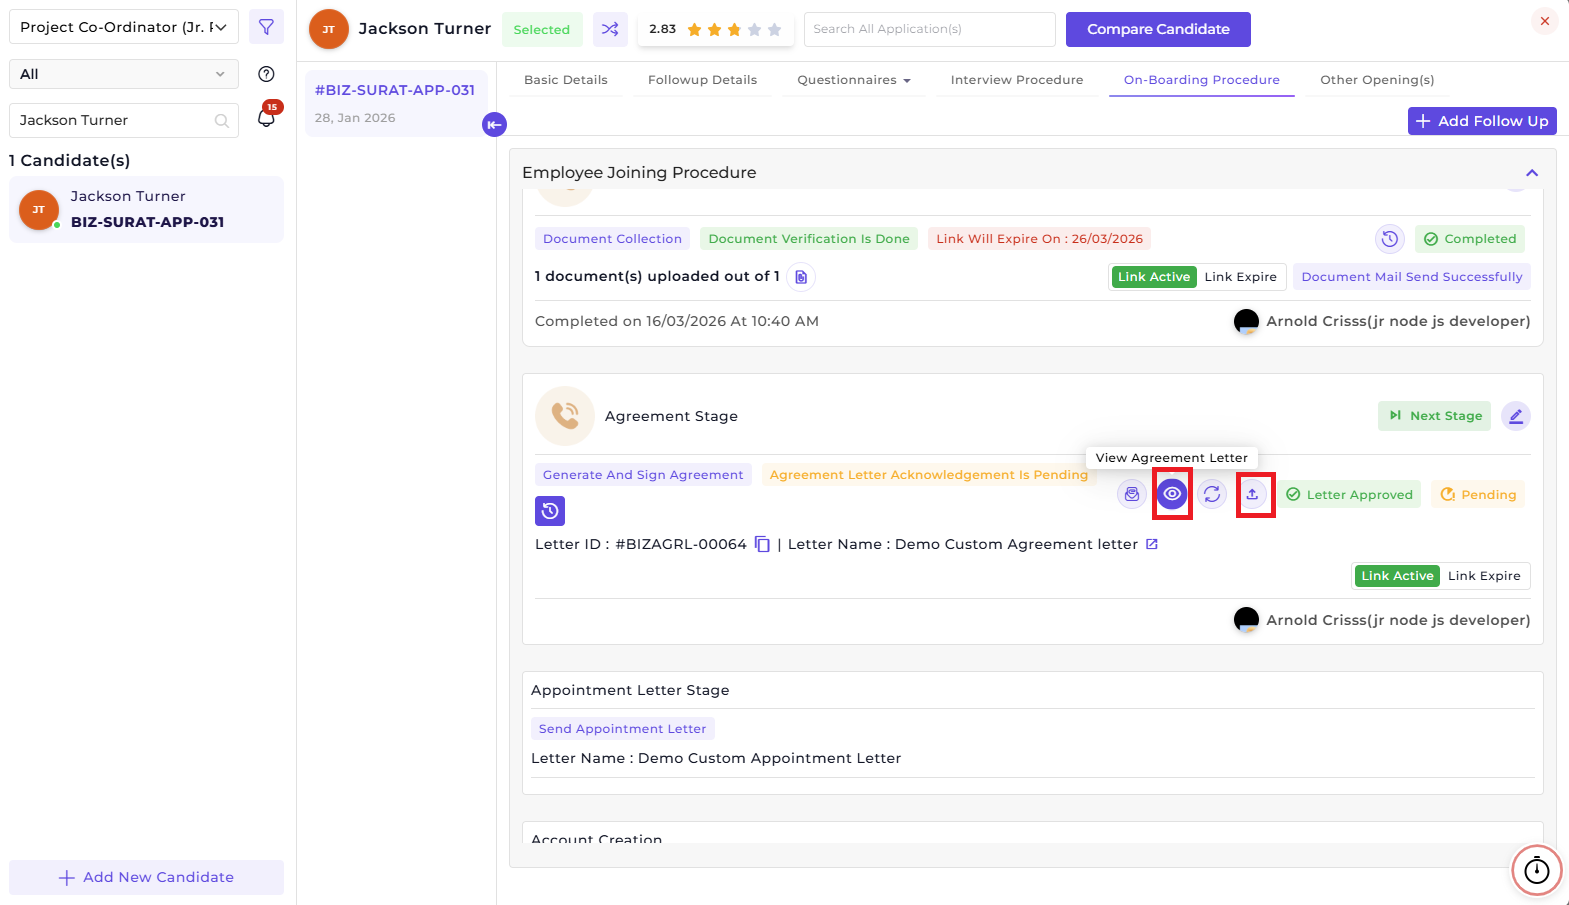
Once the respective person approves it from the Approval section, the recruiter can view the generated letter, download it, upload it and send it to the candidate. The recruiter can also re-generate the letter.
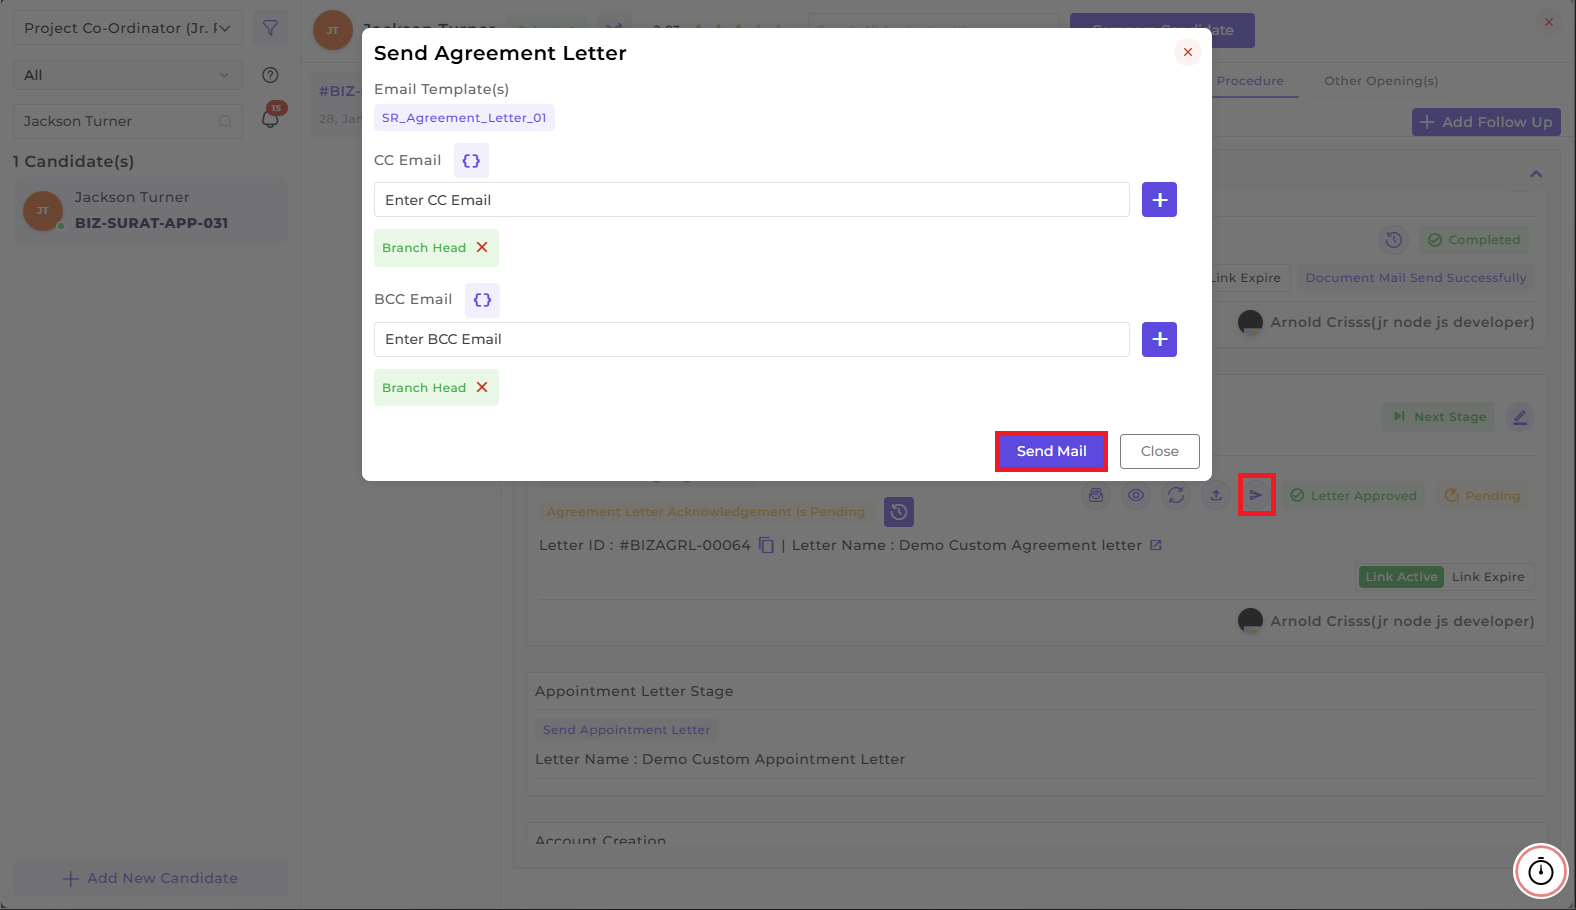
If Letter has Send Acknowledgement configuration on, then there will be an option to send the acknowledgement email in which there will be credentials for adding signature either through file or they can sign it on screen/canvas. The candidate will receive the letter and below mail through which he/ she can send acknowledgement.
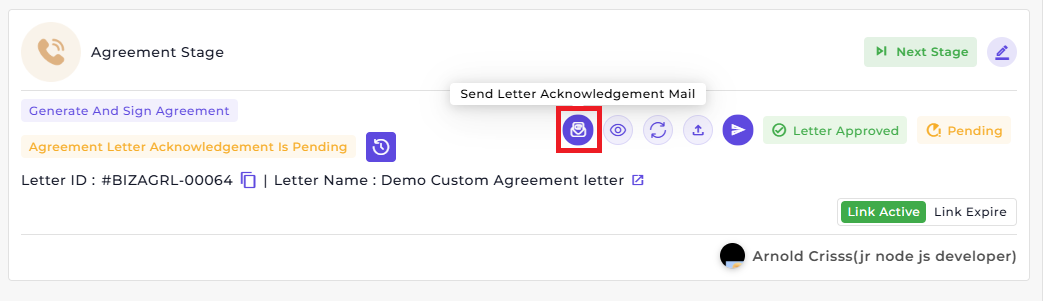
Once acknowledgement from the candidate side is done, the status turns verified and the new button will be visible to attach the acknowledgement signature with document.
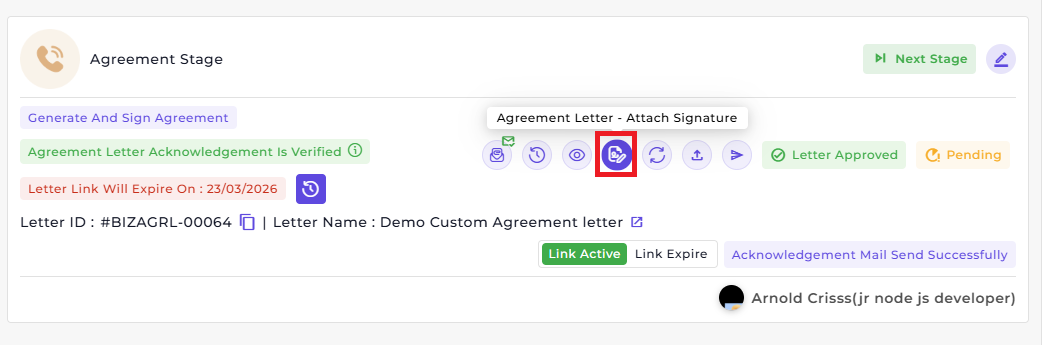
In the stage card, Letter ID and Letter Name will be visible and next to the letter name and there is a redirection button which redirects to the Letter Log page where every letter with its status will be visible.
Note: This letter process works for every letter type based on the letter configuration configured during creating the letter and during configuration of the flow.
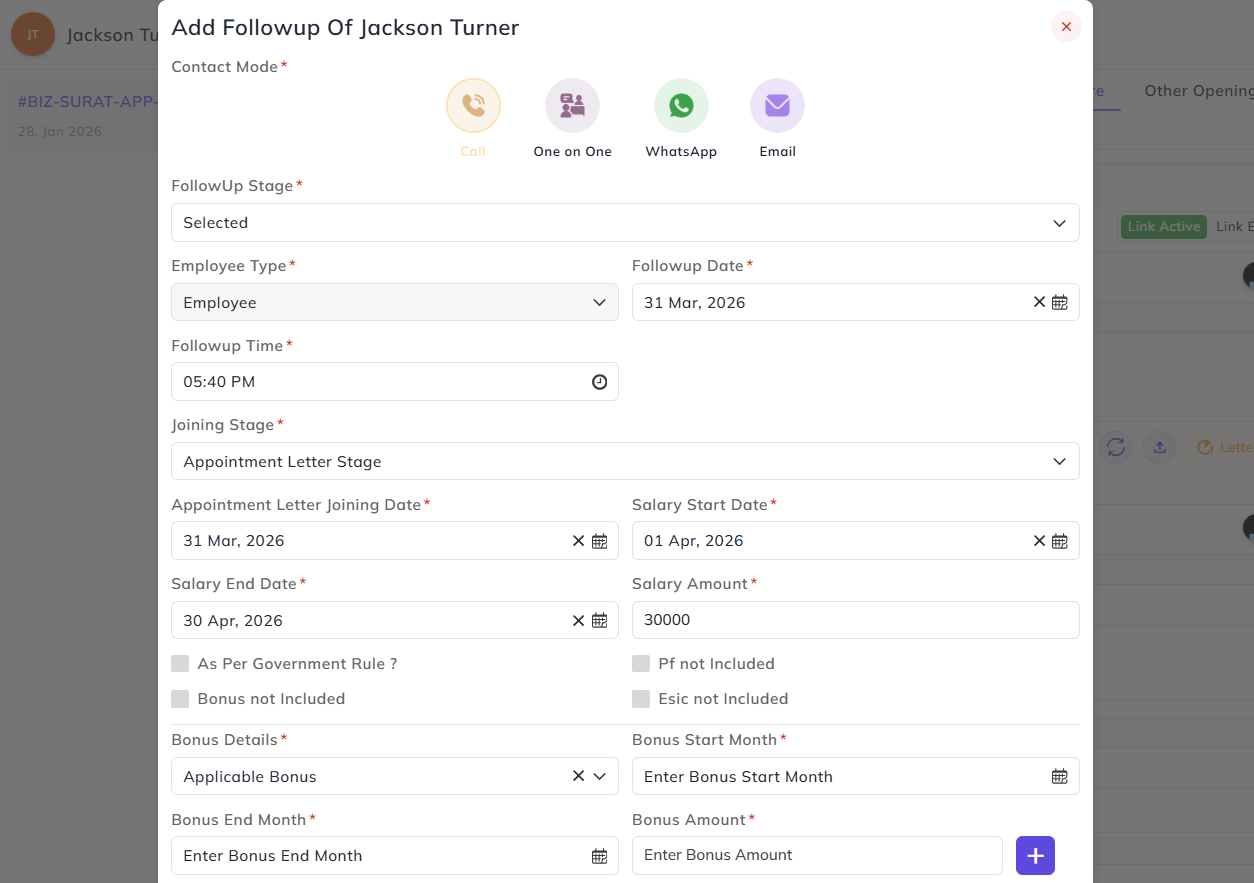
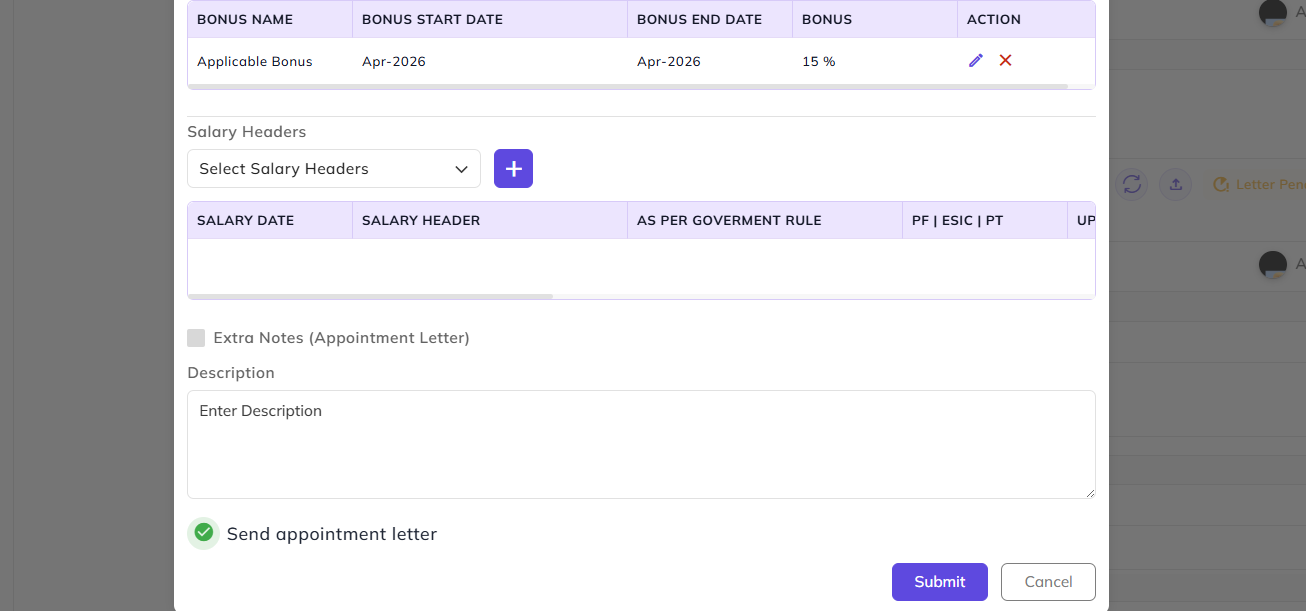
During the letter generation (Appointment Letter Stage), a form to add the salary details for the structure is also visible which is also there at the first stage in the salary calculator.
In this, we can add that salary data while the letter is generated and if the letter has the salary data tags, salary table will also be visible in the generated letter.
Account Creation/Generate Intern:
Note: Account Creation/ Generate Intern cannot be in same stage but the functions of this stages are same, the only difference is that while Account creation is selected we cannot create an intern profile and if Generate Intern selected then we cannot create an employee profile
this options visible based on the selection type of candidate at Selected Follo-up/Candidate status add time
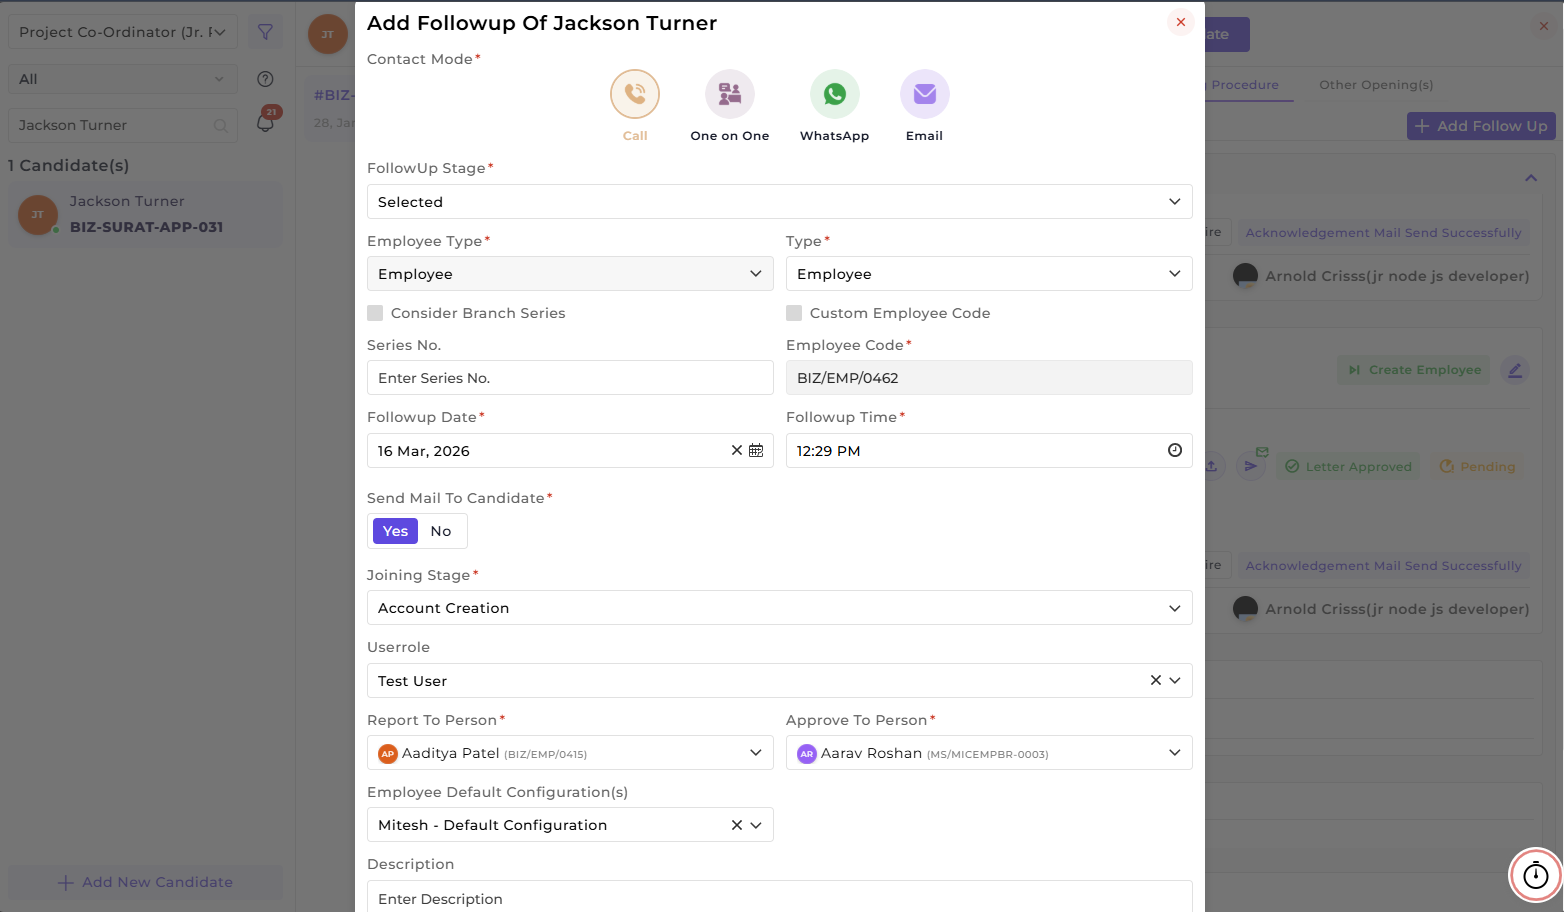
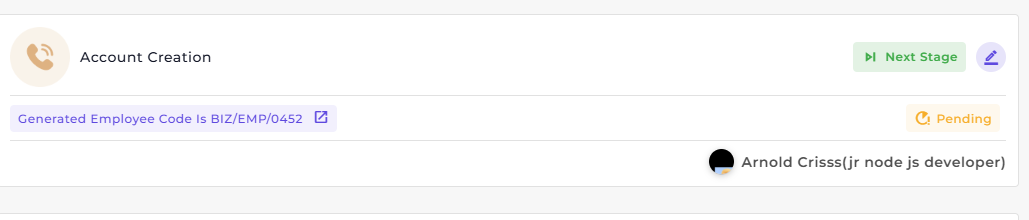
In this stage, the recruiter can assign user role, report to person, and approve to person. After creating it, an Employee Code will be generated for the candidate.
Note: Account Creation/Generate Intern this cannot be in same stage but the functions of this stages are same, the only difference is that while Account creation is selected we cannot create an intern profile and if Generate Intern selected then we cannot create an employee profile
this options visible based on the selection type of candidate at Selected Follo-up/Candidate status add time
In this stage organization can create an account
during the stage configuration the code generation/generate intern option must enabled thus in this stage there is button visible of Create Employee
while creating an employee we need to select the type is the candidate is Employee, Apprentice, Trainee or a Consultant
We can add a custom employee code or even the series number
Need to select the Userrole
if want to change the reporting person then change or just add the approval person(Mostly HR)
and if want to add some default policy for the employee’s attendance, shift and etc. then we can select the employee default configuration
After submitting there is employee code visibility and there is redirection to employee’s profile in Employee 360
Provide Joining Goodies:
Assign the joining Goodies by selecting it
Introduction:
In this stage whichever template is selected will sent over the email automatically no need to send manually
Training Assigned:
If assign training option is enabled in the flow then in this stage we can assign/select the here and once the shift and everything is assigned they can start the training.