Opening
The Opening(s) page is used to create job openings in the recruitment module. You can define the role, department, experience, salary, recruiter, and screening questions for hiring. These openings can be used to raise a Resource Request in the future.
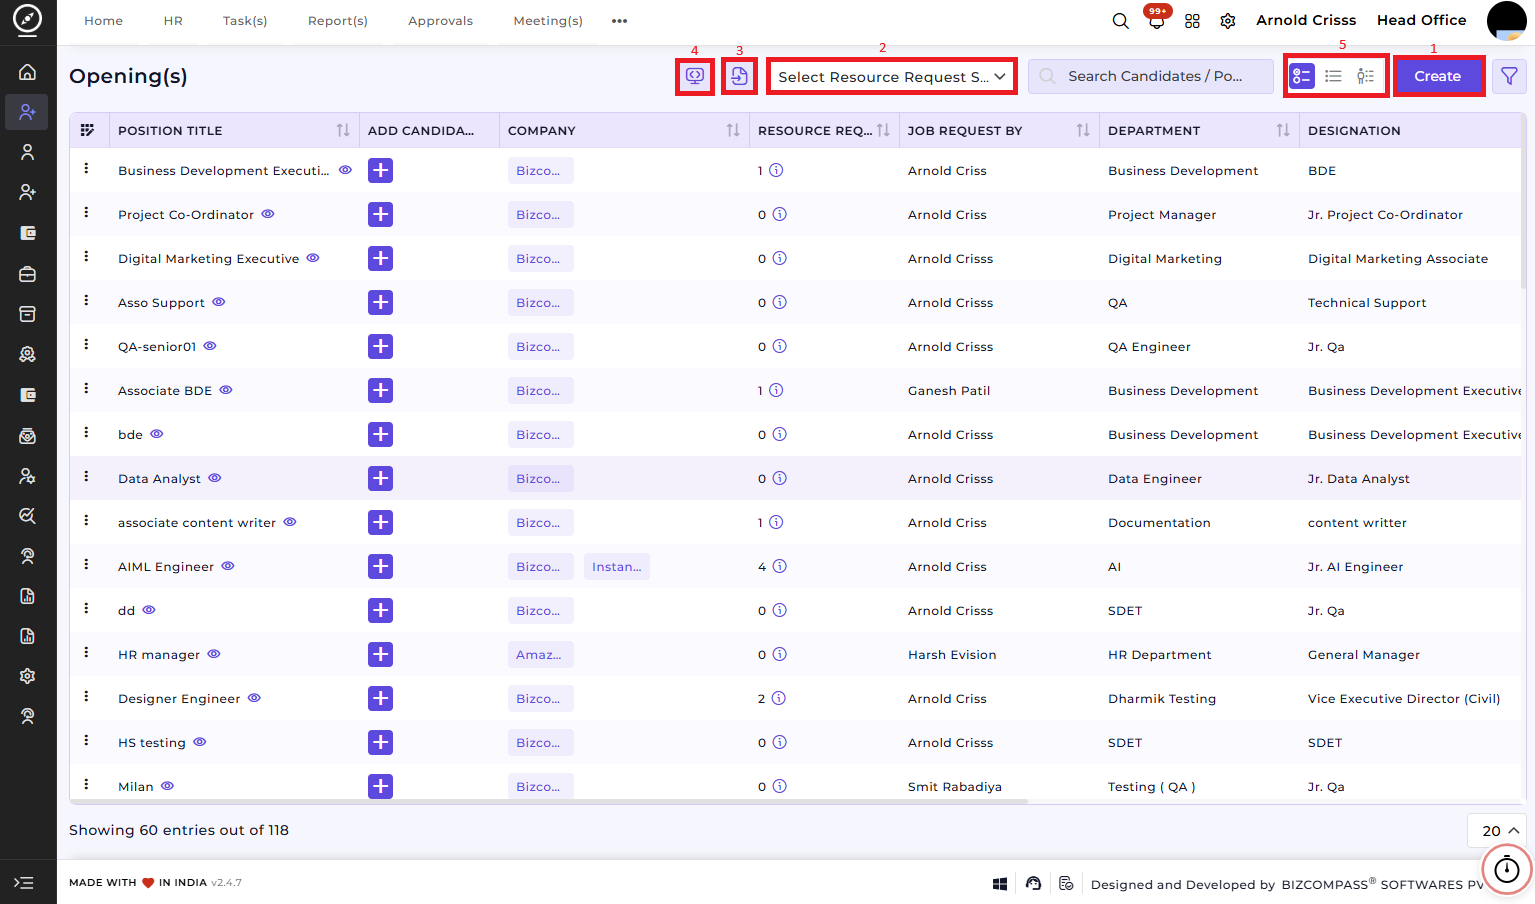
1) Create Opening(s):
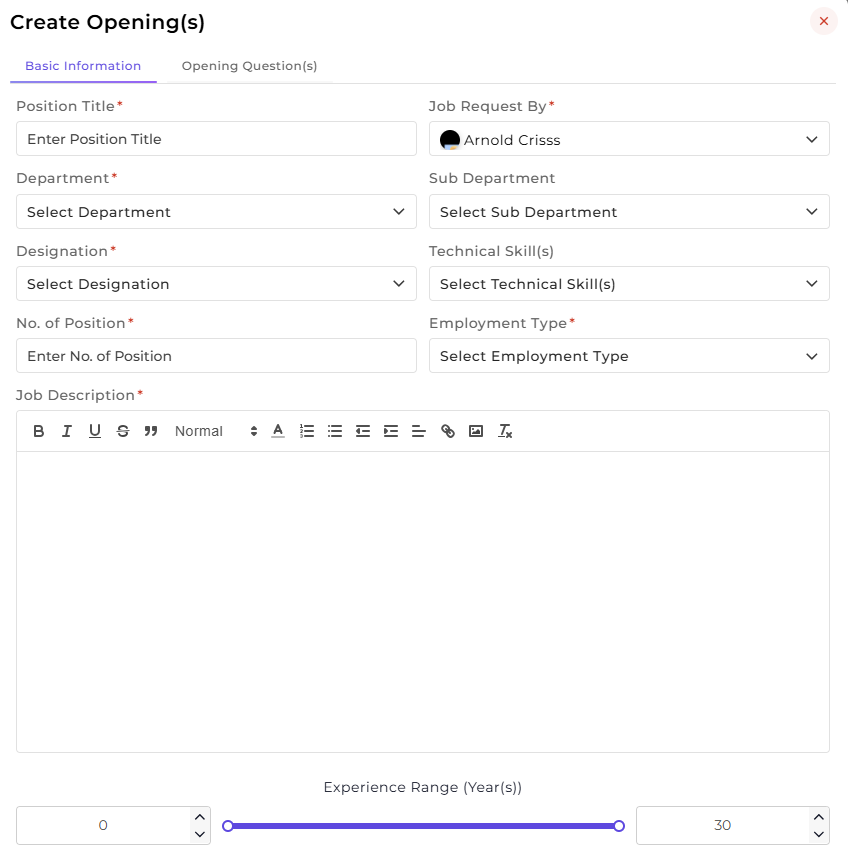
1. First, enter the Position Title.
2. Select Job Request By (the person who requested the hiring).
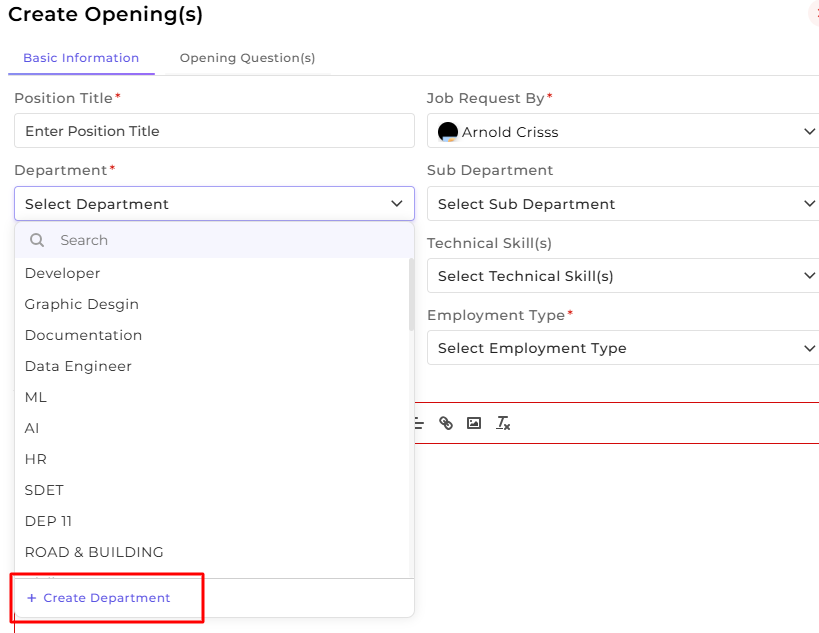
3. Select or create the Department and Sub Department.
4. Select or create the Designation for the position.
5. Select or create the required Technical Skill(s) for the role.
6. Enter the Number of Positions required.
7. Select or create the Employment Type.
8. Add the Job Description explaining the role and responsibilities.
9. Set the Experience Range (Years).
10. Enter the Salary Range and select the Salary Type.
11. Select the Company and the Branch.
12. Enable Resume Attachment or Cover Attachment if required and select the Recruiter who will manage this opening.
13. You can also choose if the pre-defined Screening Questions should be mandatory or not by checking its box.

Adding Opening Questions:
You can add Opening Questions for a particular position by selecting the Question Type (Set/Individual), selecting the questions, and defining passing marks.

Note: You can create new Department, Sub-Department, Designation, Technical Skill(s), Employment Type, Company, Branch and Customer Company from here only as well as in their separate configuration pages (if you have access to them). An example of creating new Department while creating an opening is shown below.
Now you can create the Opening questions:
1. Select the Question Type (Set or Individual).
2. Enable Sectional Cut Off if required (if Set is selected).
3. Select the Question Set (if Set is selected) or Opening Questions (if Individual is selected).
4. Choose the Question Selection Type : Manual or Auto (if Set is selected).
5. Select the Opening Question(s).
6. The Total Mark(s) are calculated automatically (if Manual is selected). Then, enter the Passing Mark(s).
7. Click Create to save the opening with questions.
2) Filter By Resource Request Status:
You can filter the Opening(s) List view by selecting the Resource Request Status (All, Pending, or In Progress).

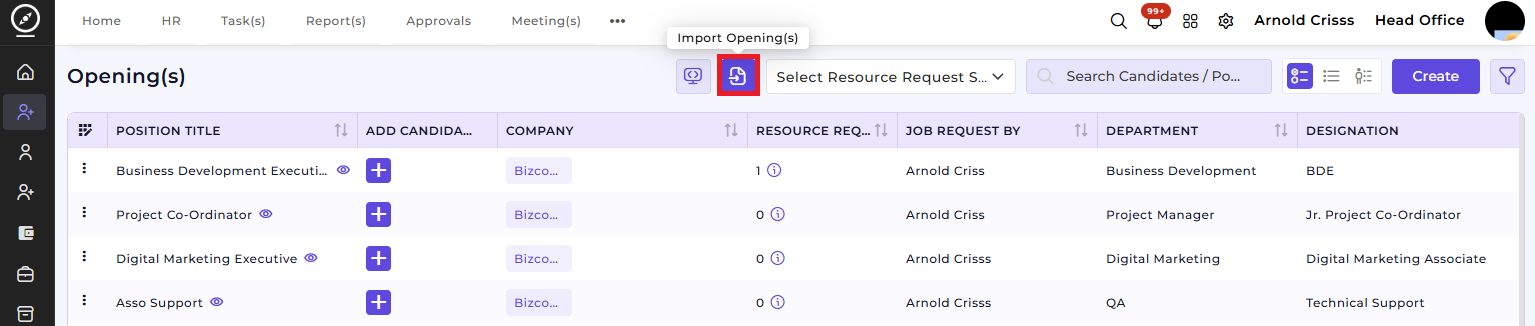
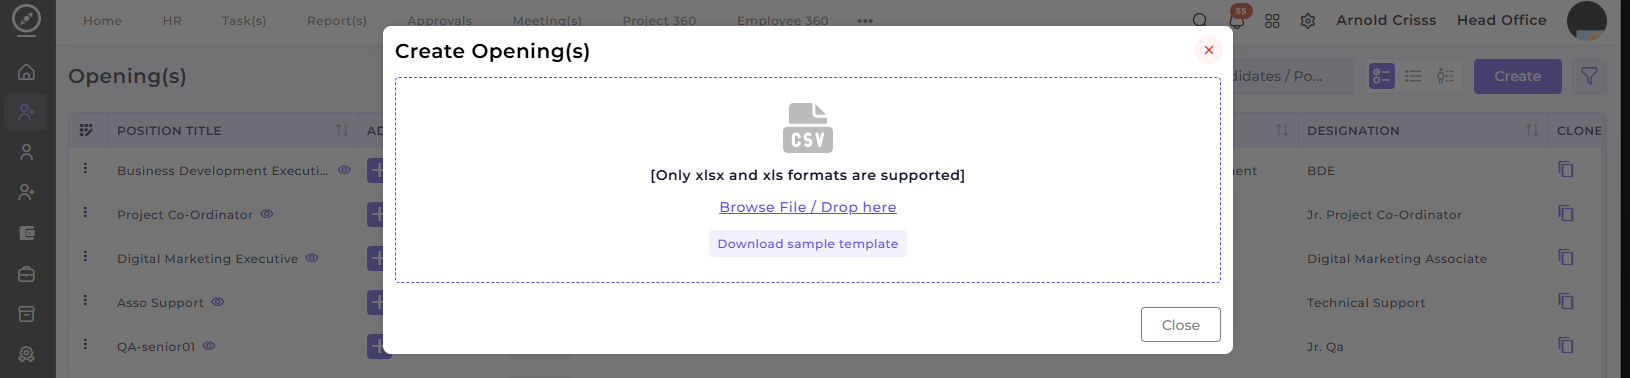
3) Import Openings
If you have bulk openings to add, you can use the Import Openings feature to upload multiple job openings at once, streamlining the process for large recruitment drives.
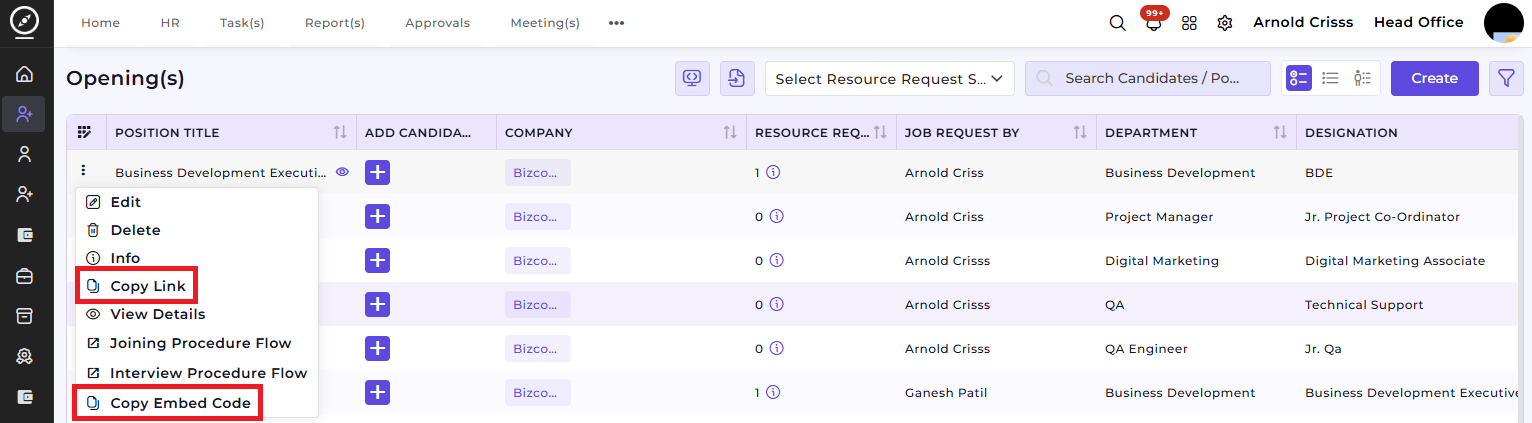
4) Copy Opening(s) Link/Embedded Codes
After creating an opening, this allows you to quickly copy the link or embed code of the opening to be used on external platforms, job portals, or within your website. This can be done in two ways:
1. You can copy link/ embedded code for one particular opening by clicking on the three dot icon before the Position Title.
Here's what will be displayed once you copy and open the link:

2. You can also copy the link/ embedded code in bulk for the openings. For that, click on the icon shown below:
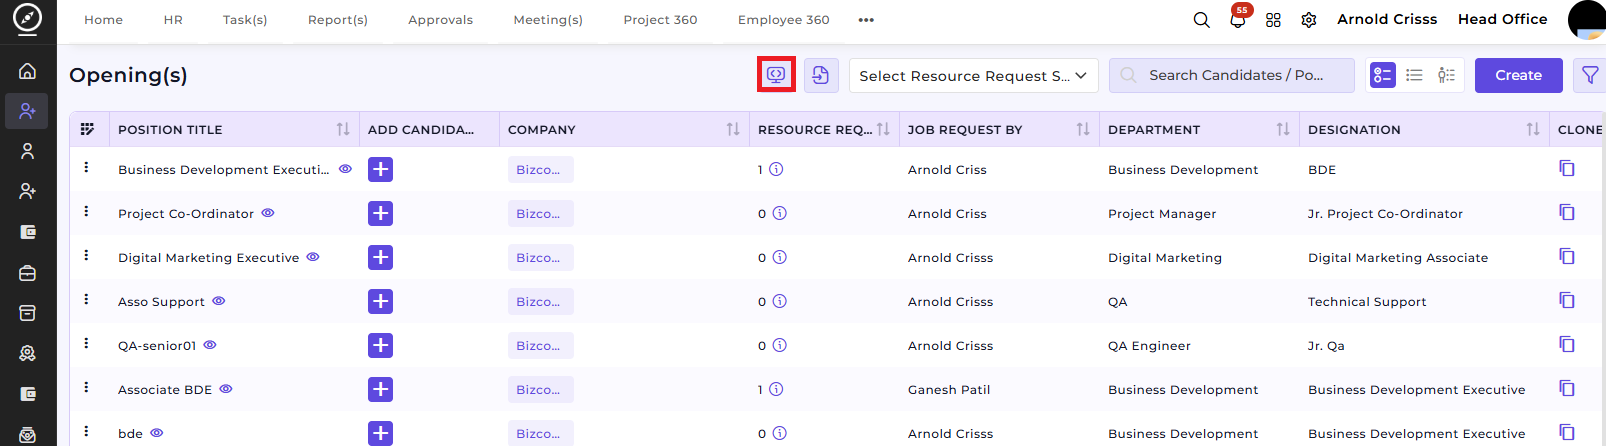
Then you can select the Company Name and Type (Opening or Resource Request) and copy the link, iFrame Code or Embedded Code as shown below.
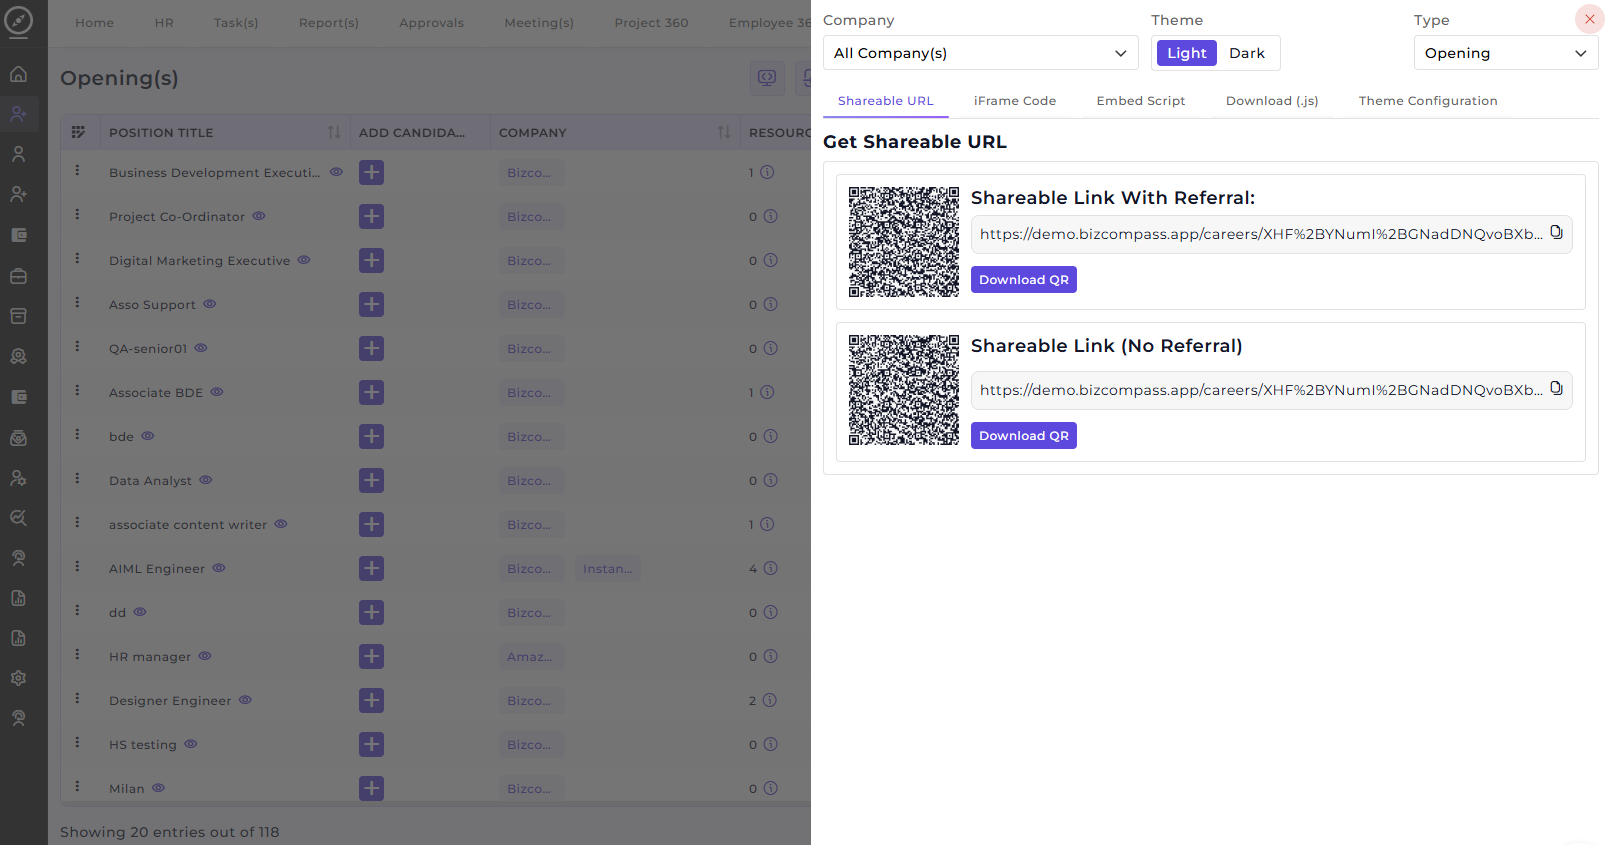
Here's what will be displayed once you copy and open the link:
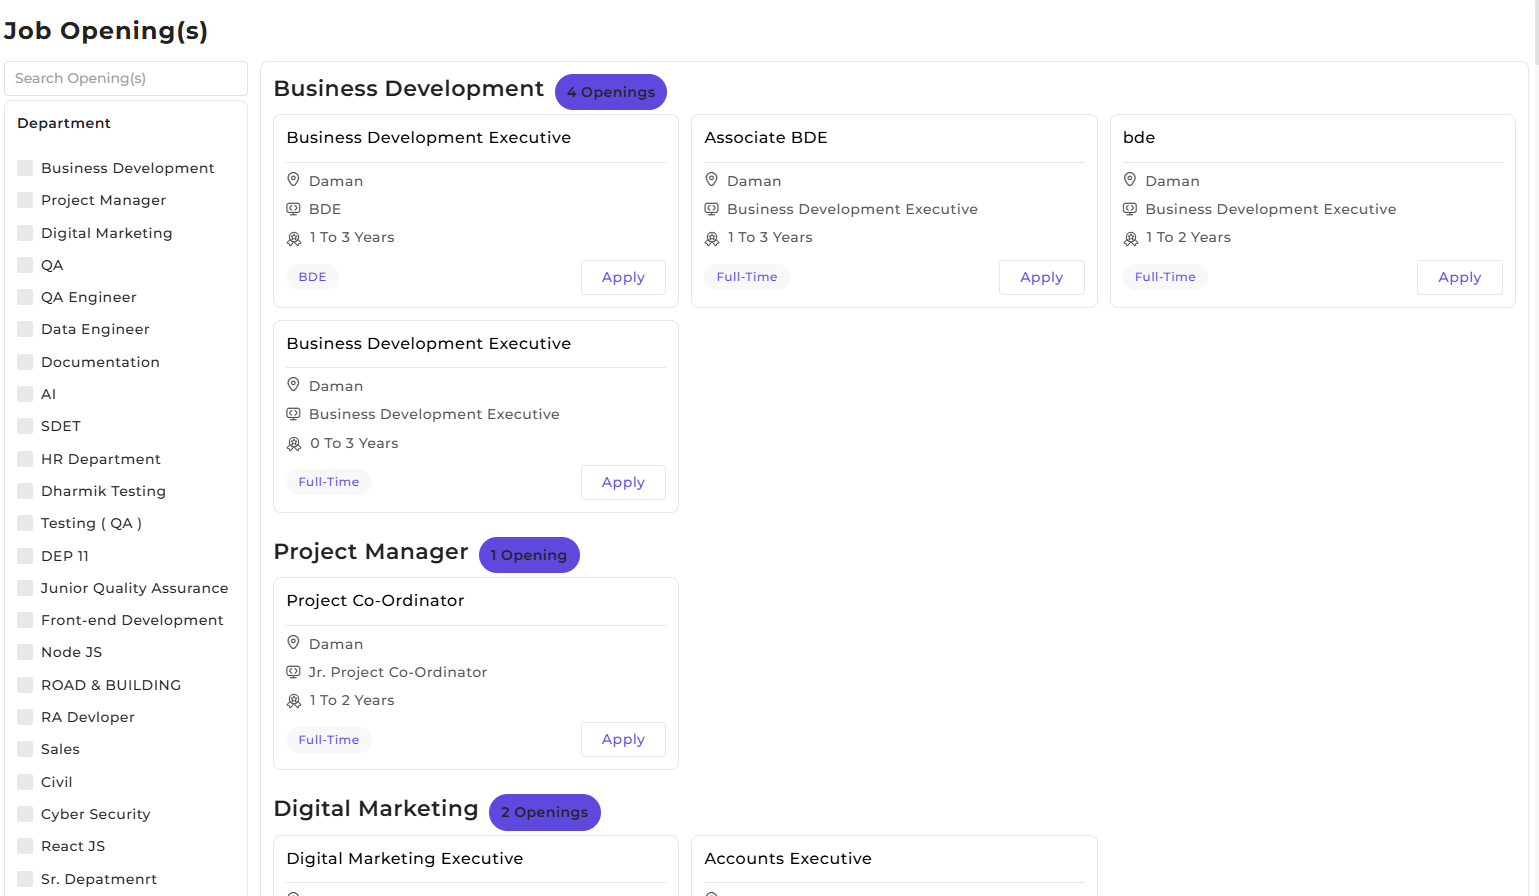
When a candidate applies for a position through these links, their details will be shown in the Candidate Inquiry page under the entry source Embedded Form. From there, you can review it and add Application ID if you want to move forward with the candidate.
5) Additional Features for Managing Openings:
Application List View:
This section provides a list of applicants for each job opening. You can view the progress of each candidate's application by applying filters such as date, status (pending/ completed), follow-up stage (schedule/reschedule interview, joined, etc.), and interview stage (aptitude, practical, etc.).

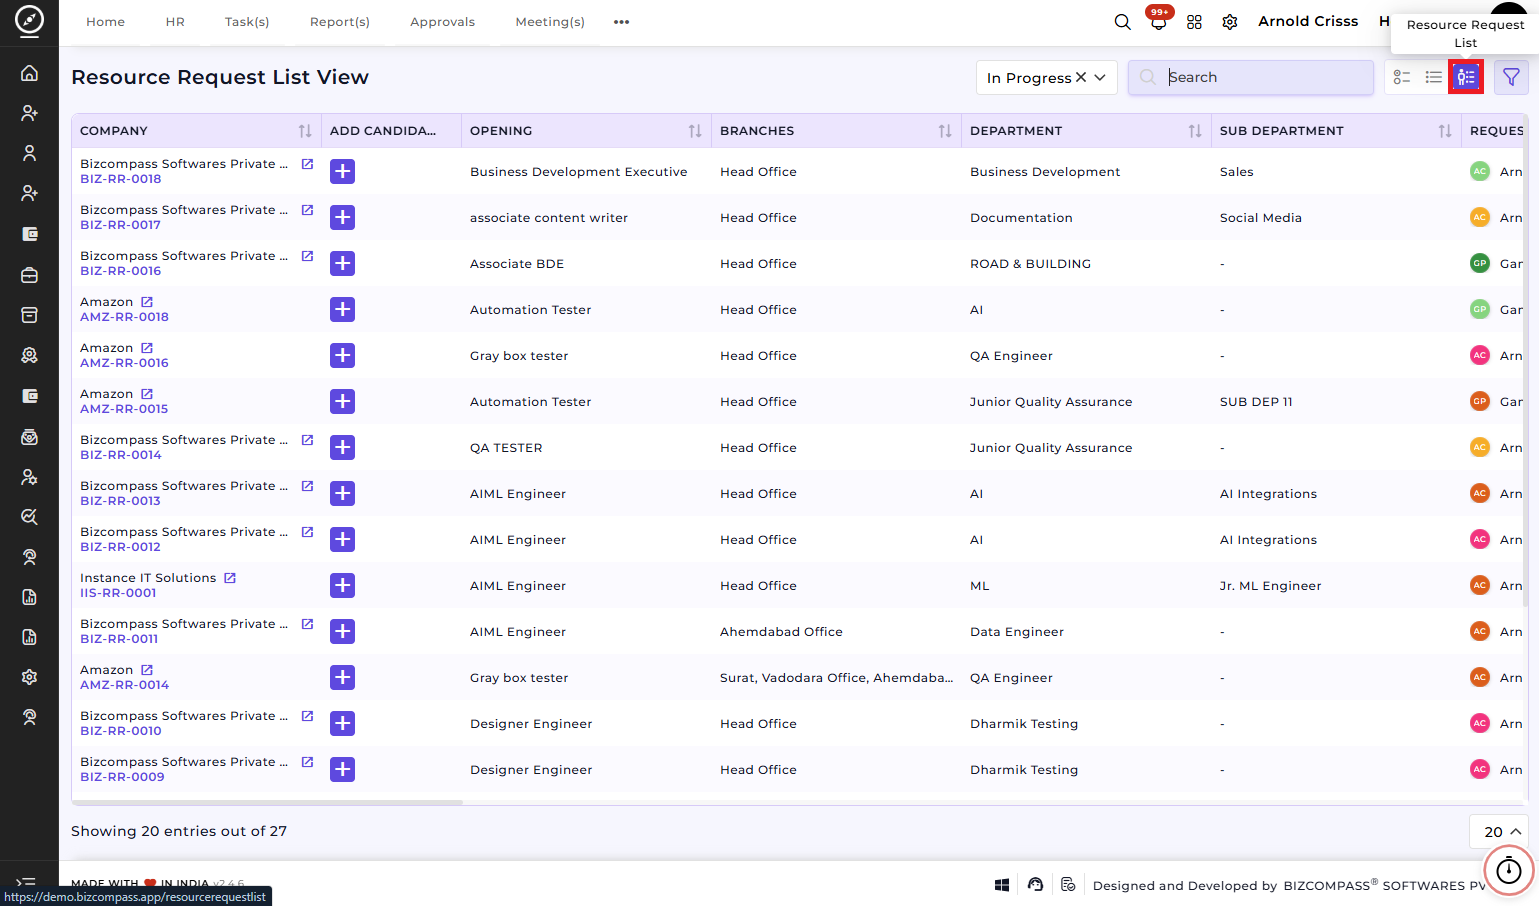
Resource Request List View:
This section allows you to view all resource requests related to job openings. It tracks the job request status (pending, in progress, etc.), the branch, department, and sub-department associated with the job opening, and it allows the recruiter to add candidates to specific positions based on the resource request.
How this feature helps:
- The Openings feature ensures that every job requirement is clearly defined before recruitment begins.
- It reduces confusion, standardizes hiring criteria, and helps recruiters screen candidates effectively, by capturing role details, experience, salary, and screening questions.
- With the Application List View and Resource Request List View sections in the same page as Opening(s), it makes it easier to track and manage all candidates and their applications.