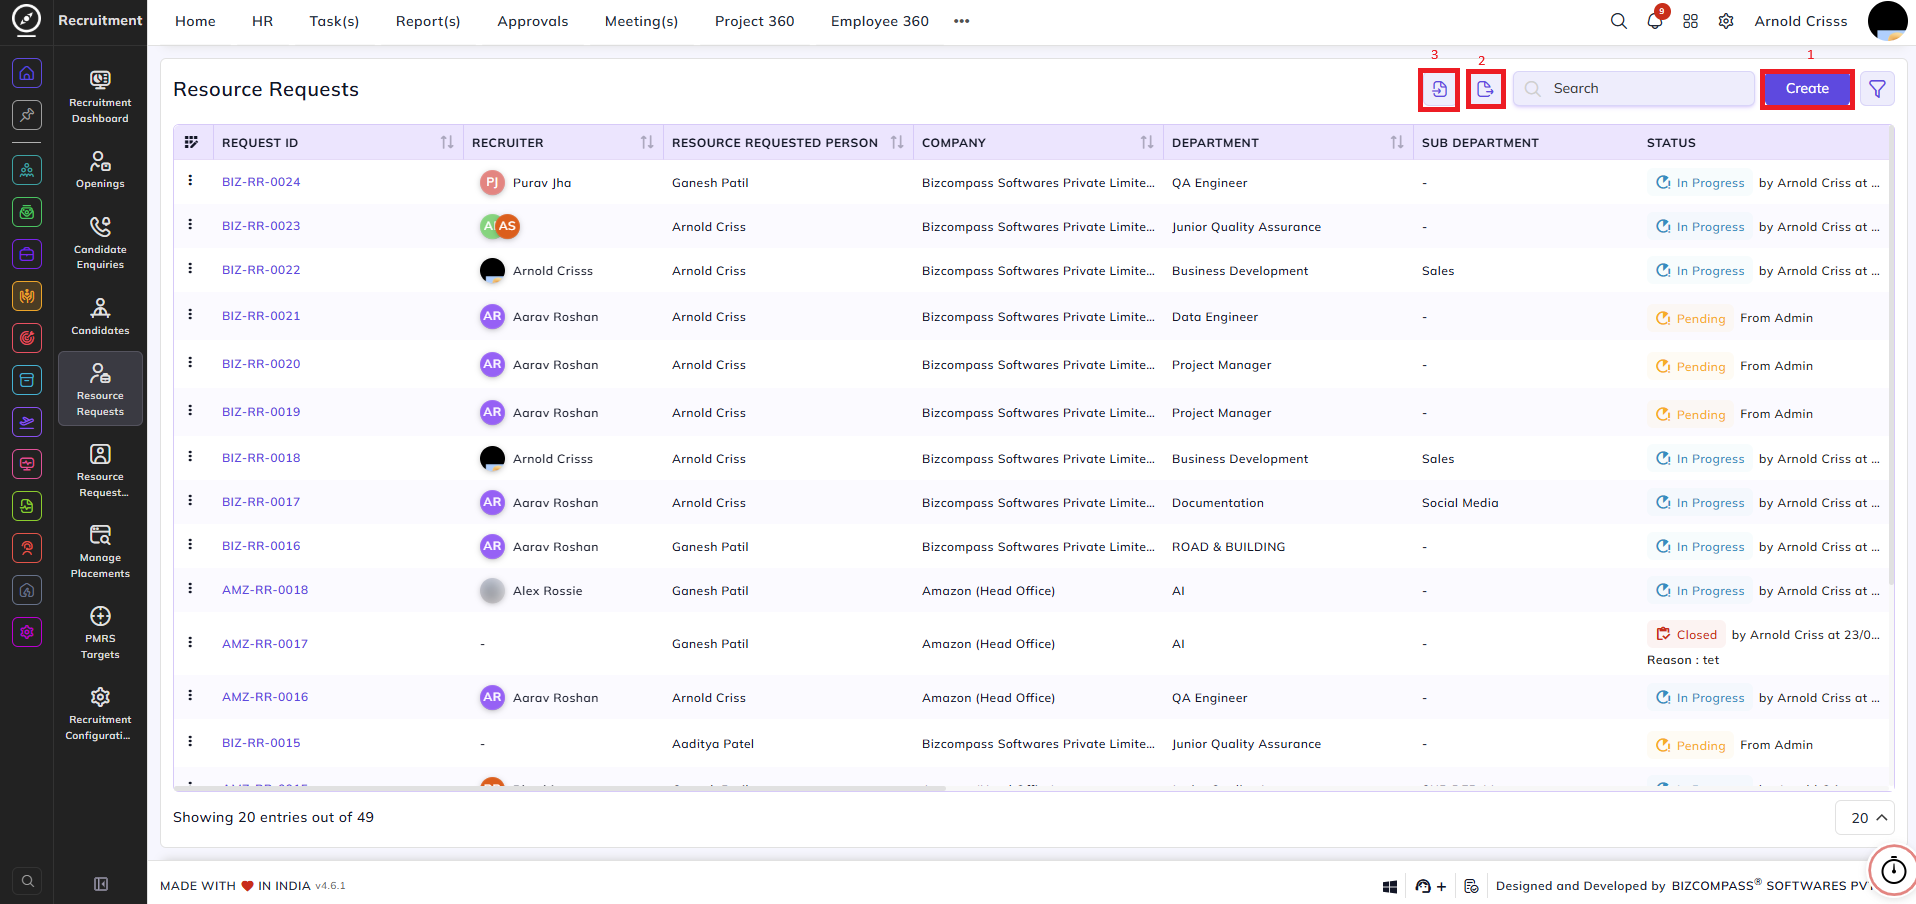
Resource Requests
The Resource Requests page is used to create a resource request. It means a department user, manager, or any authorized person can create a request for hiring.
Based on this request, the recruiter can add candidates, and once candidates are selected, the resource request will be fulfilled. A higher number of resources can also be requested within a single request.
Note: The Opening must be created first for the position before creating a resource request. Also, create the series for the resource request.
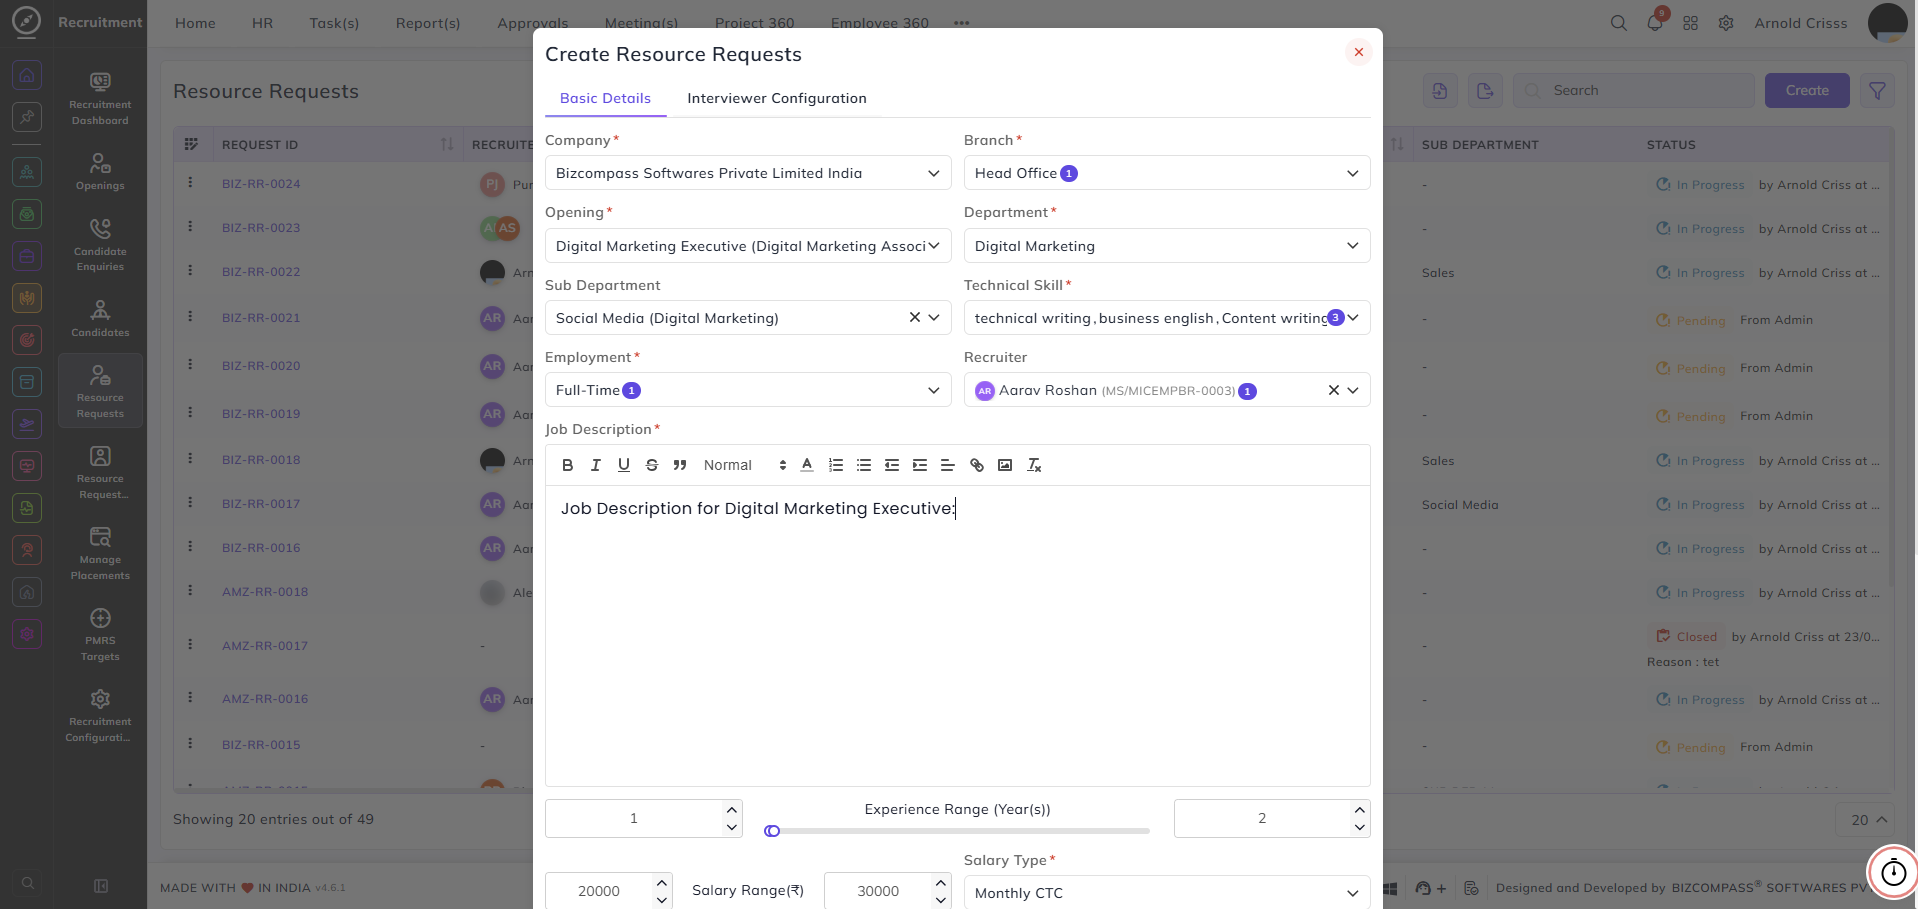
1) Create Resource Requests:
- Select the Company and Branch for which the requirement is raised. Based on this, the opening will be visible, and resources can be requested for that opening.
-
On selecting the Opening, the following fields will be auto-filled:
-
Department
-
Sub Department
-
Technical Skill
-
Employment Type
-
Recruiter
-
Job Description
-
Experience
-
Salary Range
-
-
If the requester wants to update or add data manually, they can modify these fields.
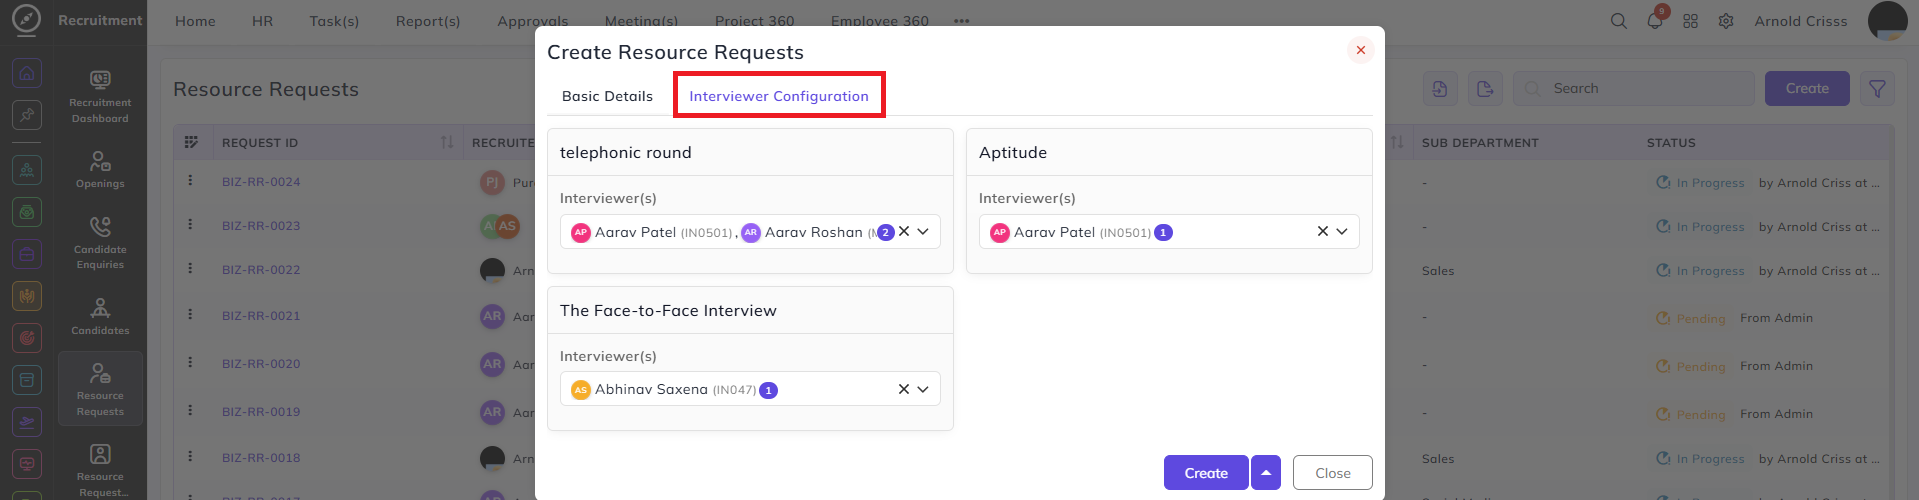
- Once you choose the Opening, a new section Interview Configuration will also appear next to the Basic Details section. That section will show default interviewer(s) configuration for a common flow or a pre-set configuration. You can edit that configuration from here as well as while designing the Interview Procedure Flow for that Opening.
- Select or create the relevant Department and Sub-Department.
- Define the required Technical Skill for the role.
- Select the Employment Type (such as Full-time, Contract, or Intern).
- Assign a Recruiter responsible for handling the request.
- Add a detailed Job Description using the rich text editor.
- Define the Experience Range (in years) using the slider to set minimum and maximum experience.
- Specify the Salary Range and select the applicable Salary Type.
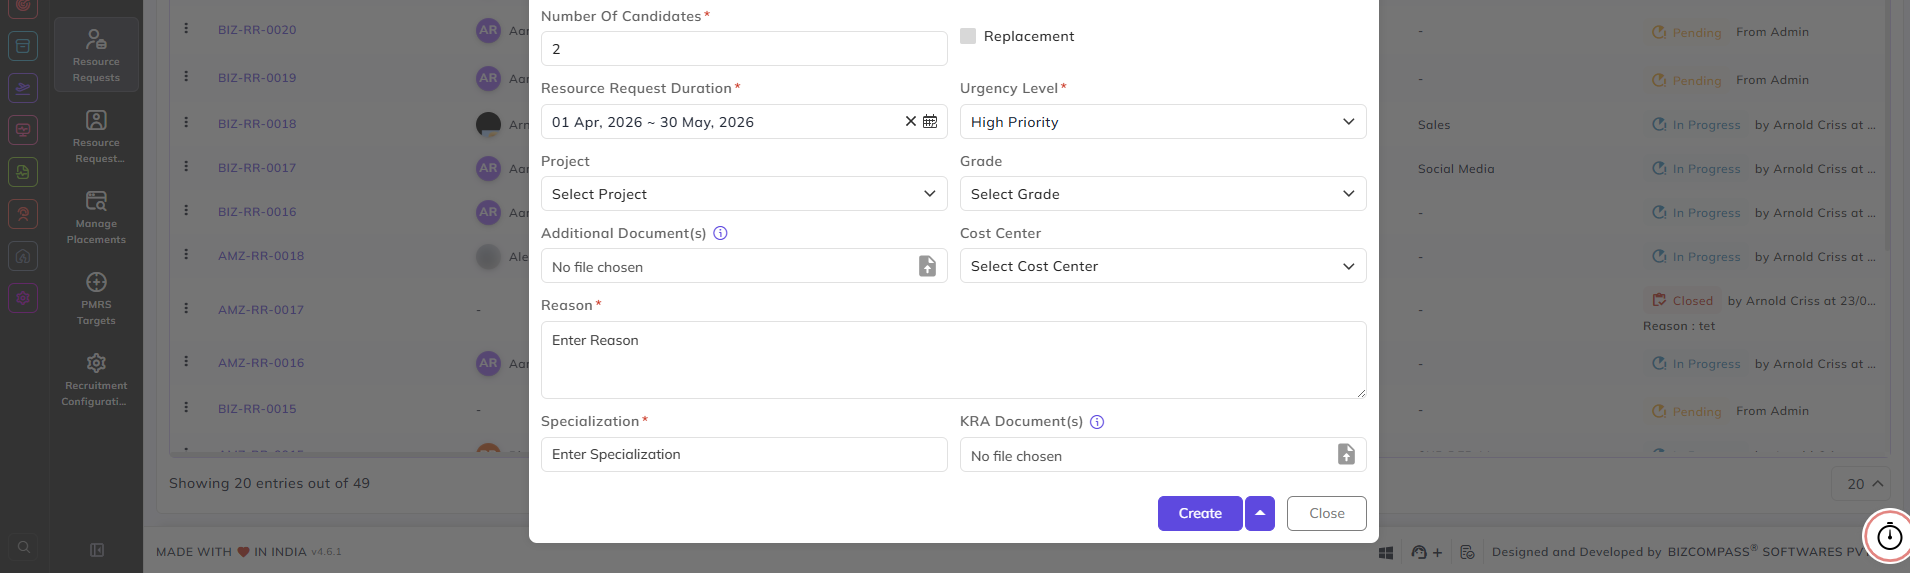
Additional hiring details can also be captured:
-
Enter the Number of Candidates required.
-
Mark the request as Replacement, if applicable.
-
Define the Resource Request Duration.
-
Select the Urgency Level to indicate hiring priority.
-
Associate the request with a Project, if required.
-
Select or create the appropriate Grade and Cost Center. (Both of these can be configured from their separate pages named Pay Grade and Cost Center by authorized person.)
-
Upload any Additional Documents or KRA Documents.
-
Specify the required Specialization and provide a clear Reason for raising the request.
2) Export Data:
By clicking on the Export Data button, an excel sheet of all the Resource Requests will be downloaded.
3) Import Resource Requests:
By clicking on the Import Resource Requests button, you can import the data in the form of .xlsx or .xls. You can also download a Sample Template for Resource Request.

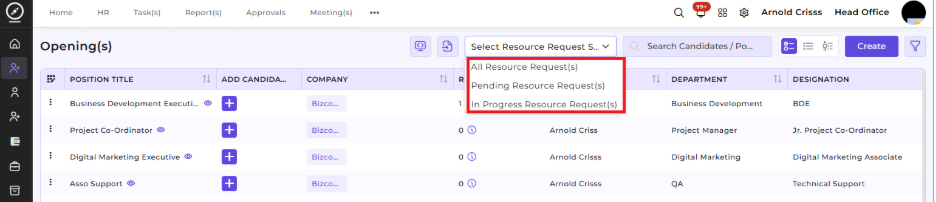
Filter By Resource Request Status in the Opening page:
You can also filter the Openings List view by selecting the Resource Request Status (All, Pending, or In Progress).
This feature is only used if your company follows a resource request flow. If not, you can directly add a candidate in a specific job opening instead of requesting for a resource prior.
After Creating the Resource Request:
- After the resource request is created, it will go for approval.
- Once the request is approved, the recruiter can add candidates to the request.
Note: Only selected candidates will be counted/considered for fulfillment of the resource request.
- If all required candidates are selected under the resource request, the request will close automatically.
- The request will also close automatically if the duration ends.