Placement
The Placement page is used to manage job placements created under a specific placement drive.
Each placement acts as a link between a placement drive and job opening, whose link can be shared to relevant institutions by HRs or Admins, enabling structured candidate evaluation and selection.
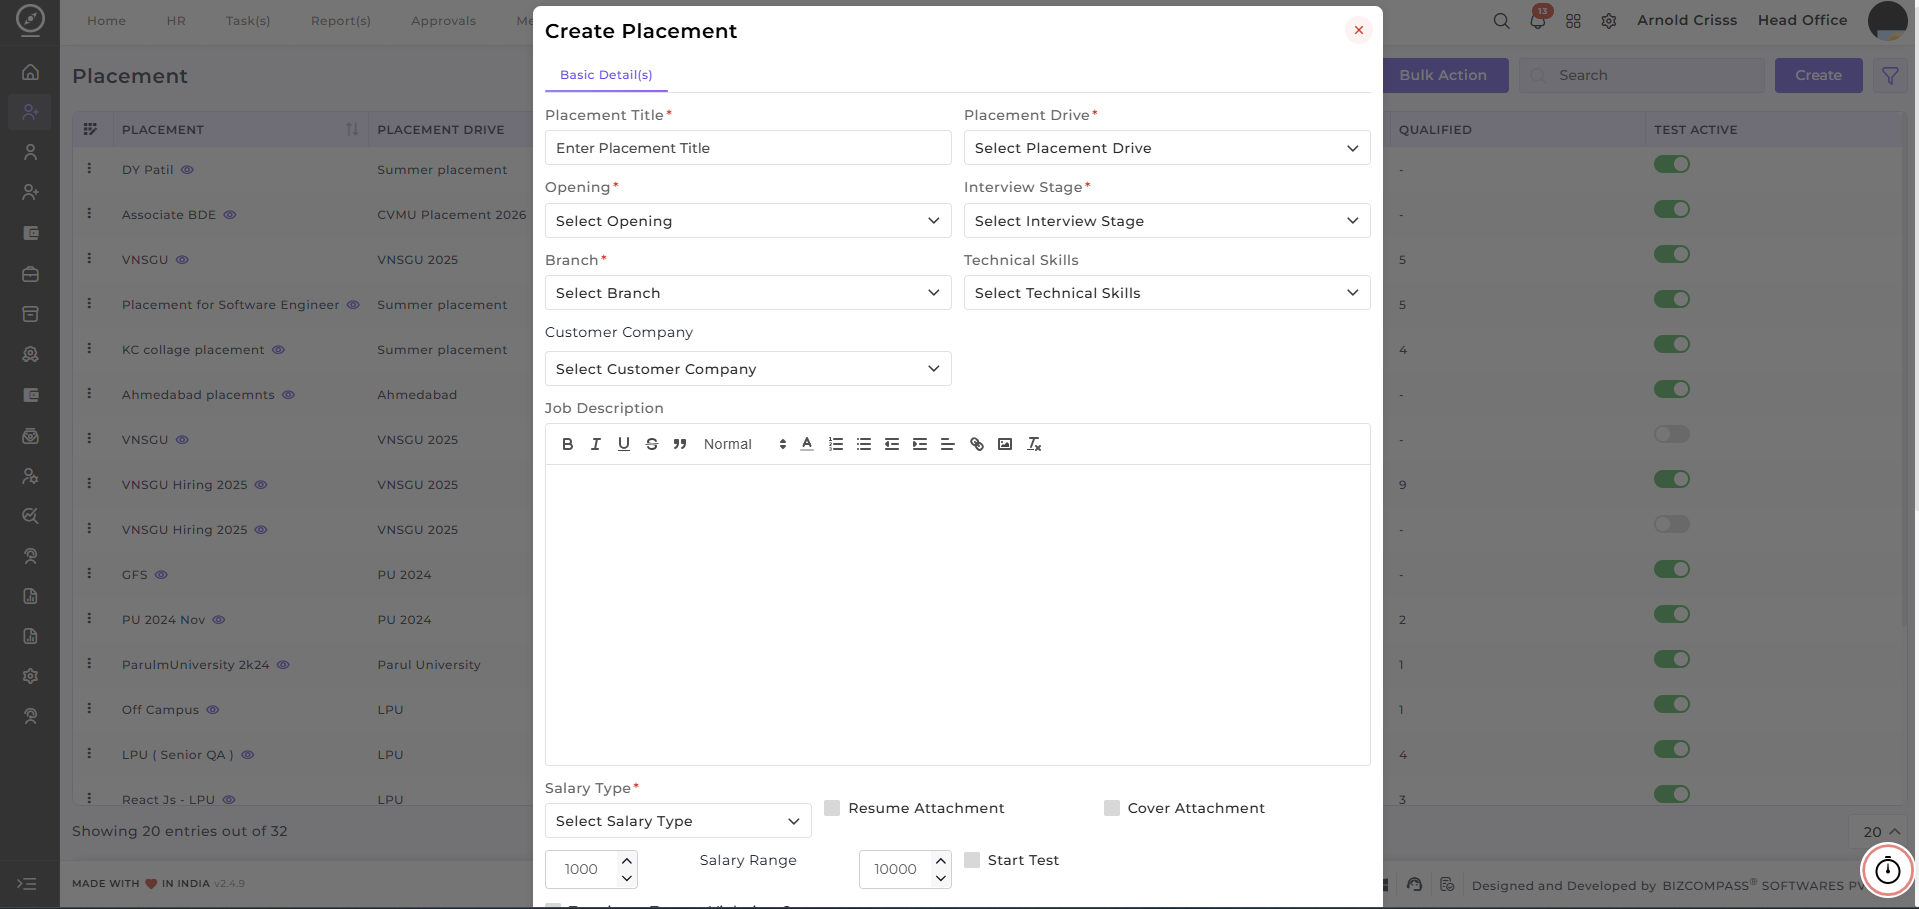
Create Placement:
- Enter the Placement Title.
- Select the
associatedassociated Placement Drive. - Once you choose the Opening,
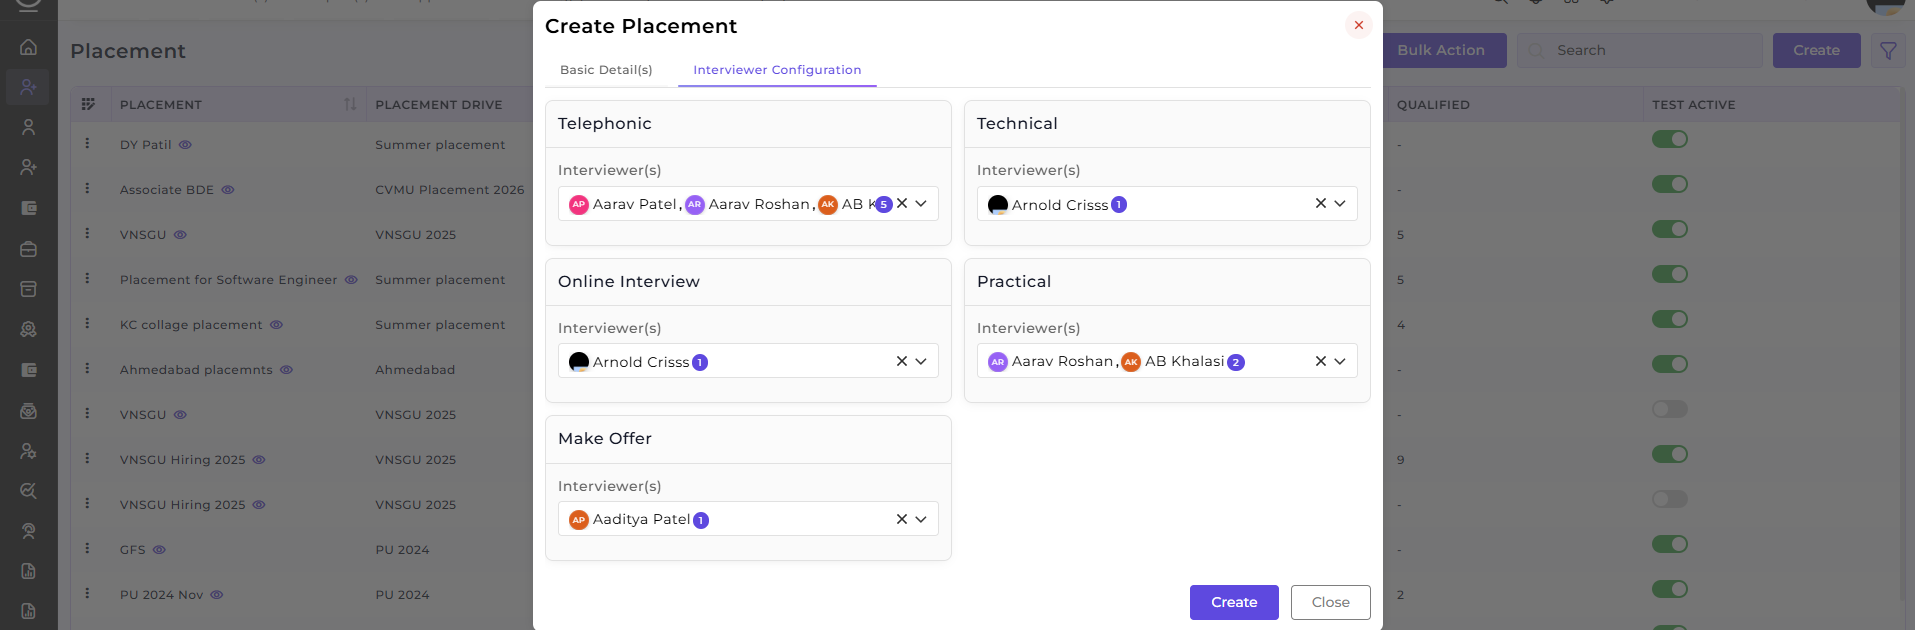
ConfigurationConfiguration will appear next to theDetailsDetails section. That section will show default interviewer(s) configuration or a pre-set configuration. You can edit that configuration from here as well as while designing the Interview Procedure Flow for that Opening. - Select
thethe Branch where the placement applies. - Select the
applicableapplicable Interview Stage. - Add or crate
requiredrequired Technical Skills. - Select
thethe Customer Company (if applicable). - Enter
thethe Job Description. - Define
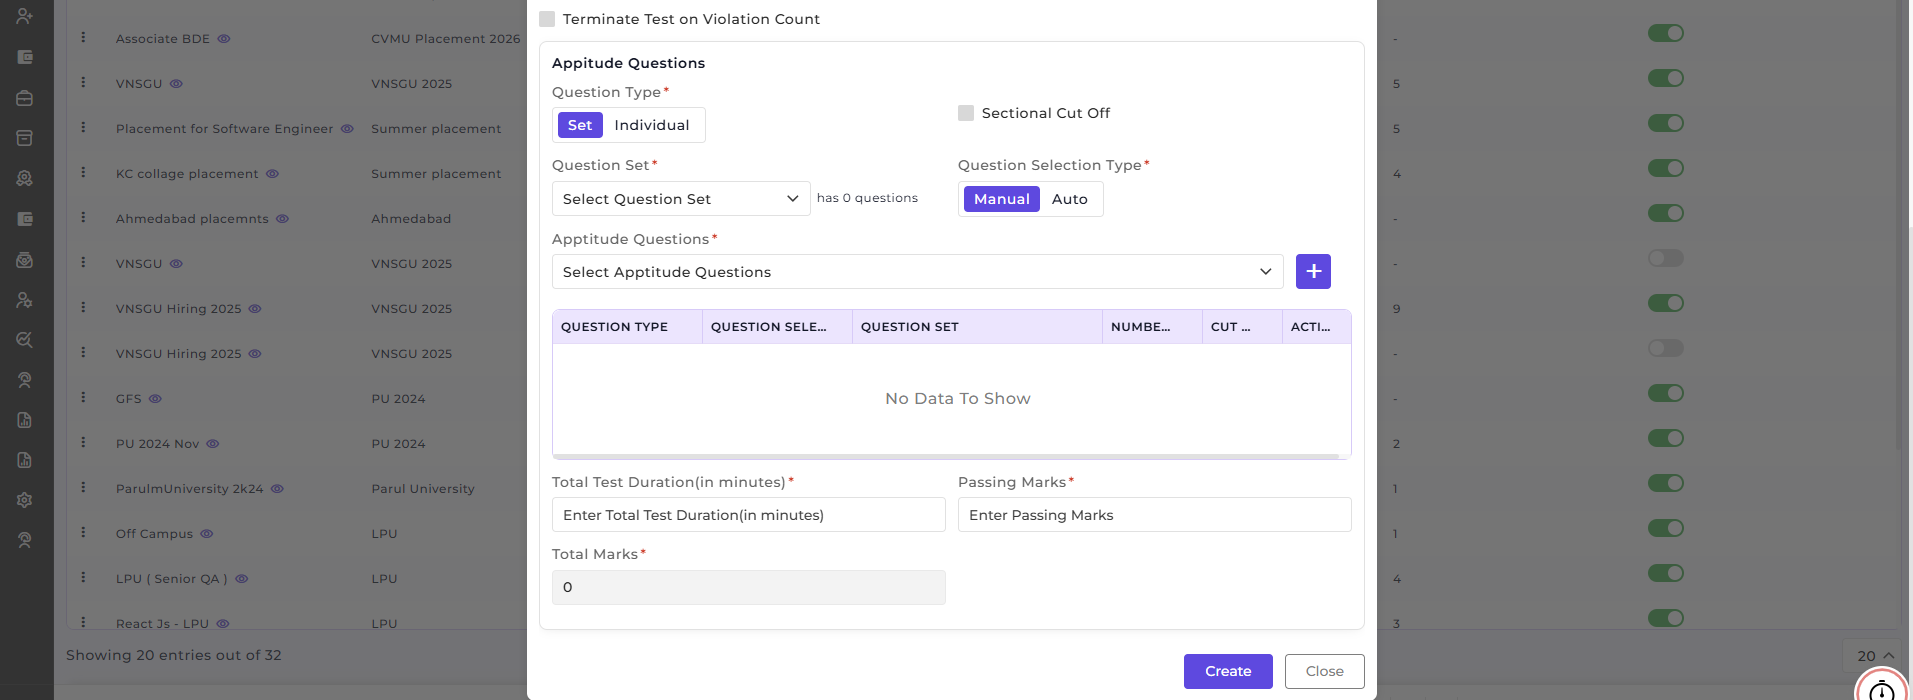
thethe Salary Type and Salary Range. EnableEnable Resume Attachment and Cover Attachment if required.- Enable the option Terminate Test on Violation Count if needed and set the Allowed Violation Count limit.
Aptitude Questions:
This section is used to configure aptitude or assessment tests associated with the placement. Refer this section for configuring them.
With the Bulk Action feature, you can delete multiple placements at once, streamlining the process of managing and maintaining the active placements.
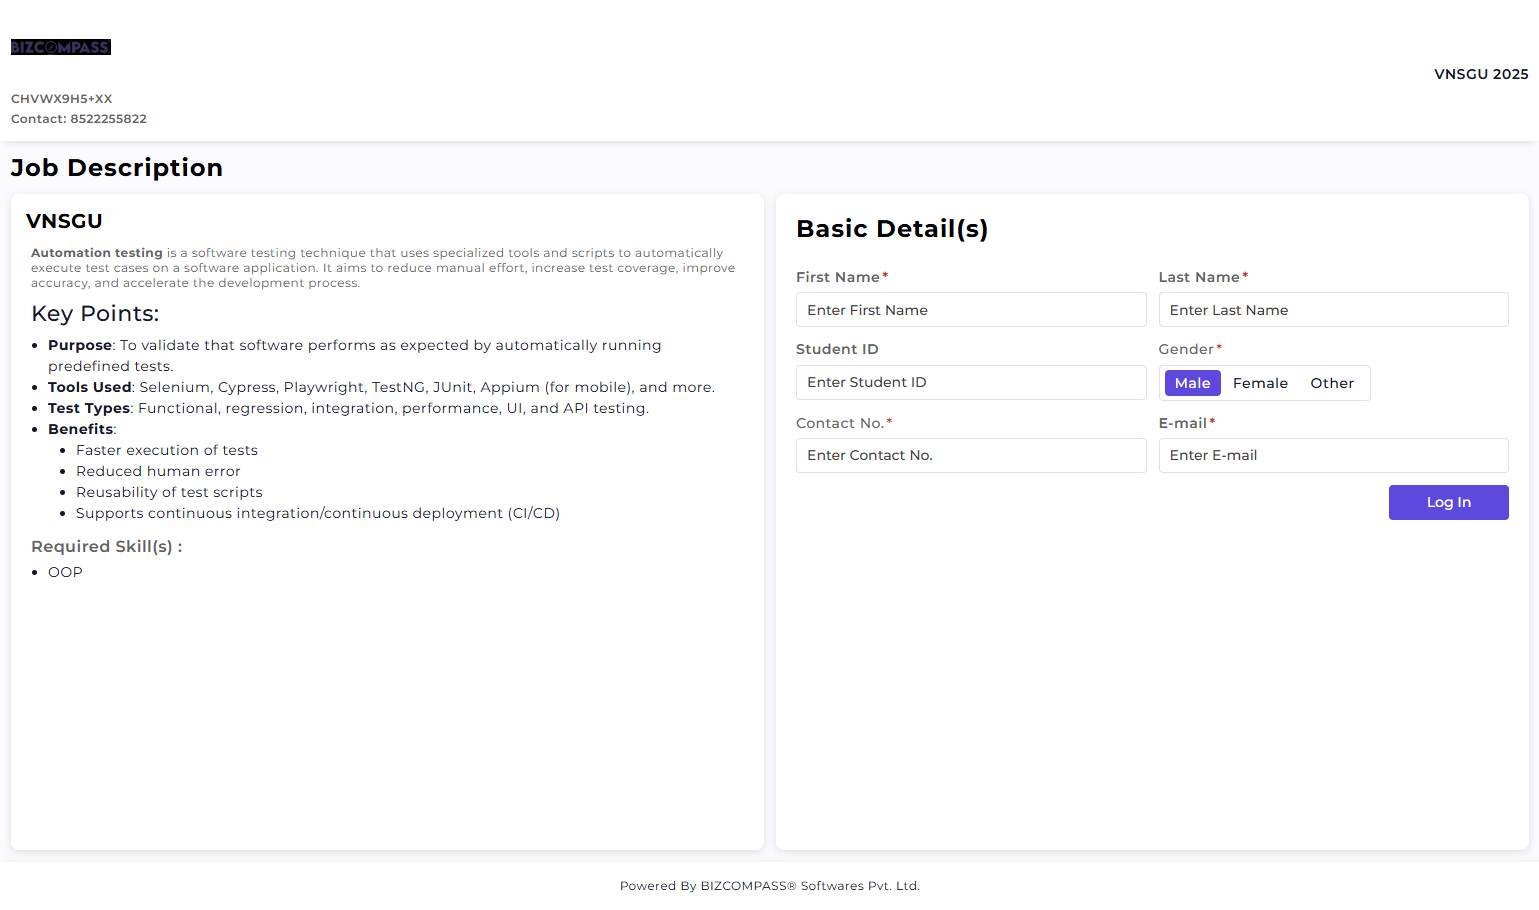
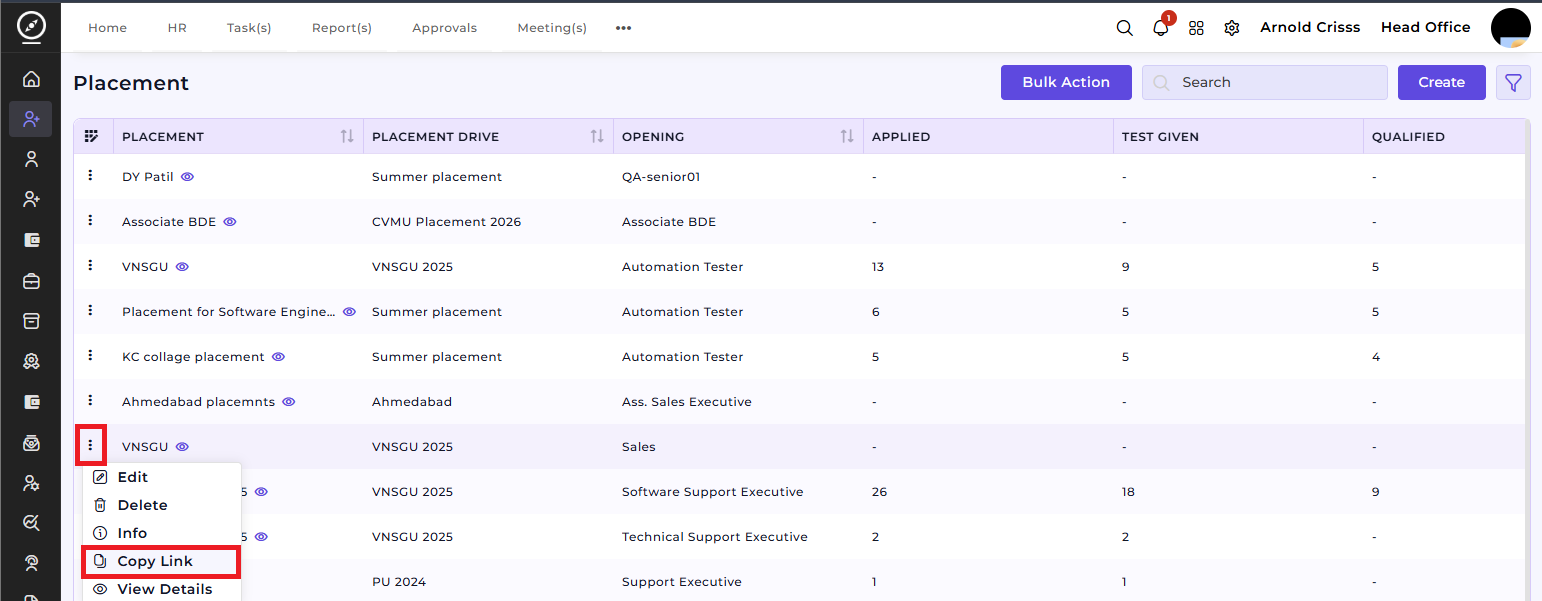
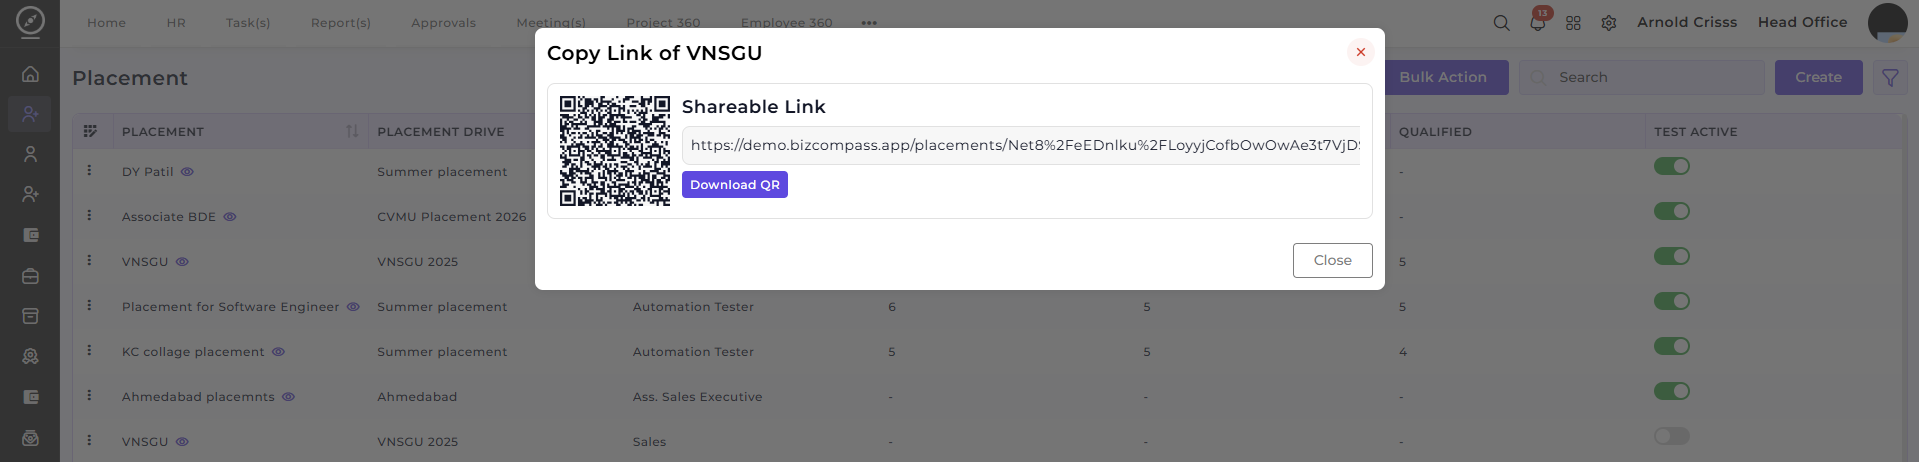
Sharing the Placement Link:
After creating a placement drive, HRs and Admins can share the the Placement Link with the relevant institutions by clicking on the three dot button beside the the Placement Name.
Here's what will be displayed after opening the link: