Declaration
The Declaration page is the central location for creating, managing, and reviewing employee declarations. Users with the required permissions can create declarations on behalf of employees. Organizations can also import declarations in bulk, along with their respective statuses, using the Bulk Import option.
Note: The Create button is available only when the declaration window is Open/Active in the Year Configuration for the selected financial year.
Creating a Declaration
-
Select the Employee whose declaration needs to be created.
-
Select the Declaration Section, such as Investment, HRA Exemption, or Other Source of Income. Based on the selected section, the relevant fields will be displayed.
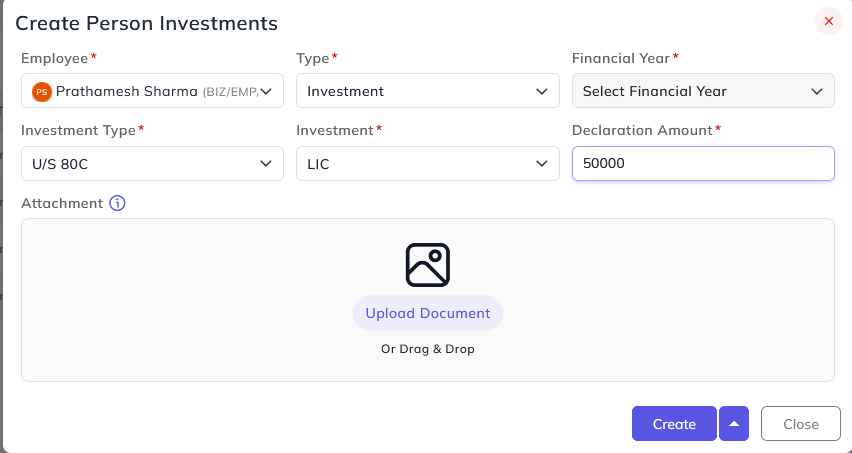
Investment
-
Select the Investment Type.
-
Select the Investment Name.
-
Enter the Declaration Amount.
-
Attach supporting documents (optional).
HRA Exemption
-
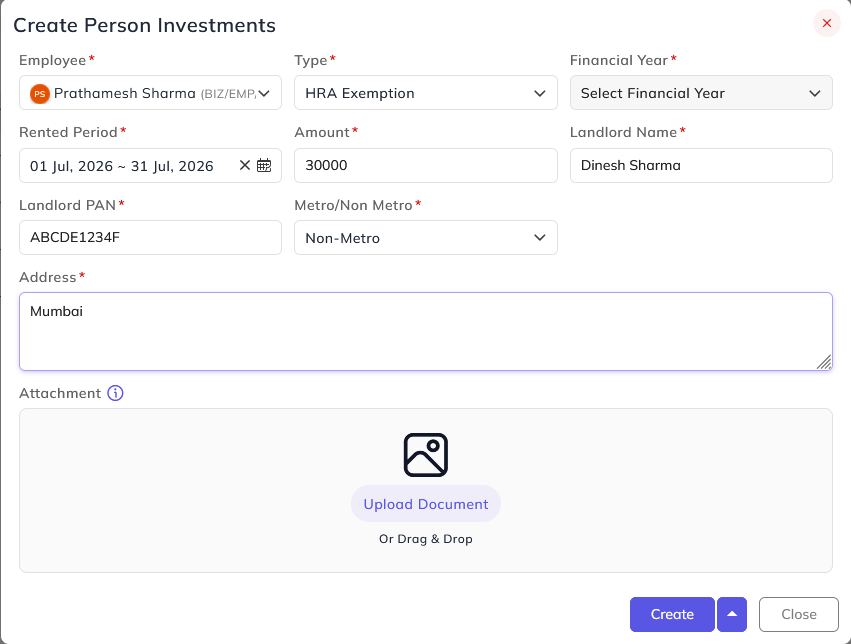
Select the Rented Period.
-
Enter the Amount.
-
Enter the Landlord Name.
-
Enter the Landlord PAN.
-
Select whether the property is in a Metro or Non-Metro city.
-
Enter the Property Address.
-
Attach supporting documents (optional).
Other Source of Income
-
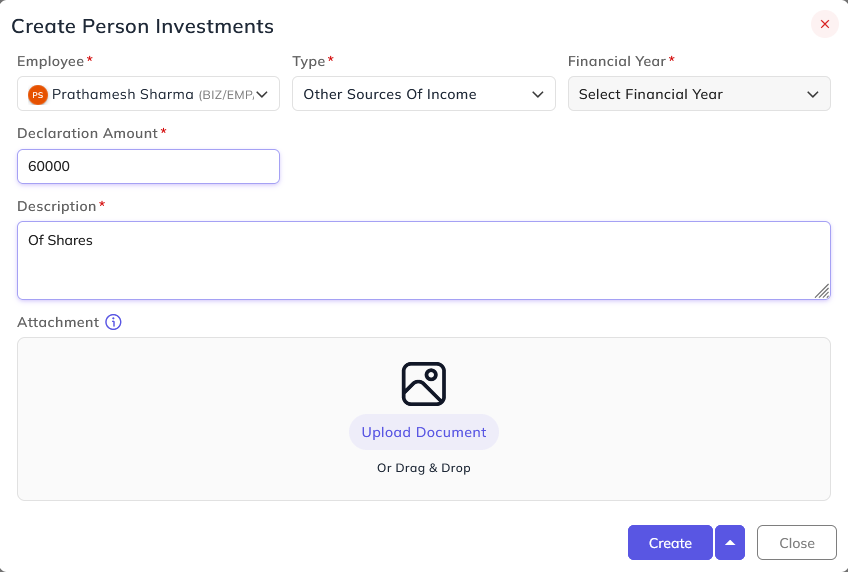
Enter the Declaration Amount.
-
Provide a Description.
-
Attach supporting documents (optional).
After the declaration is submitted, it is sent for approval. If a Declaration Approval Hierarchy has been configured, the request follows that approval workflow. Otherwise, it follows the standard Reporting and Approval Hierarchy.
Once the declaration is created, the employee can also view it under My Profile → Declaration.
Adding Declaration in Bulk
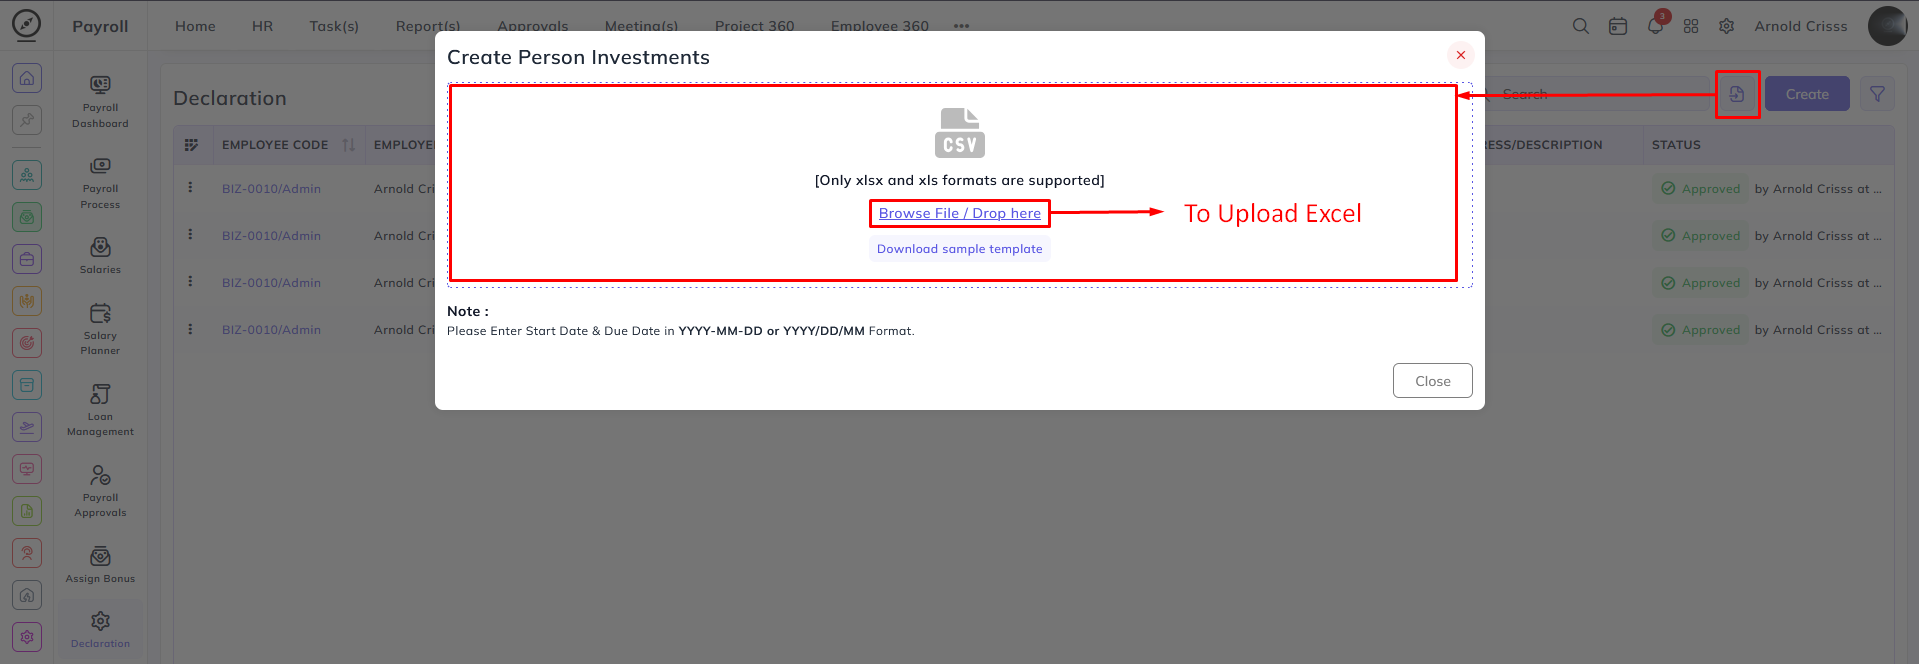
To import declarations in bulk, click the Import Declaration(s) button located next to the Create button or the Filter button. Download the provided Excel template and enter the declaration details before importing the file. 
The fields in the Excel template correspond to the same information required when creating a declaration manually.
Complete the following fields in the Excel sheet:

- Employee Code
- Declaration Section (Type)
- Financial Year for which the declaration is being submitted.
For Investment Declarations
- Select the Investment Type.
- Select the Investment Name.
- Enter the Declaration Amount.
Status
Select the declaration Status. If the declaration has already been approved outside the system and the organization only wants to maintain the record in Bizcompass, select Approved. In this case, the declaration will be added directly without generating an approval request or following the approval workflow.
For HRA Exemption
- Enter the Rented Period.
- Enter the Landlord Name.
- Enter the Landlord PAN.
- Select whether the property is located in a Metro or Non-Metro city.
- Enter the Property Address.
For Other Source of Income
- Enter the Description.
- Enter the Declaration Amount.
After completing the Excel sheet, upload it using the Import Declaration(s) option to create the declaration records in bulk.