Manage Logs
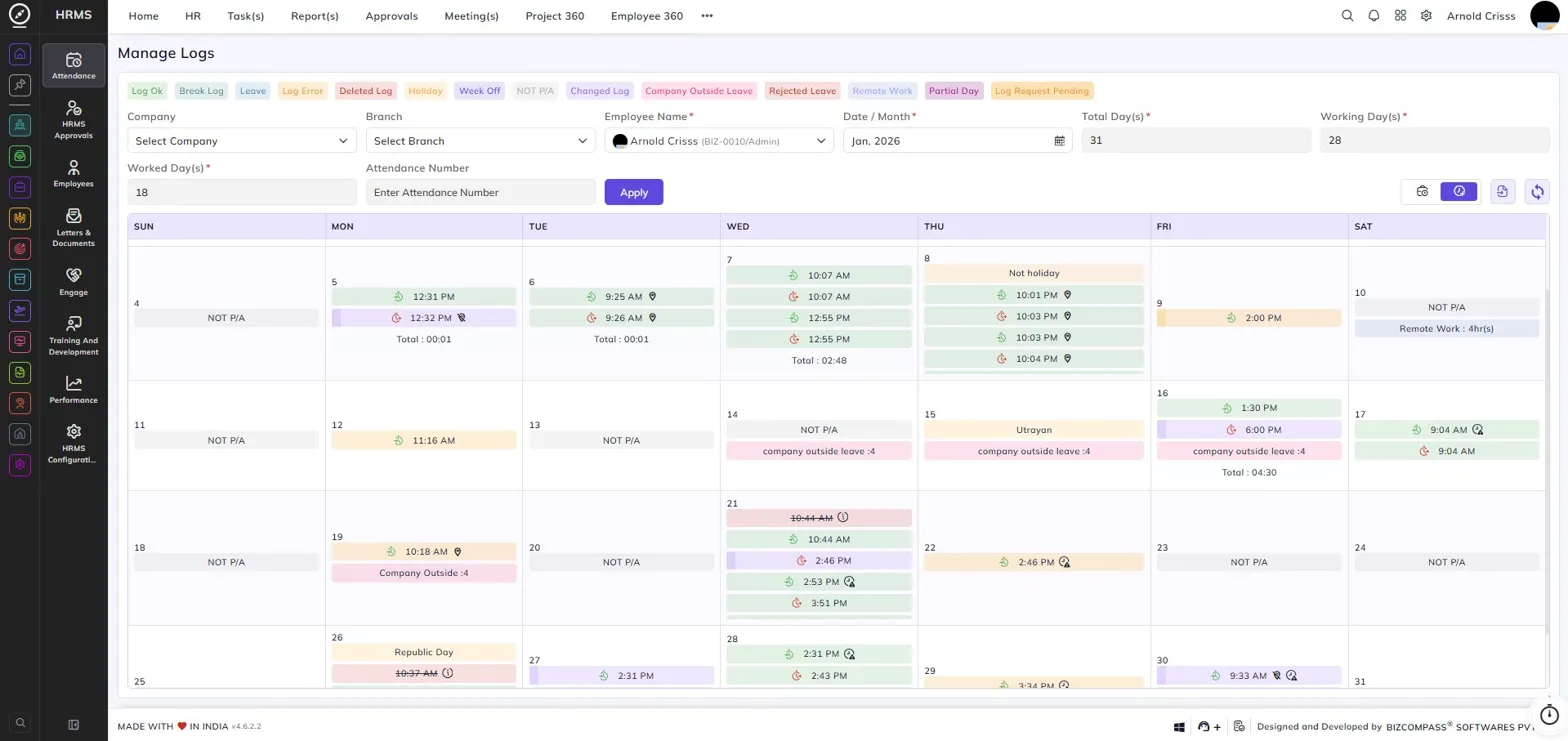
The Manage Logs page gives administrators a detailed calendar view of any employee's attendance logs for a selected month. To navigate here, go to HRMS->Attendance->Manage Logs.
Use the filters at the top to select the Company, Branch, Employee Name, and Date/Month to load that employee's attendance calendar. The page also displays a summary of key figures for the selected month — Total Days, Working Days, Worked Days, and Attendance Number.
The color-coded legend at the top works the same way as the employee attendance calendar, helping you identify each type of log entry at a glance — Log Ok, Break Log, Leave, Log Error, Deleted Log, Holiday, Week Off, NOT P/A, Changed Log, Company Outside Leave, Rejected Leave, Remote Work, Partial Day, and Log Request Pending.
Each day on the calendar shows the employee's clock-in and clock-out times along with location and IP indicators. Days marked with Company Outside Leave, Remote Work, or holidays are clearly highlighted with their respective labels.
Attendance Number - this Indicates the attendance number from logs which are synced from the punch machine
Total Hours Display Toggle
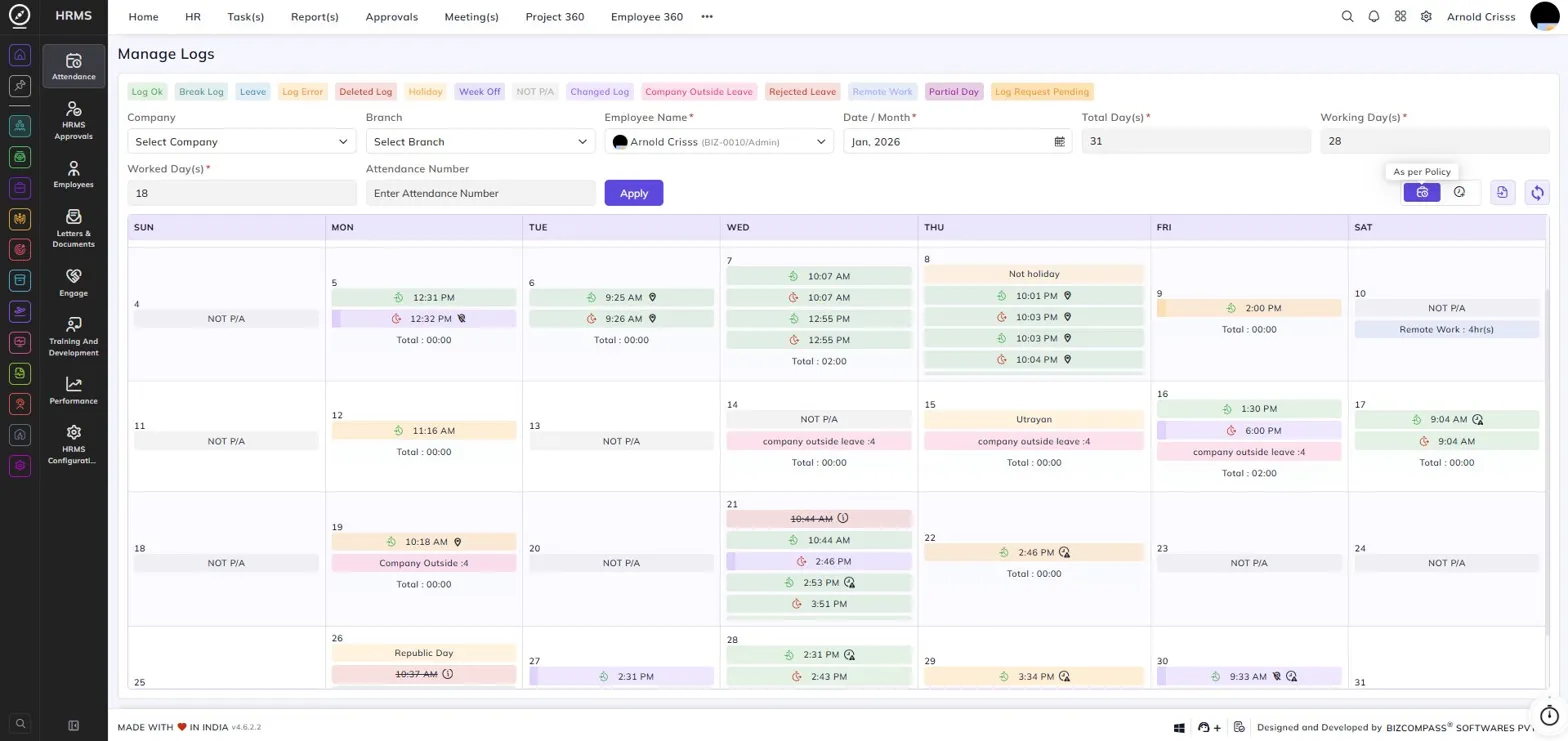
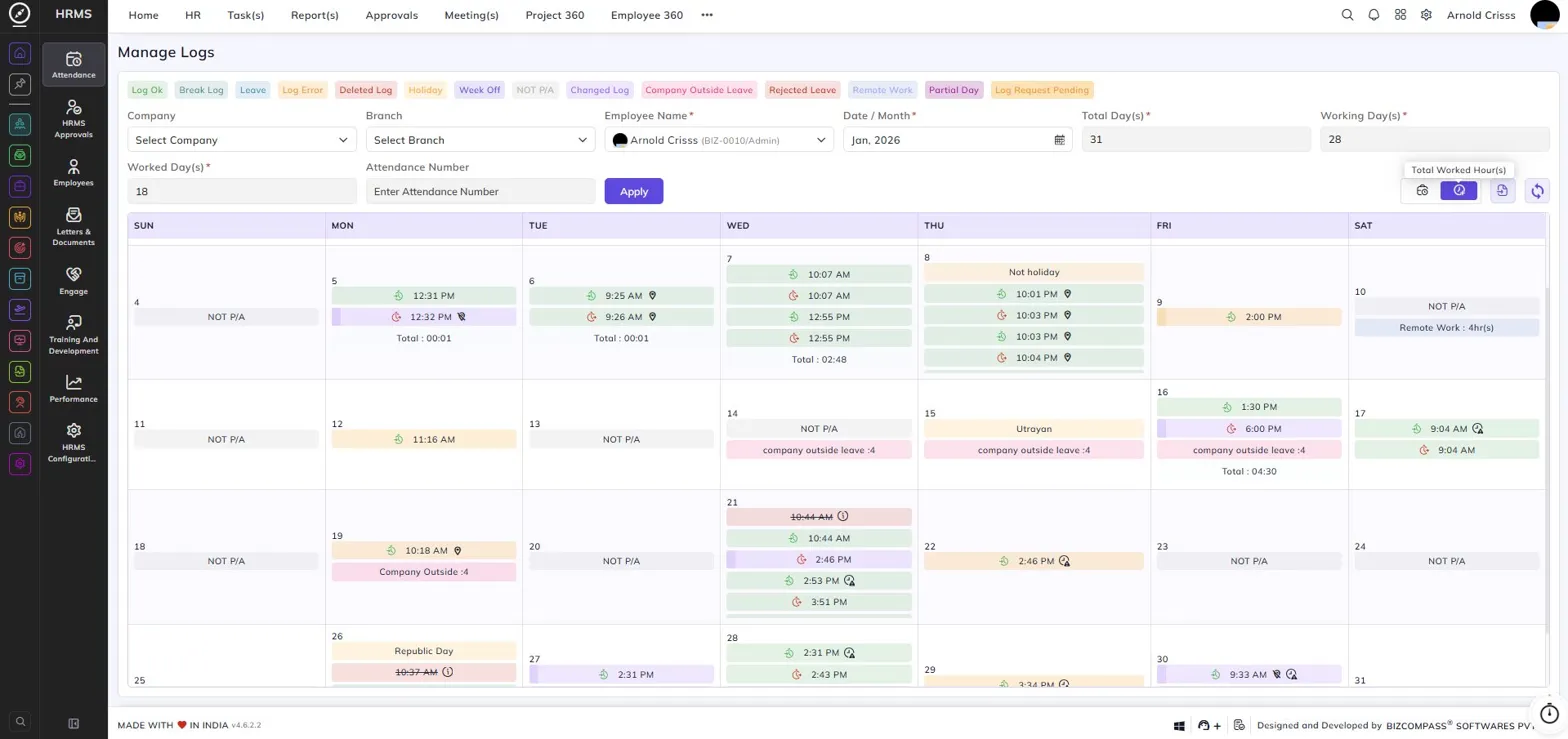
At the top right of the calendar, you can switch between two hour display modes using the toggle icons:
As per Policy — Shows the total hours as per the employee's shift policy for each day.
Total Worked Hour(s) — Shows the actual hours worked by the employee each day.
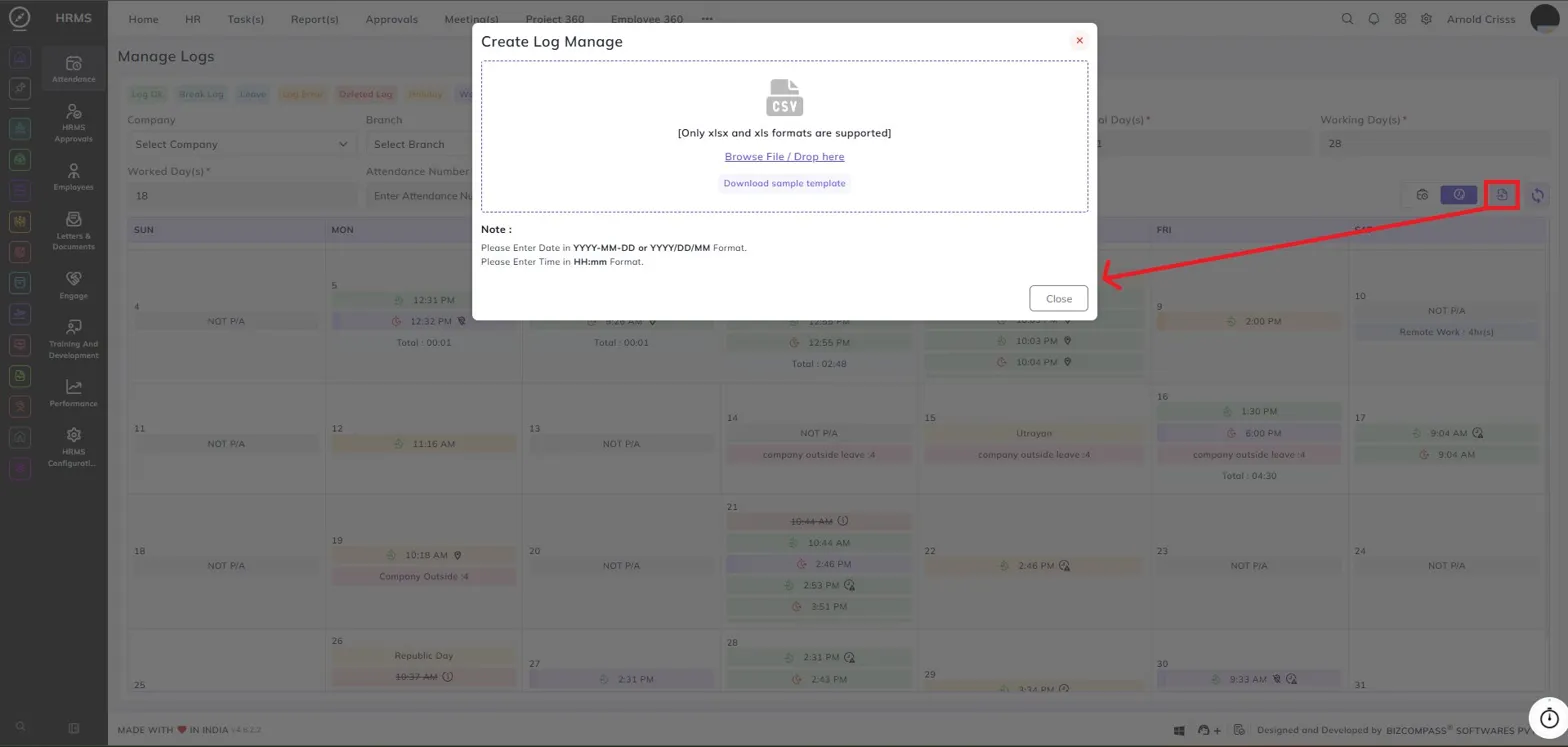
Import Logs
Click the import icon at the top right of the Manage Logs page to open the Create Log Manage dialog. This allows you to bulk import attendance logs for employees using a spreadsheet file. Only xlsx and xls formats are supported. You can drag and drop a file into the upload area or click Browse File / Drop here to select one. Click Download sample template to get a pre-formatted file showing the required columns.
Sync Button
If the attendance policy or shift details are changed, click the Sync button once to reprocess and synchronize the attendance logs for the selected duration, including the updated overtime calculations.
Click on a Day to check the logs and details for that specific day
Log Detail View
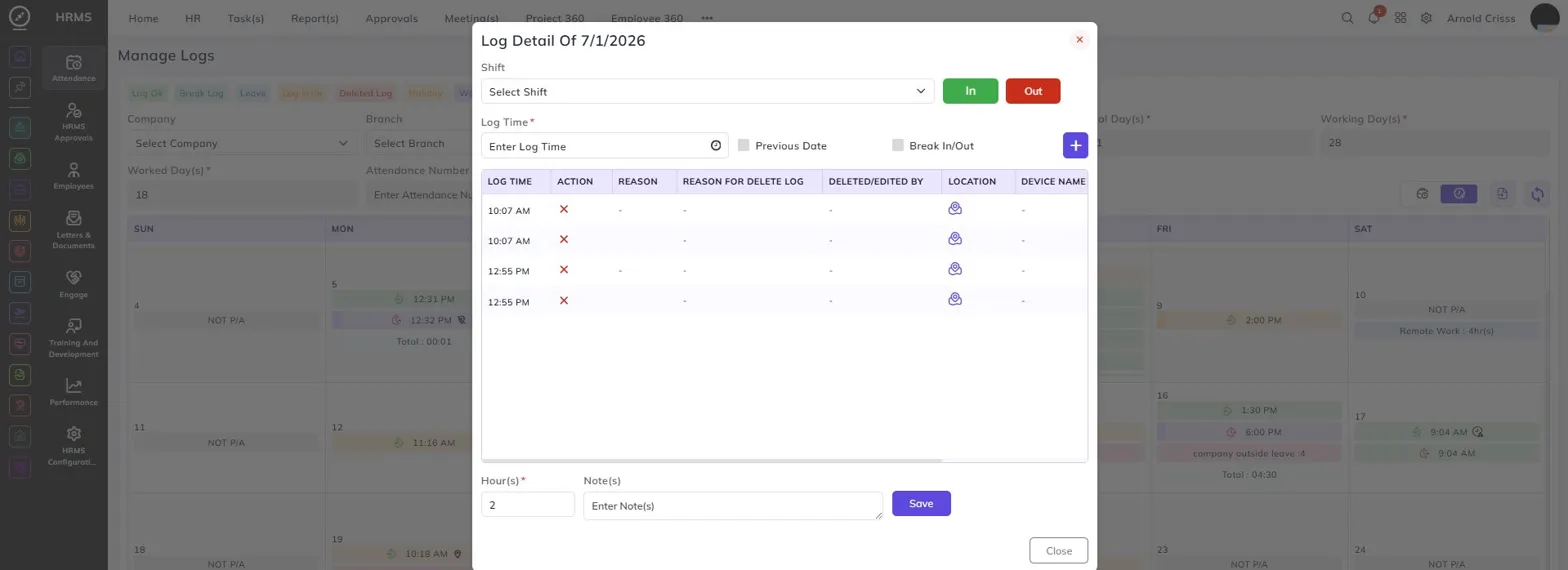
Clicking on any date in the Manage Logs calendar opens the Log Detail dialog for that day. This gives administrators a complete view of all log entries for that date along with the ability to add new ones.
The log table shows each entry's Log Time, Action, Reason, Reason for Delete Log, Deleted/Edited By, Location, and Device Name. Existing logs can be deleted directly using the delete icon on each row.
Add new Entry for log
To add a new log entry based on Shift Time or any Time
Shift:
Select the employee's shift for that day.
In / Out:
Select whether this is a clock-in or clock-out entry.
Log Time:
Enter the time for the log entry.
Previous Date:
Enable this if the log belongs to the previous date. mostly used in such case where employee is working in night shift
Break In/Out:
Enable this if the entry is a break log.To add specific duration as a work Hour statically (No need to add the Log just hours)
Hour(s):
Enter the number of hours.
After applying this hours click on Save to save the changes.Note(s):
Add any additional notes if needed.
Click the + button to add the entry to the log table.Click the Save button only when manually changing the logged hours directly.
If you are adding time logs based on the selected time, there is no need to click Save, as the changes are saved automatically.
View and Delete Previous Logs
Below the log entry section, a table is available to view all logs. The table includes the following details:
- Log Time – Displays the time of the log entry.
- Action – Allows you to delete the log.
- Regularization Reason – Displays the reason provided when the log was updated or regularized.
- Delete Reason – Displays the reason entered when the log was deleted from this page.
- Deleted By – Shows the name of the person who deleted the log.
- Location – Displays the location captured at the time of the log entry.
- Device Name – Indicates the punch machine name configured for log synchronization.
- Note – Displays any additional note added for the log.