Approvals Hierarchy
The Approvals Hierarchy page is used to manage and configure the approval processes for various types of requests across the system. This page allows you to define the hierarchical flow through which requests are approved, ensuring a structured and controlled approval process.
The following approval types can be configured from this page:
- Leave Approval(s)
- Log Approval(s)
- Declaration Approval(s)
- Letter Approval(s)
- Resource Request Approval(s)
- Remote Work Application Approval(s)
- Partial Day Application Approval(s)
- Exit Application Approval(s)
- Handover Approval(s)
- Credit Application Approval(s)
- KRAs/KPIs Approval(s)
- Payroll Approval(s)
- Hold Salary Approval(s)
- Probation Approval(s)
If no specific hierarchy is configured for a particular approval type, it will automatically follow the Default hierarchy.
Creating an Approval Hierarchy:
The same steps apply for all approval types listed above.
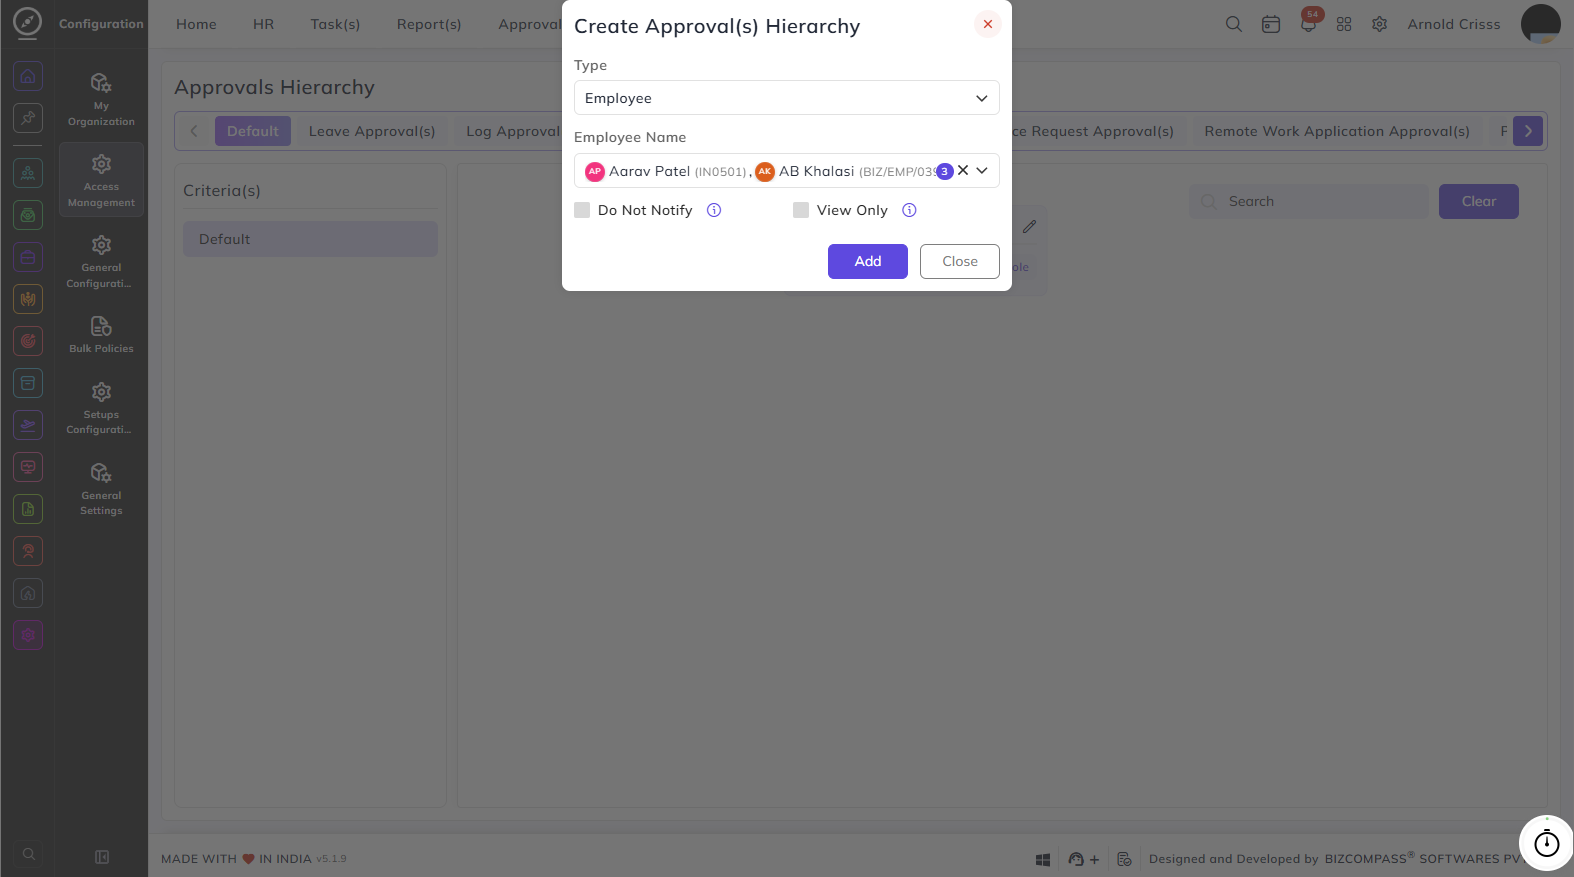
Example: Select Department as the type, then choose the specific department for which this hierarchy applies.

4. Configure the following options for the approver node:
-
- Do Not Notify – if enabled, this approver will not receive any approval emails or notifications.
- View Only – if enabled, this approver can only view requests but cannot approve, reject, or take any action
5. Click Create to save and generate the hierarchy.
6. Once the hierarchy is created, click the + symbol below any approver node to add the next level of approvers, building a multi-
level approval chain.
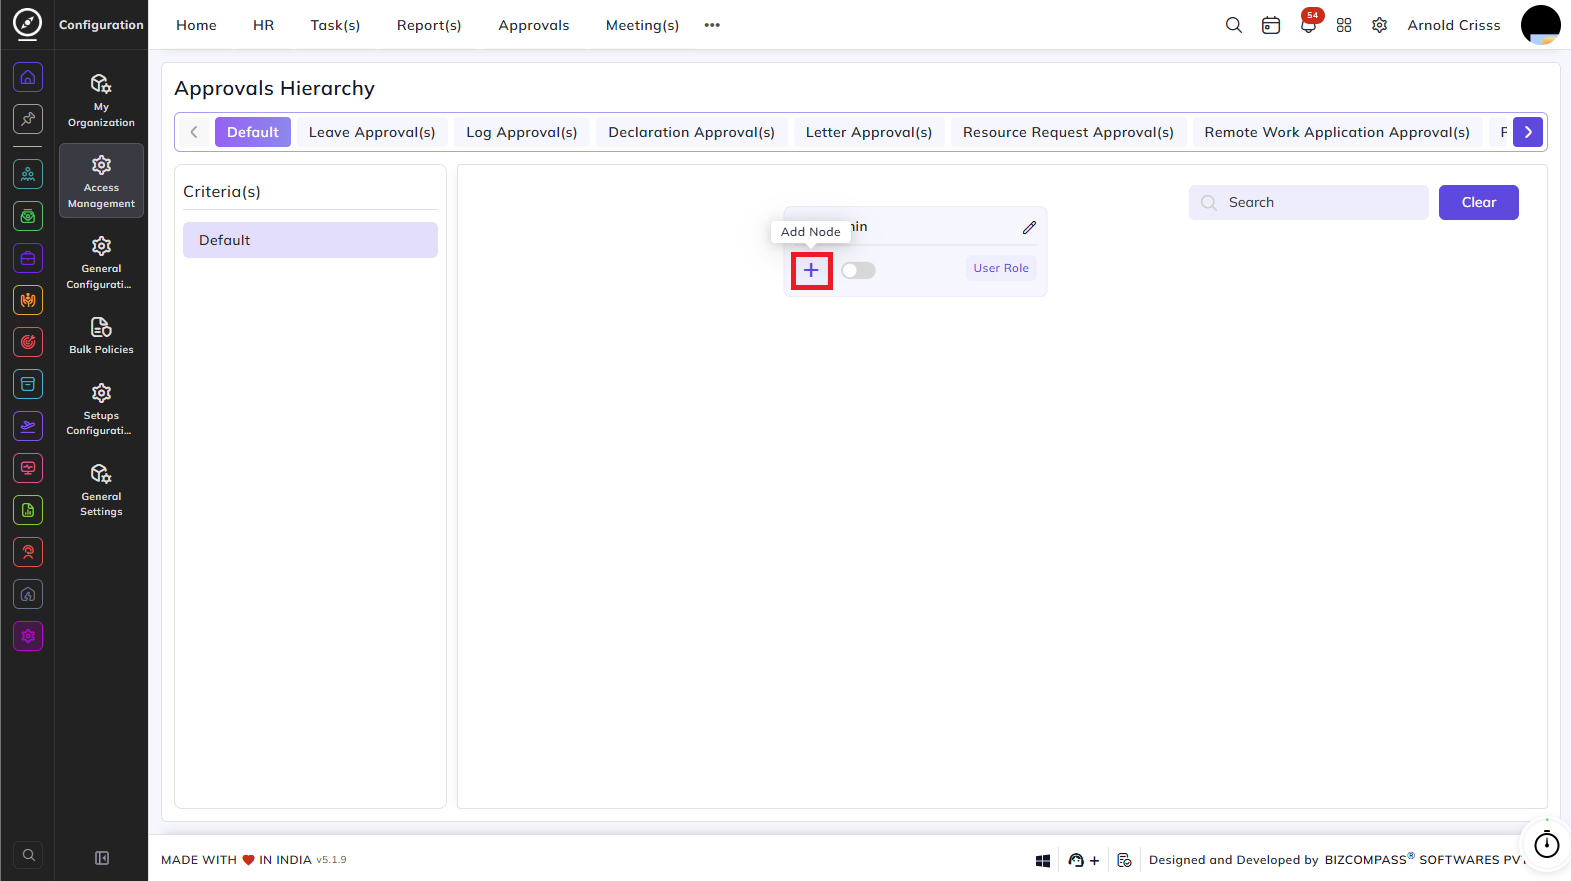
Continue adding nodes to create as many approval levels as needed.
Adding Multiple Criteria:
The hierarchy is created under Default by default, meaning all requests of that type across your organization will follow this hierarchy.
If you want to create different approval hierarchies for different companies, branches, departments, or designations, click the + button (available in all approval types other than Default one) to Add Criteria. Enter a Criteria Name and fill in the specific details such as company, branch, department, or designation for which this separate hierarchy applies. Once the criteria is created, set up its hierarchy the same way as the Default hierarchy.

This way, you can maintain separate approval flows for different parts of your organization.
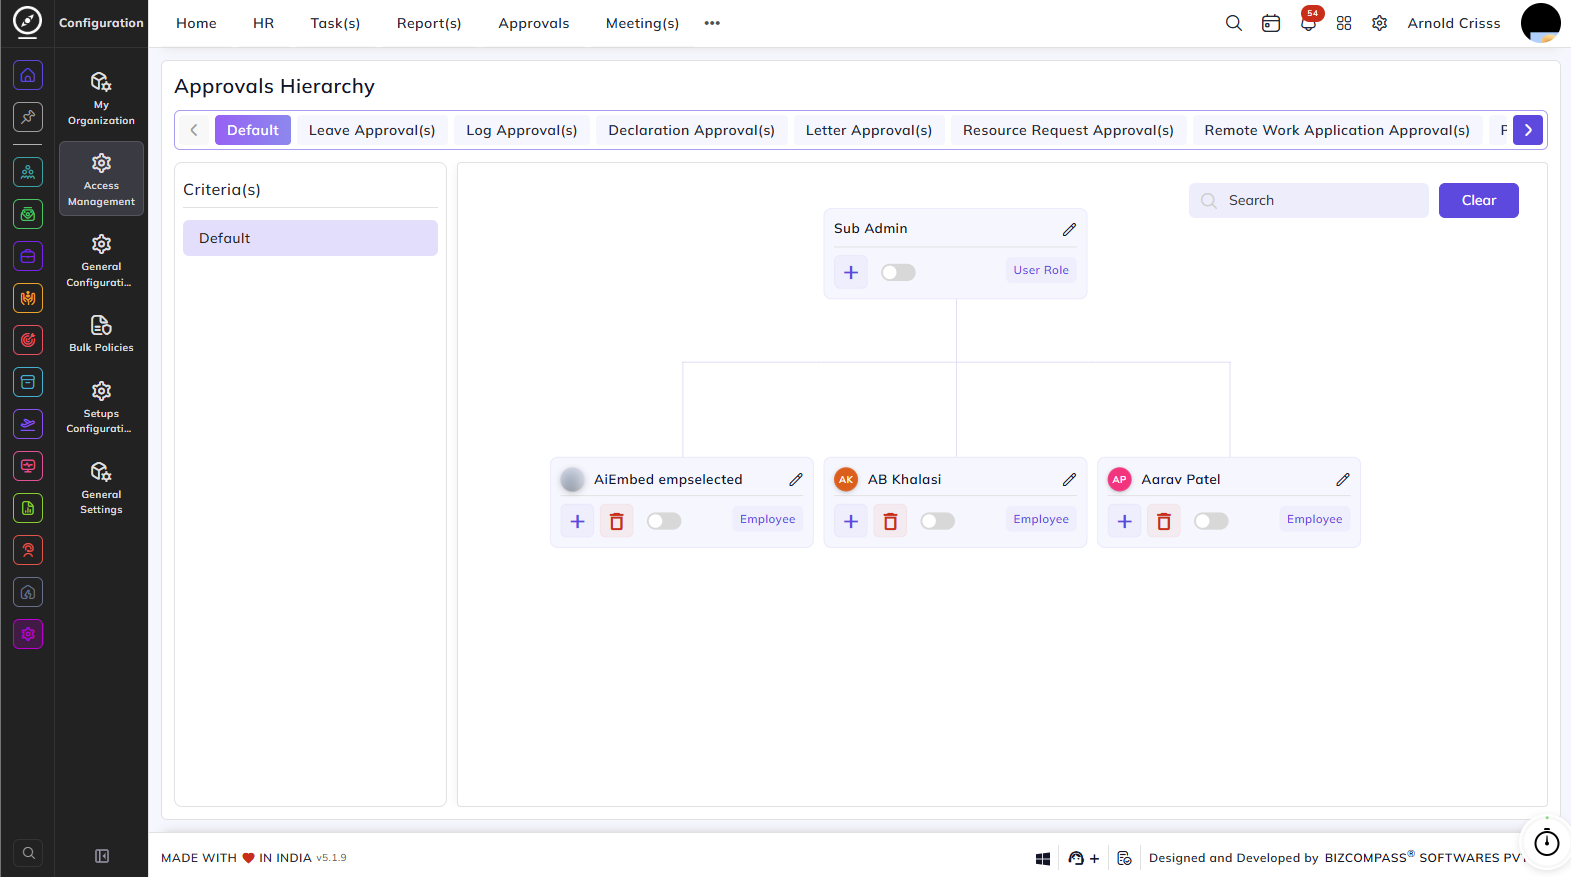
How It Works:
Taking the above image in reference, the root node is Manager and Employees are under that node. It means that the approvals of those employees will go to the Manager user role (all people that have the user role of a Manager).
Hierarchy Settings:
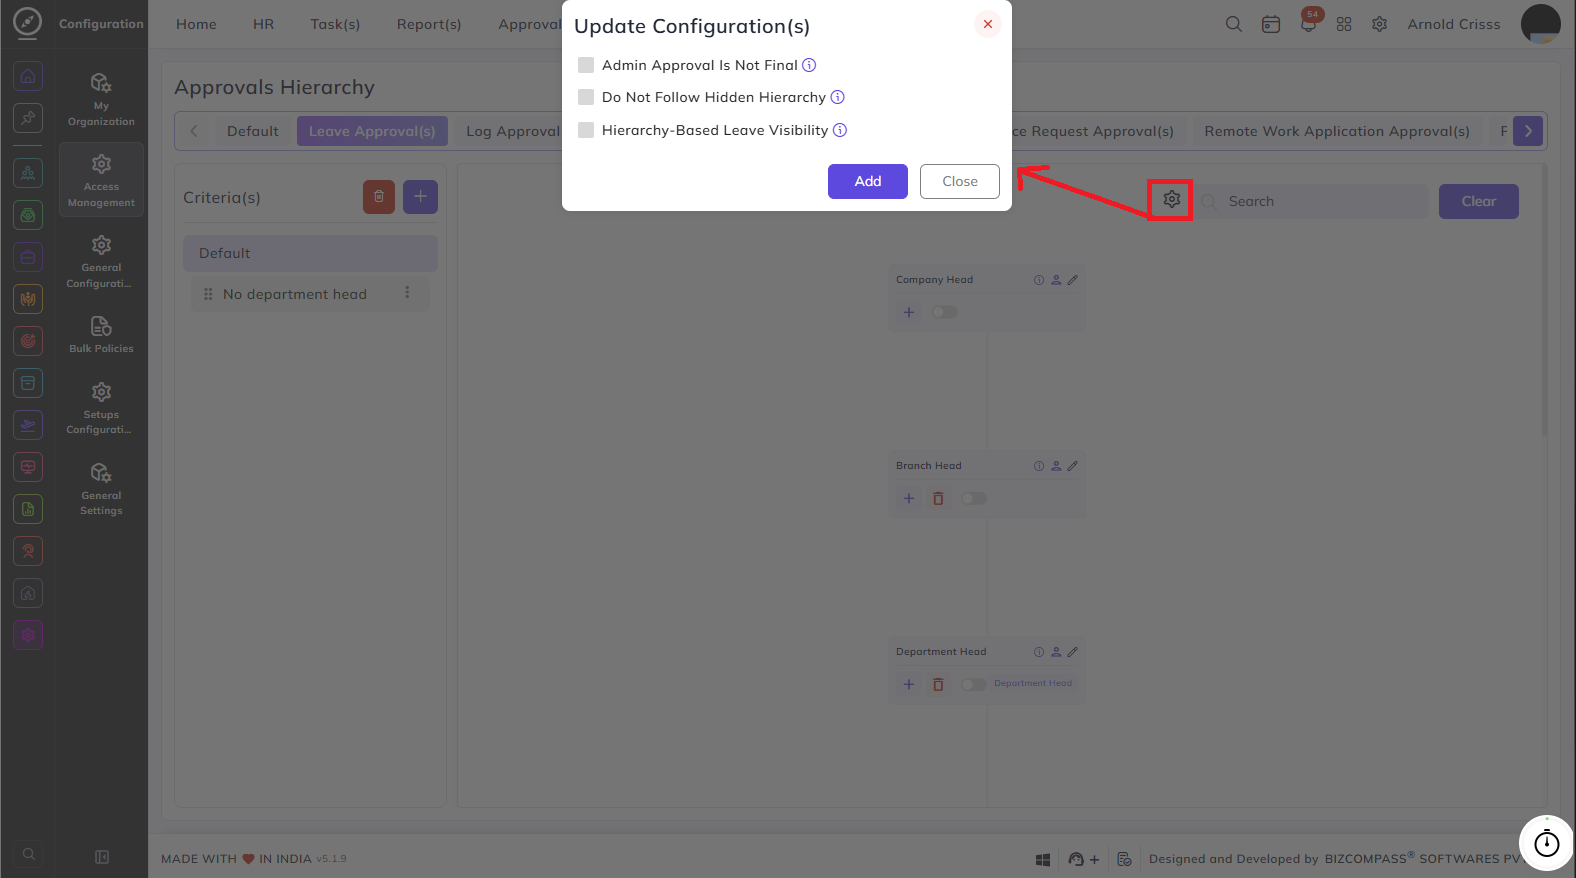
Click the Settings button on any hierarchy (other than the Default one) to open the approval configuration popup. The following options are available:
- Admin Approval Is Not Final — when enabled, admin approval requires further approval and will not be treated as the final approval.
- Do Not Follow Hidden Hierarchy — when enabled, any hidden hierarchies are excluded from the standard approval flow.
- Hierarchy-Based Leave Visibility — when enabled, parents can view leave only after child-level approvals. If any child does not approve, the leave remains hidden for corresponding parent.
No comments to display
No comments to display