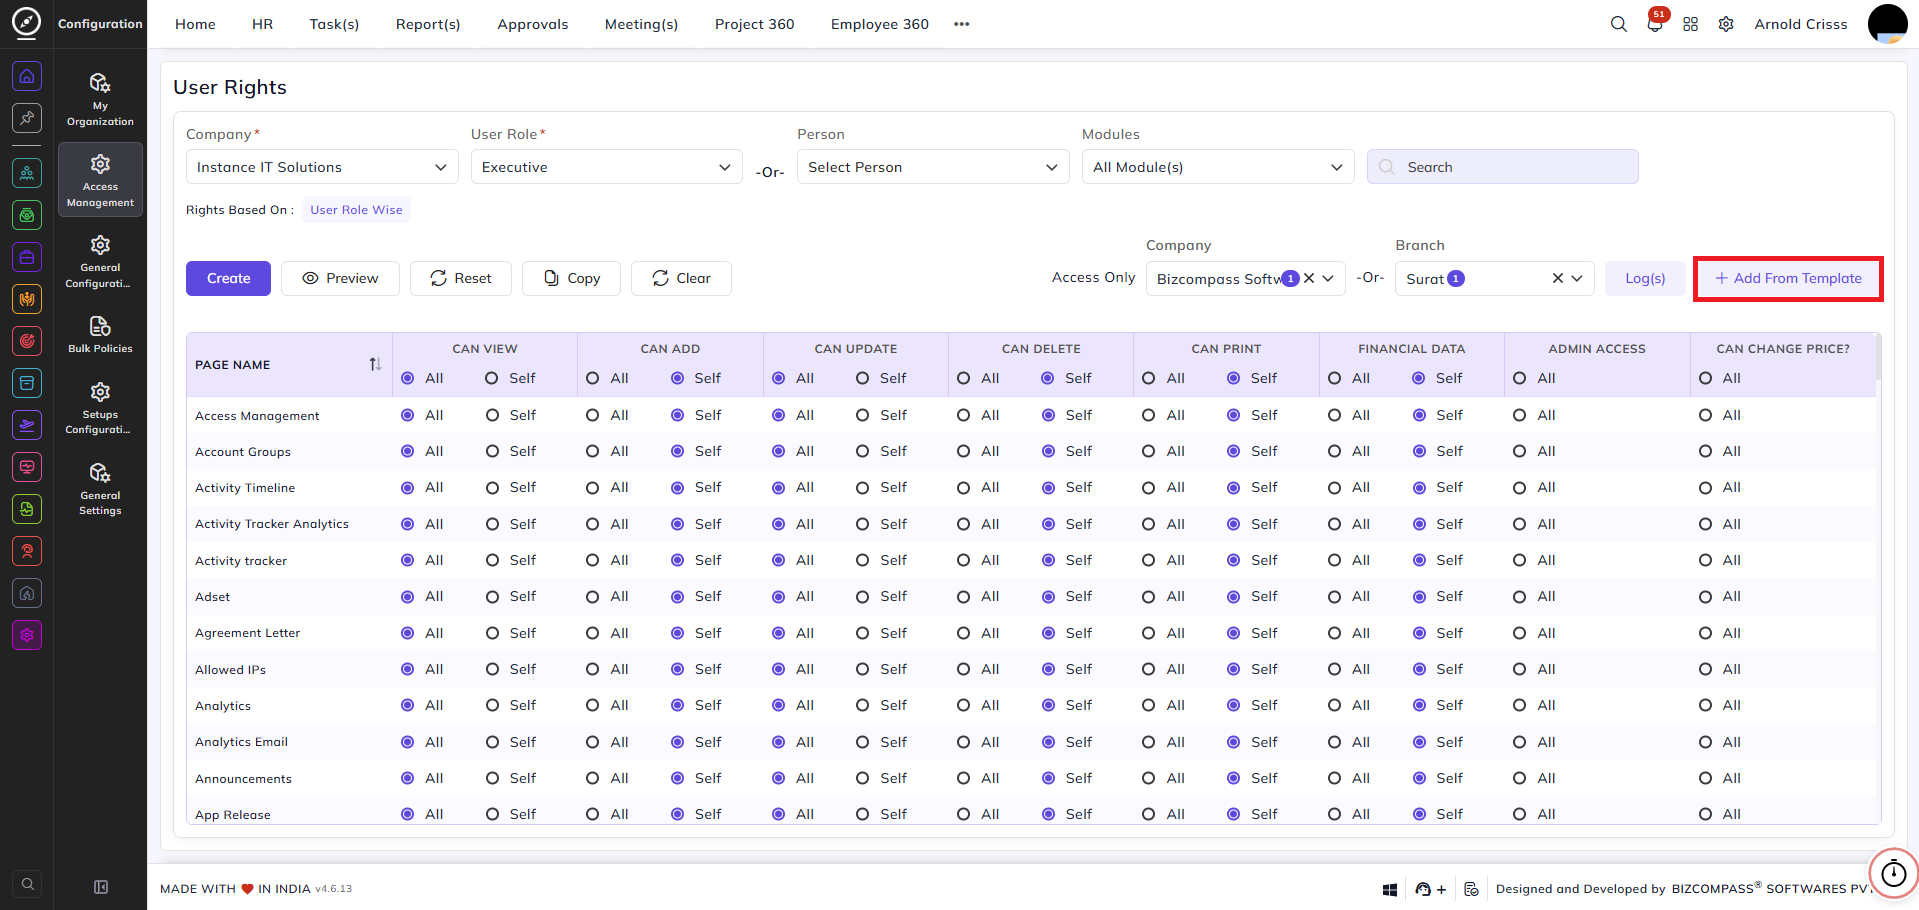
User Rights
From this page, you can define and manage access rights for user roles or individual employees across all pages and modules in the system.
Filters:
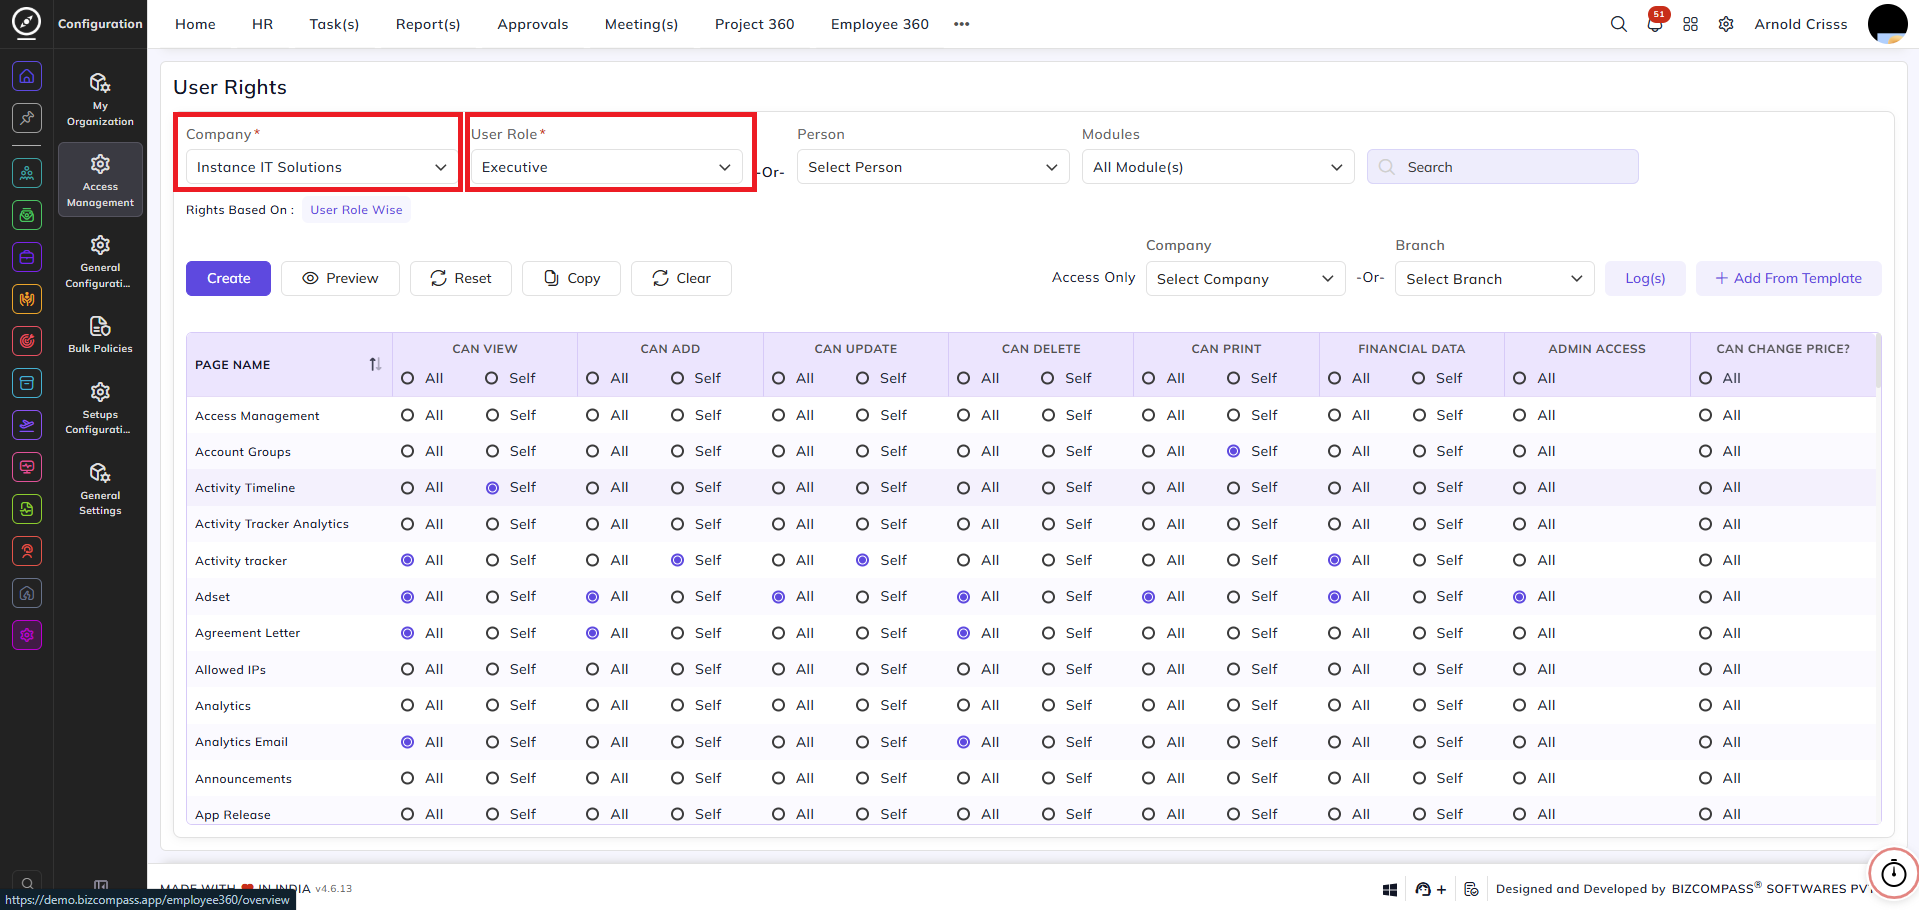
Company:
Select the company for which you want to configure user rights.
User Role:
Select the user role for which rights are being configured. Rights defined here apply to all users assigned to this role.
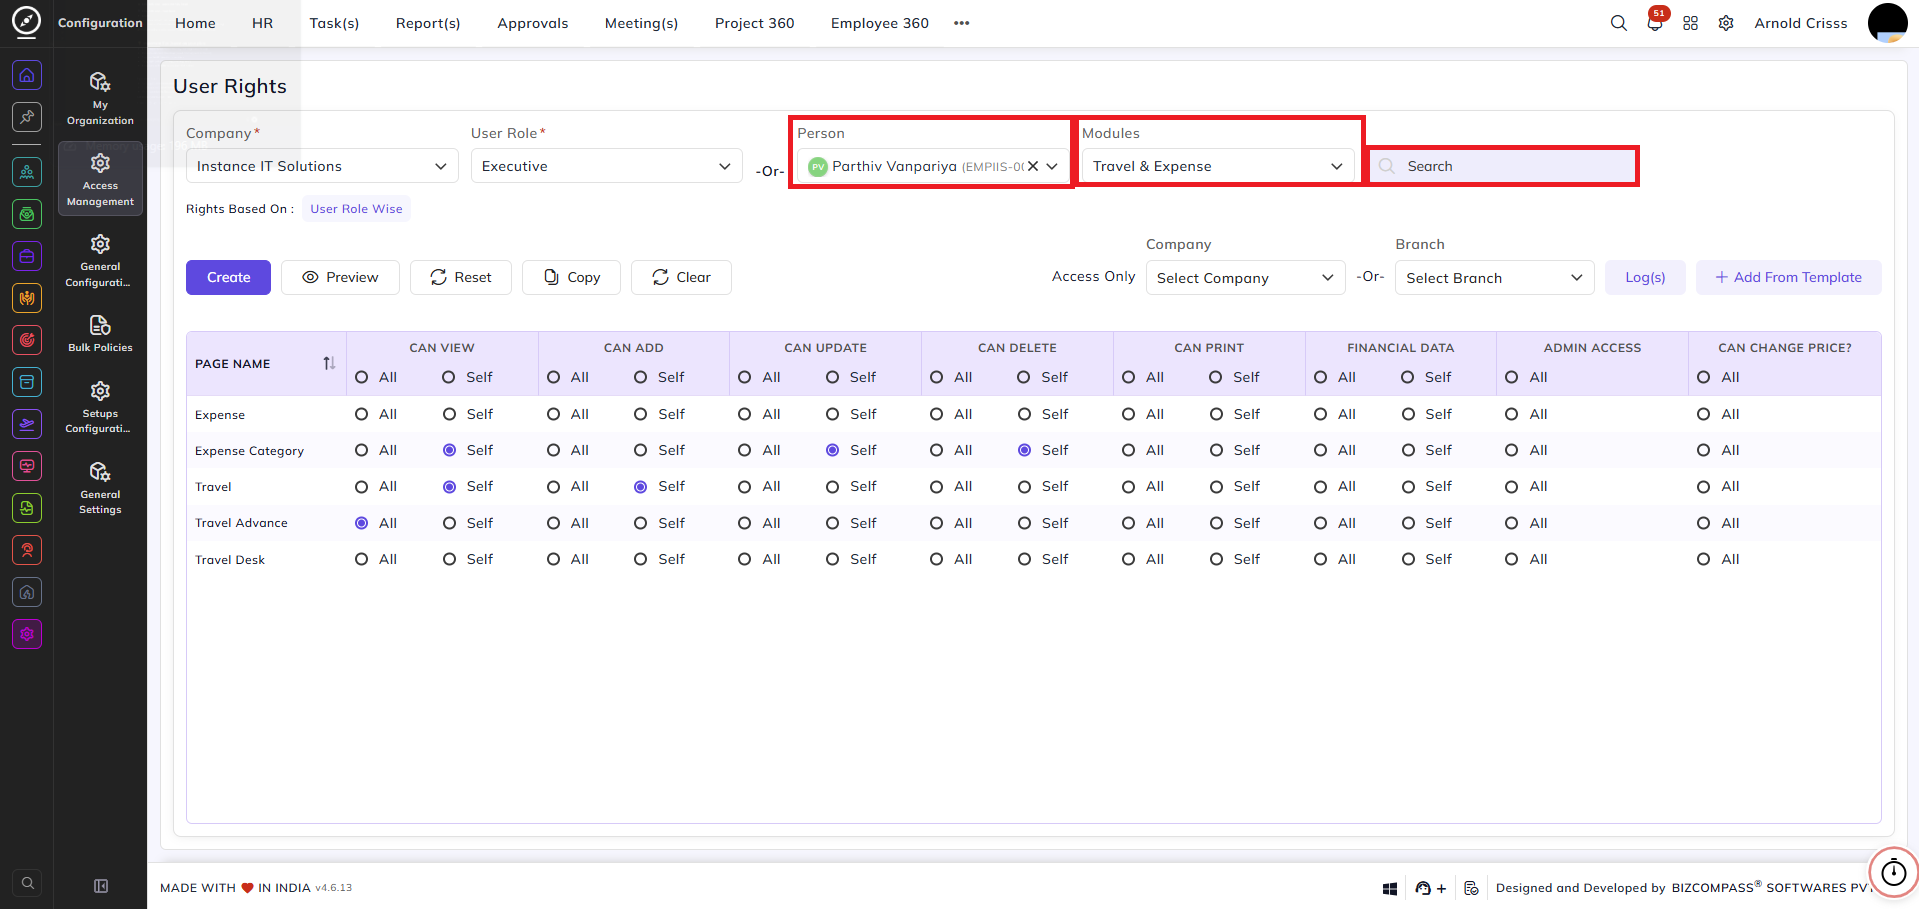
-Or- Person:
Instead of configuring by role, select a specific employee to configure rights for that individual only. The Rights Based On label below the filters will update to show whether rights are currently set User Role Wise or Person Wise.
Modules:
Filter the page list by a specific module — for example, Travel & Expense — to view and configure rights only for pages within that module.
Search:
Search for a specific page/Menu by name within the current filter selection.
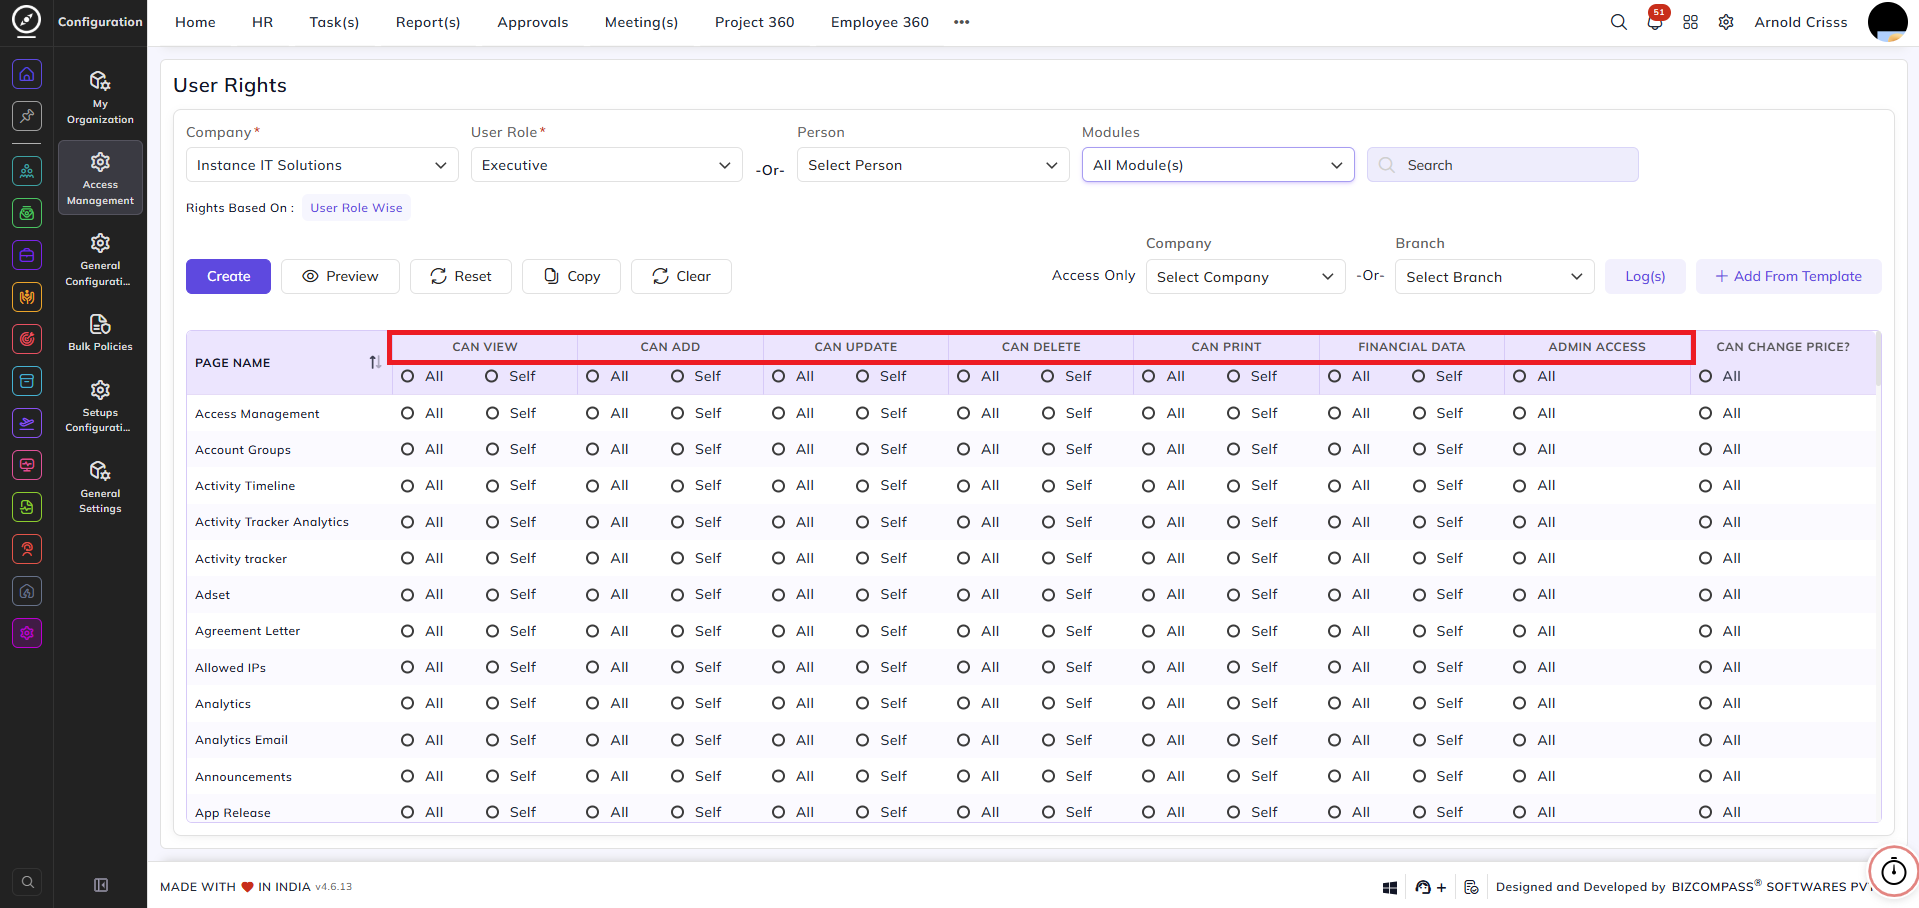
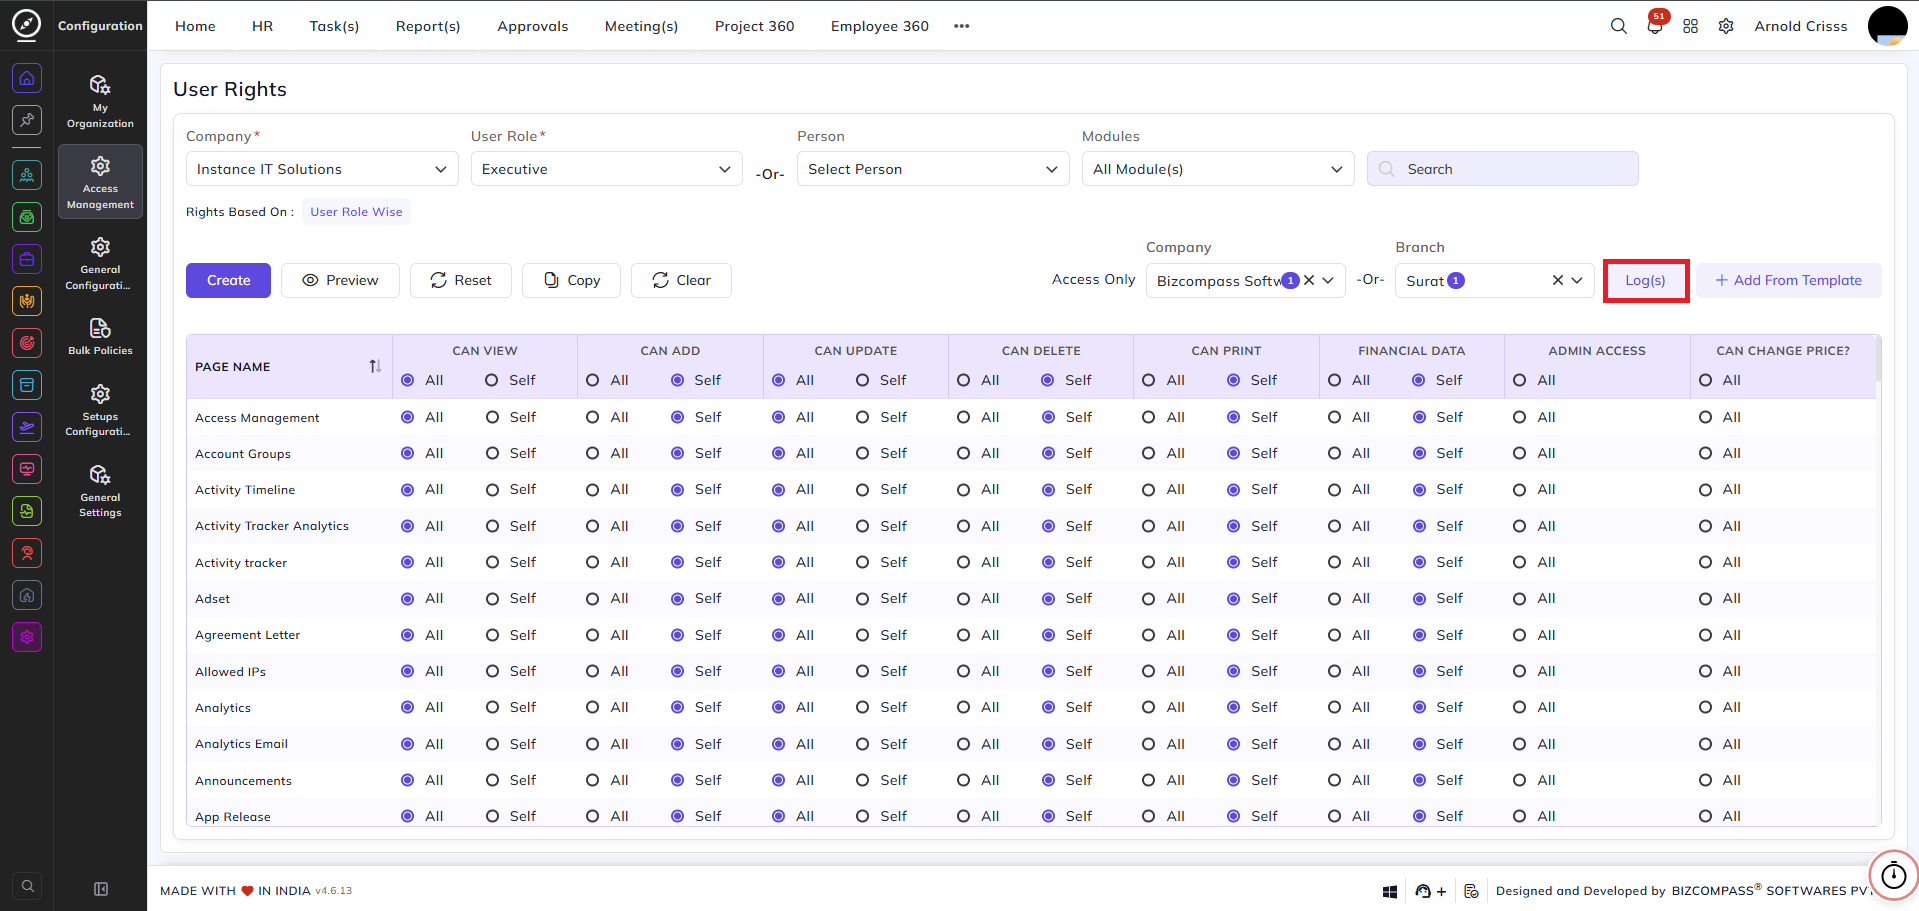
Access Rights Table:
The table lists all pages in the system. For each page, the following permissions can be configured:
Each permission has two options — All and Self:
- All — the user can perform this action on all entities coming under his/ her Reporing/Approval hierarchy
- Self — the user can only perform this action on their own records
| Permission | What It Controls |
|---|---|
| Can View | Whether the user can view records on this page |
| Can Add | Whether the user can create new records |
| Can Update | Whether the user can edit existing records |
| Can Delete | Whether the user can delete records |
| Can Print | Whether the user can print reports |
| Financial Data | Whether the user can view payroll data of an employee |
| Admin Access | Whether the user has admin-level access to this Specific Page/Menu |
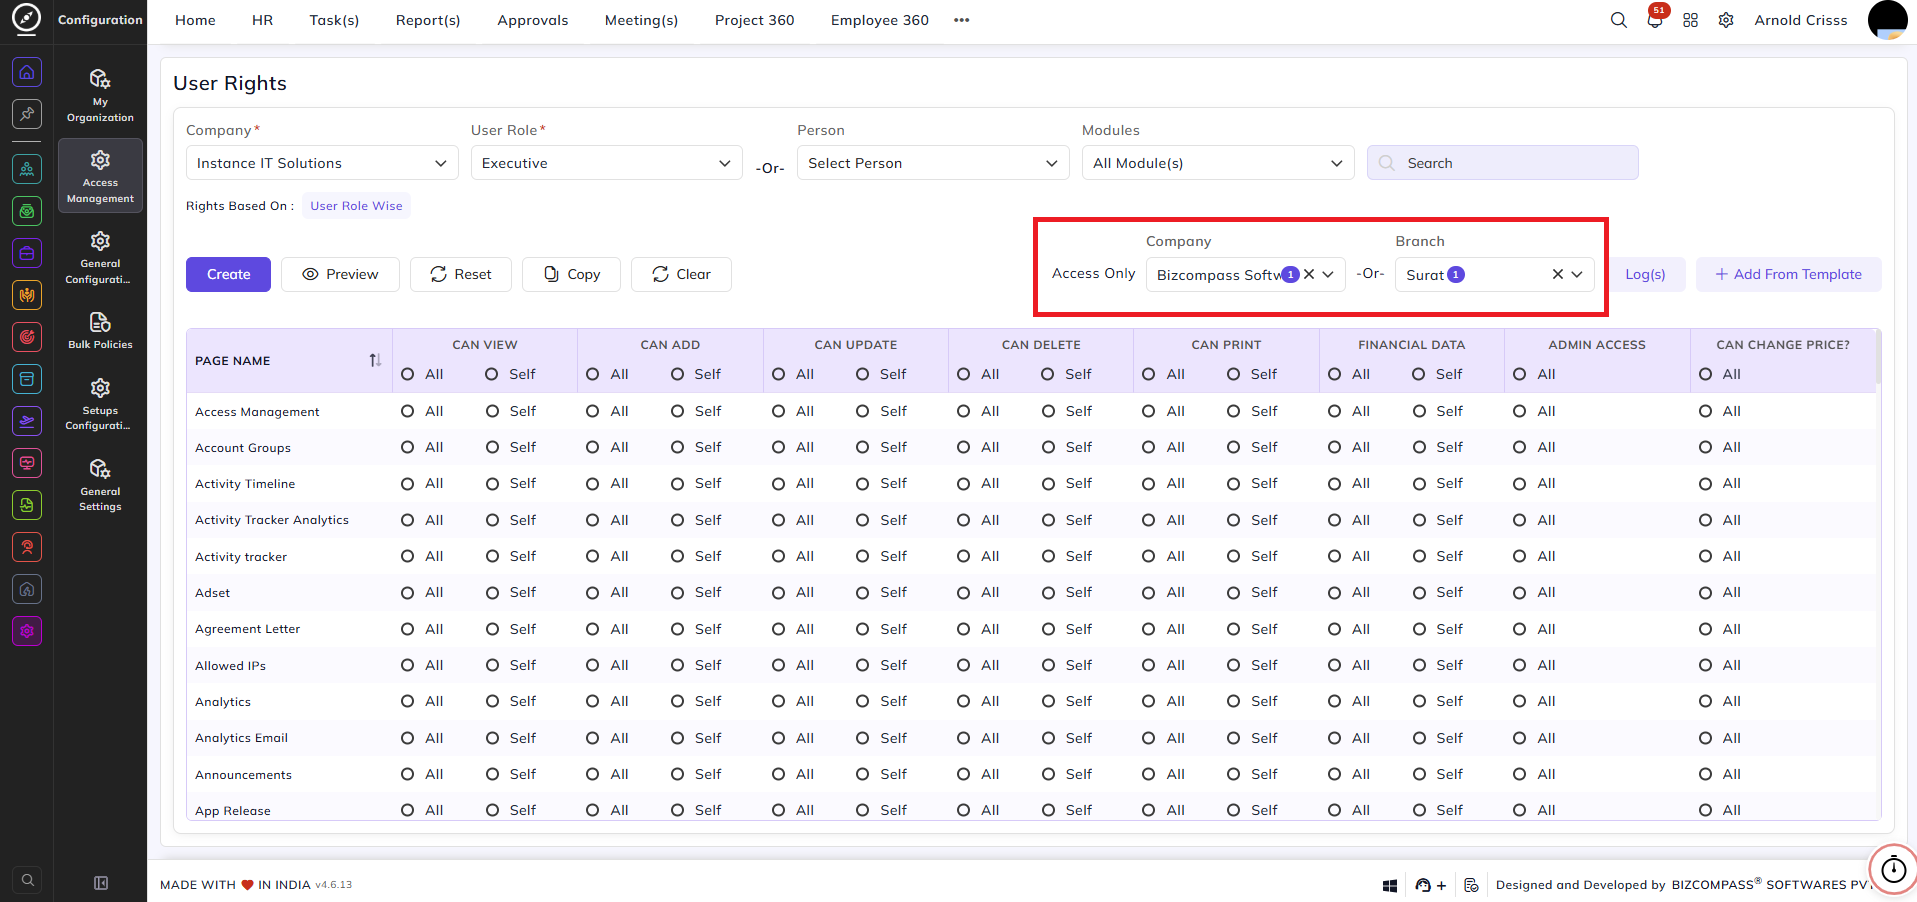
Company and Branch Access:
If None Selected and applied the Rights then user can access the records for every company and branch.
Access Only — Company:
Select a specific company to restrict this user's access to records from that company only.
-Or- Branch:
Select a specific branch to restrict this user's access to records from that branch only.
Action Buttons:
Create:
Save the configured rights for the selected user role or person.
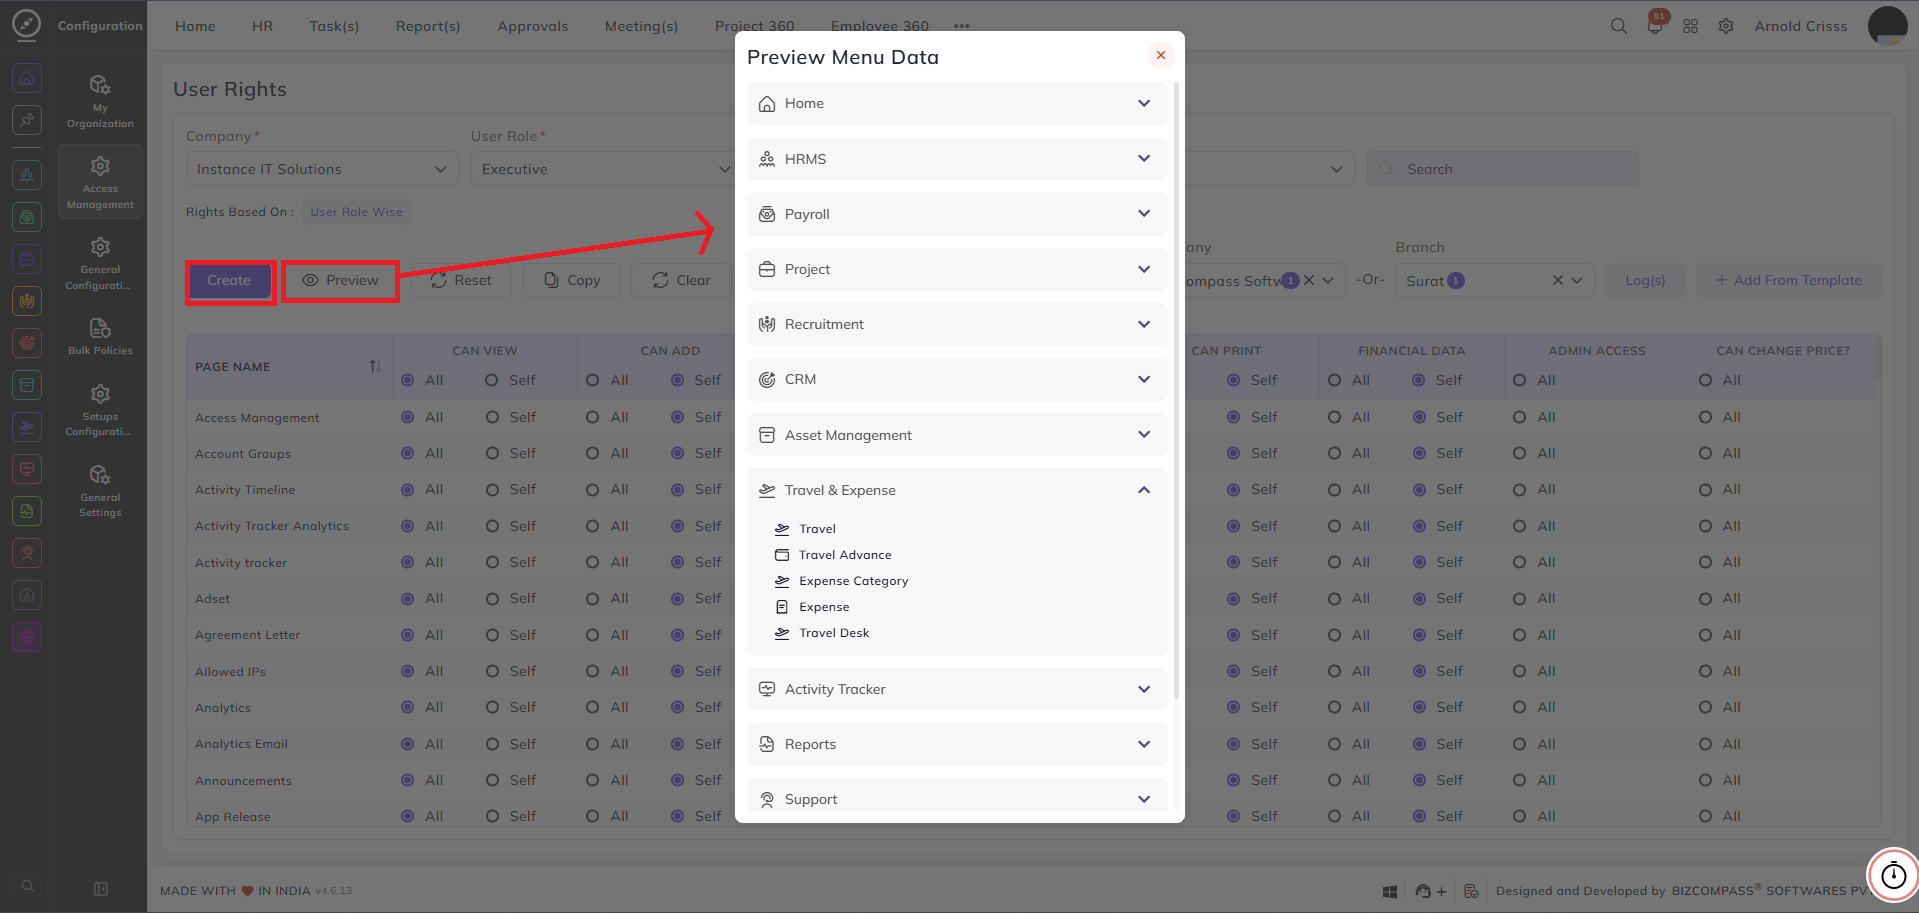
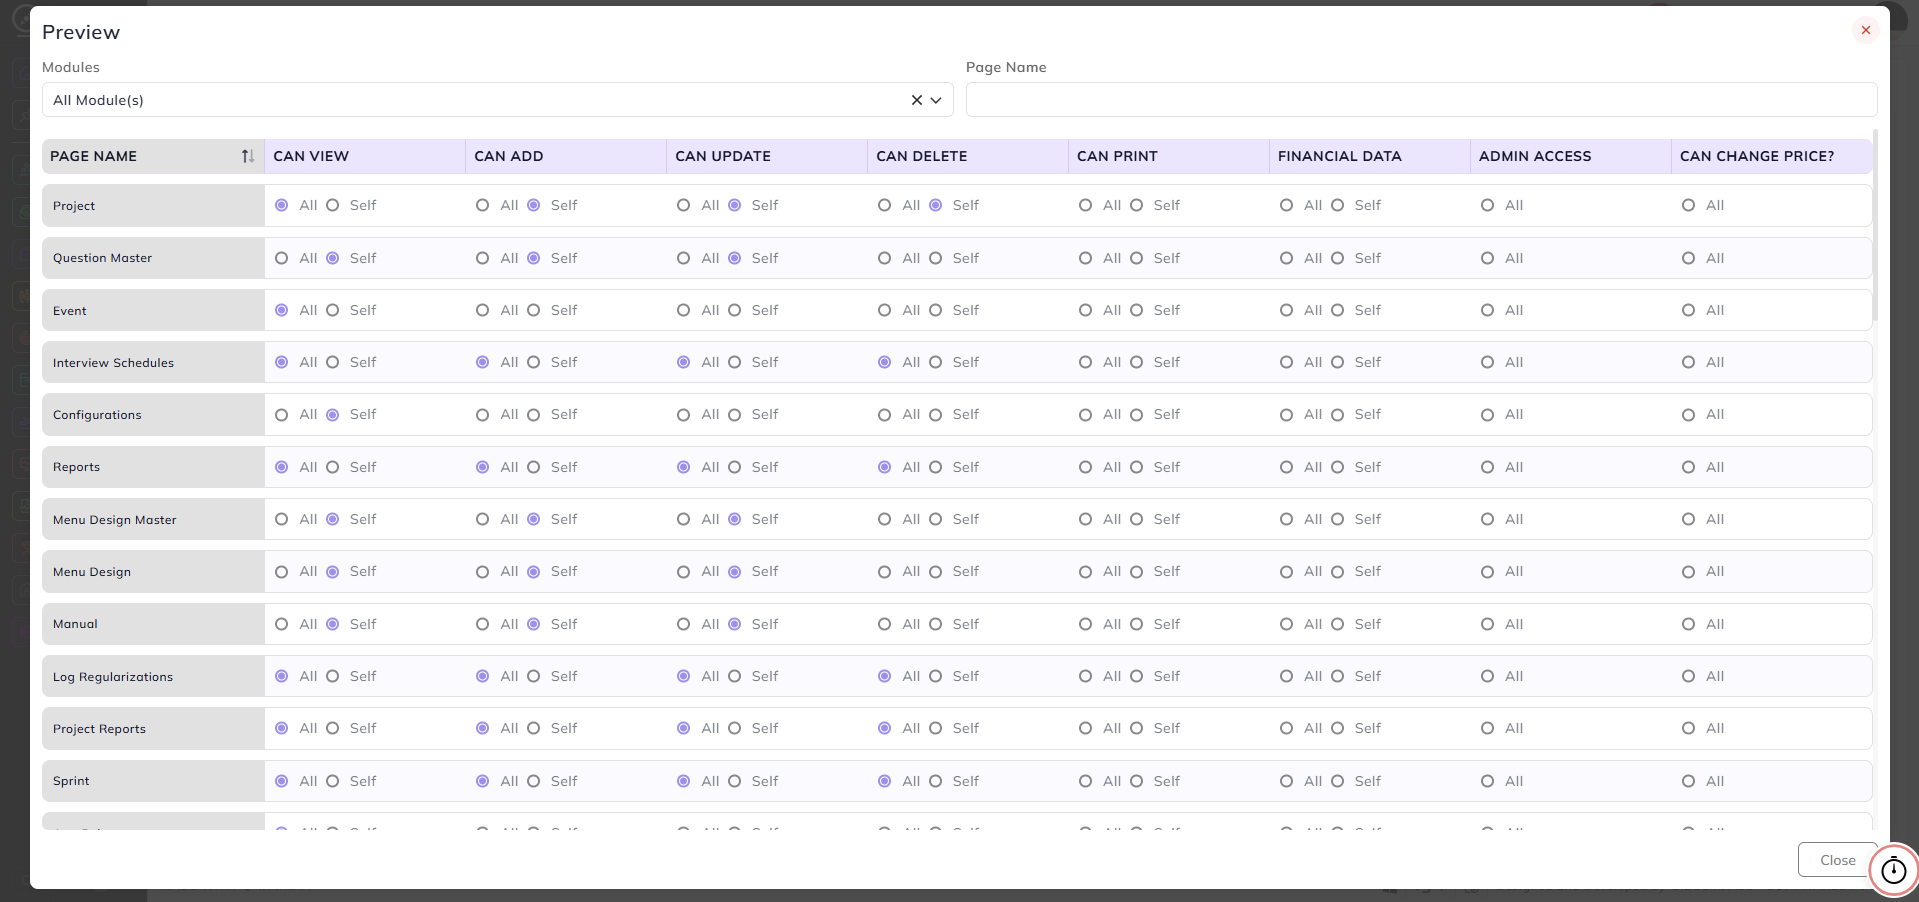
Preview:
Opens a preview of the current rights configuration for the selected user role or person — showing all pages and their configured permissions in a read-only view.
Reset:
Unsaved changes can be discarded or reset using this button.
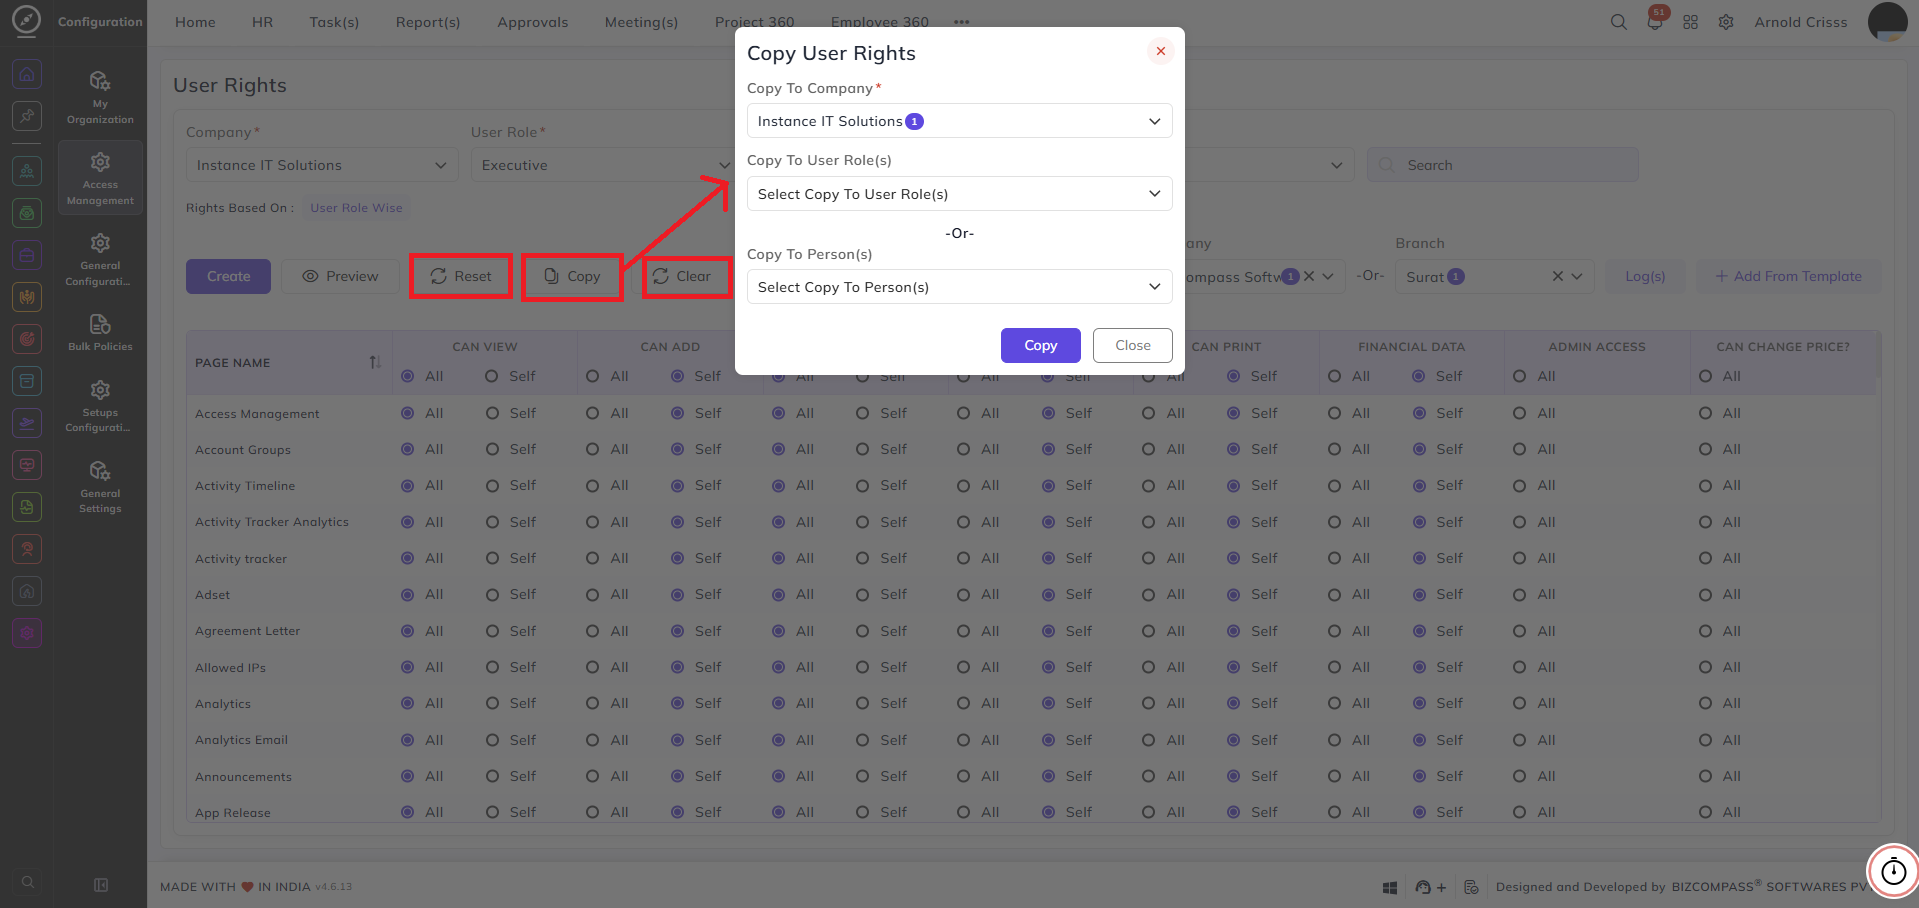
Copy:
Copies the rights configuration from the currently selected user role or person and applies it to another role or person.
Clear:
Clears all configured rights for the selected user role or person.
Applying ‘Clear’ for a person will remove their individual rights, and they will then inherit rights based on their user role.
Applying ‘Clear’ to a user role will remove rights for that role, but any individually assigned rights for a person will remain.
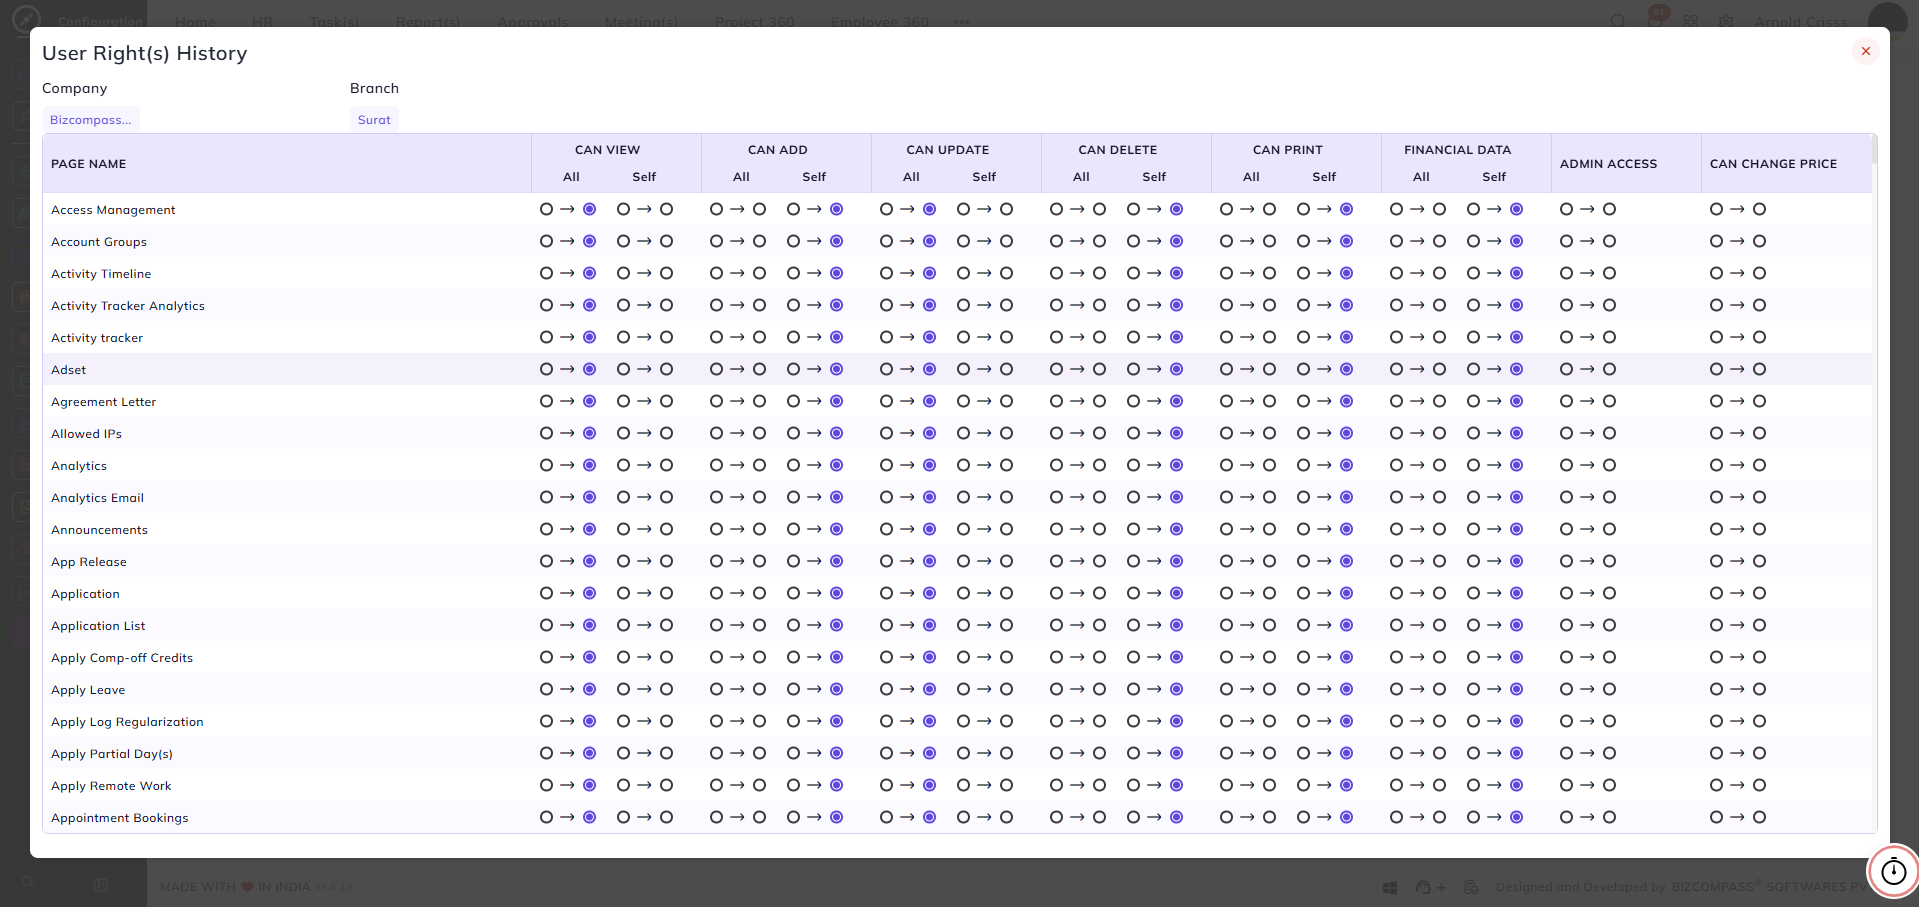
Log(s):
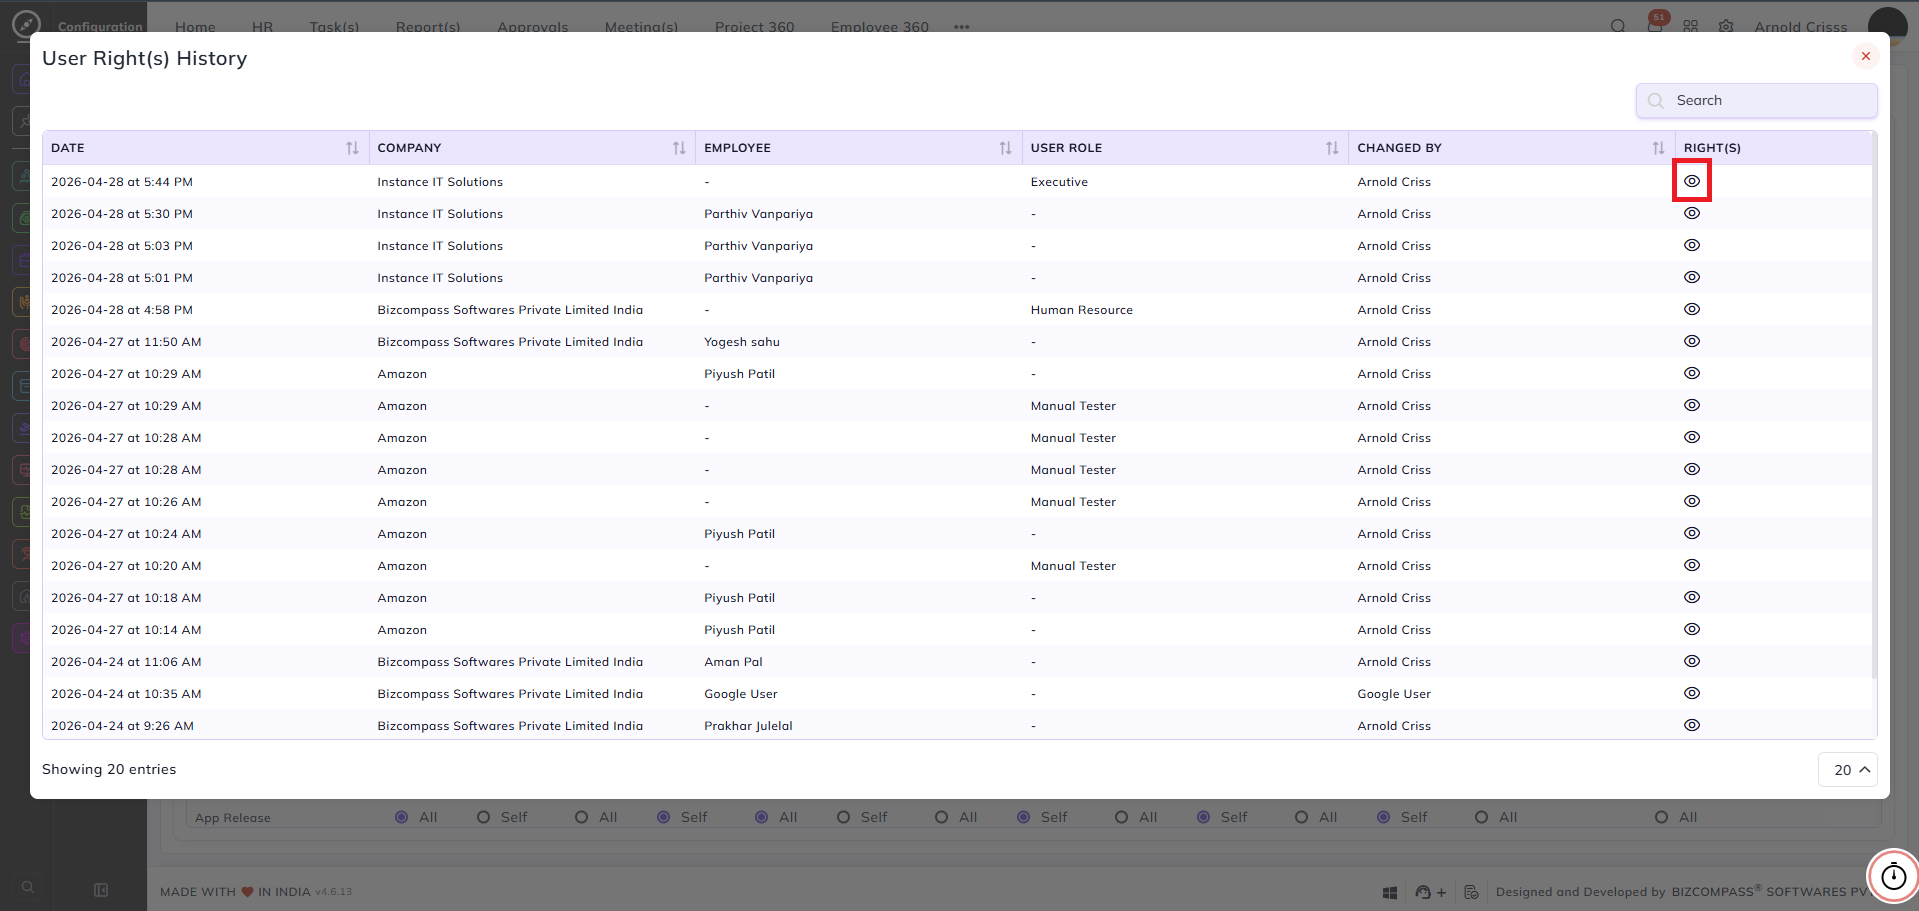
Click Log(s) to open the User Right(s) History panel.
This displays a full audit trail of all changes made to user rights, showing:
- Date — when the change was made
- Company — the company the change applies to
- Employee — the employee whose rights were changed, if configured person wise
- User Role — the role whose rights were changed, if configured role wise
- Changed By — the user who made the change
- Rights — click the eye icon to view a detailed breakdown of what changed for that entry, showing the before and after state of each permission per page
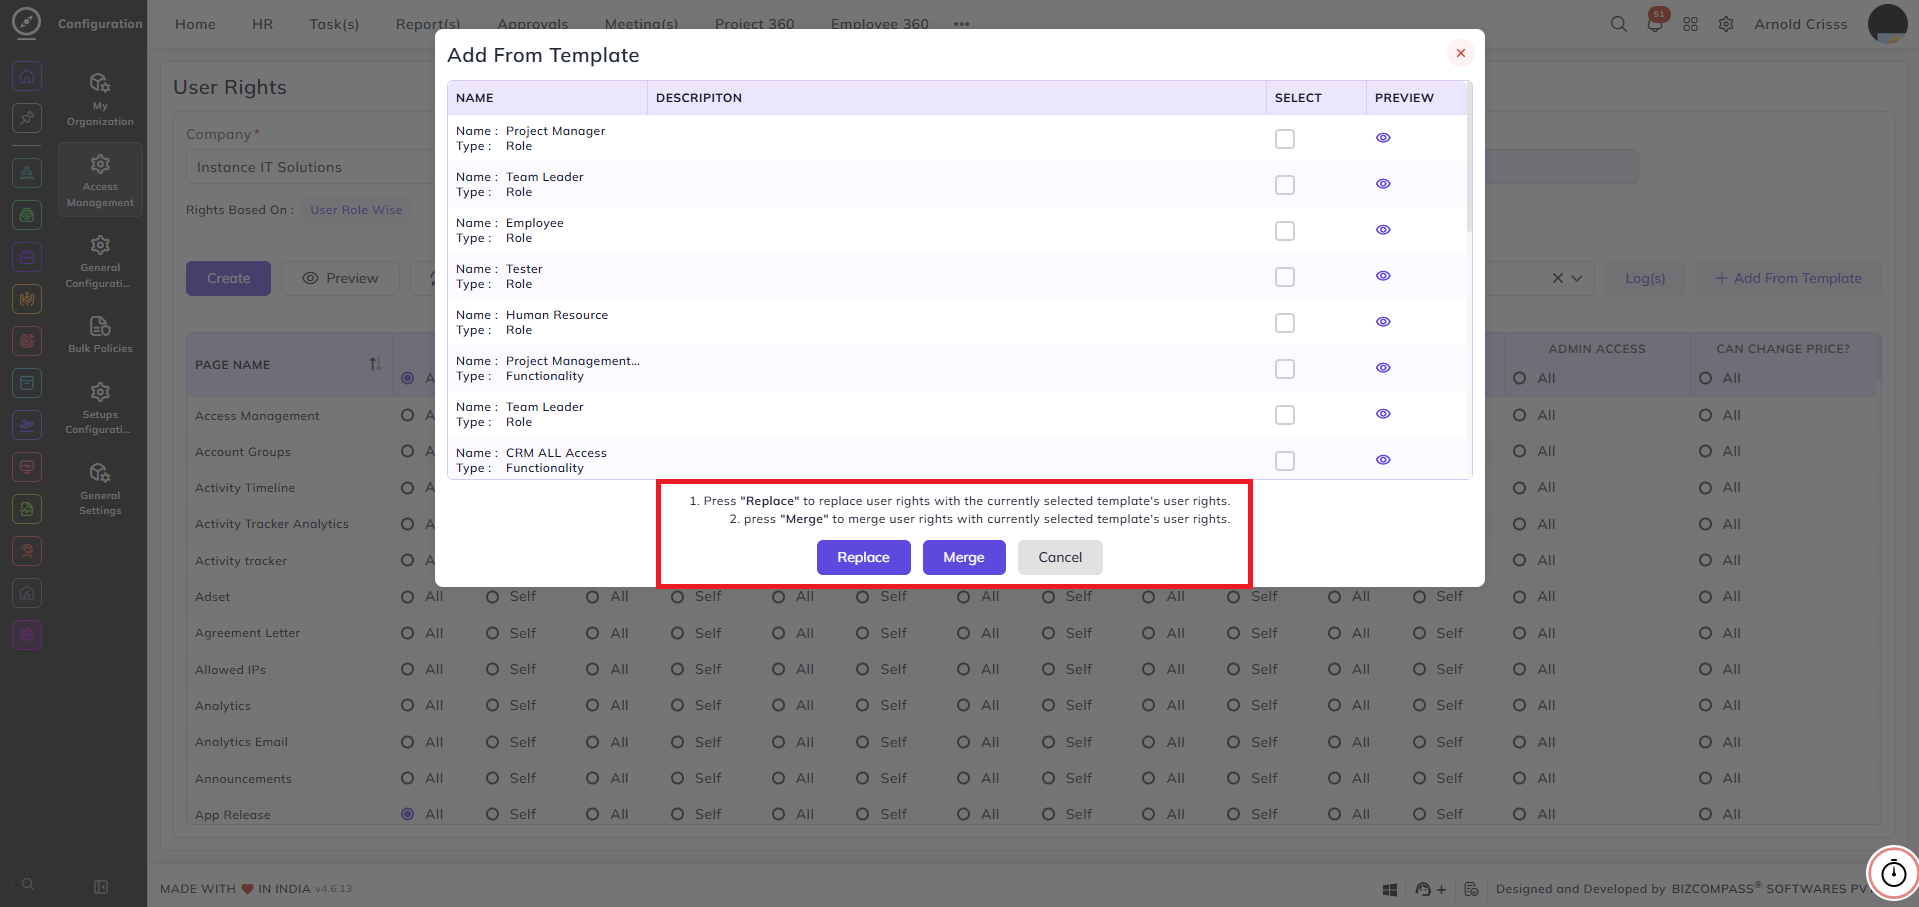
Add From Template:
Click + Add From Template to apply a pre-configured rights template to the current user role or person.
The popup displays all available templates with their Name and Type — Role or Functionality.
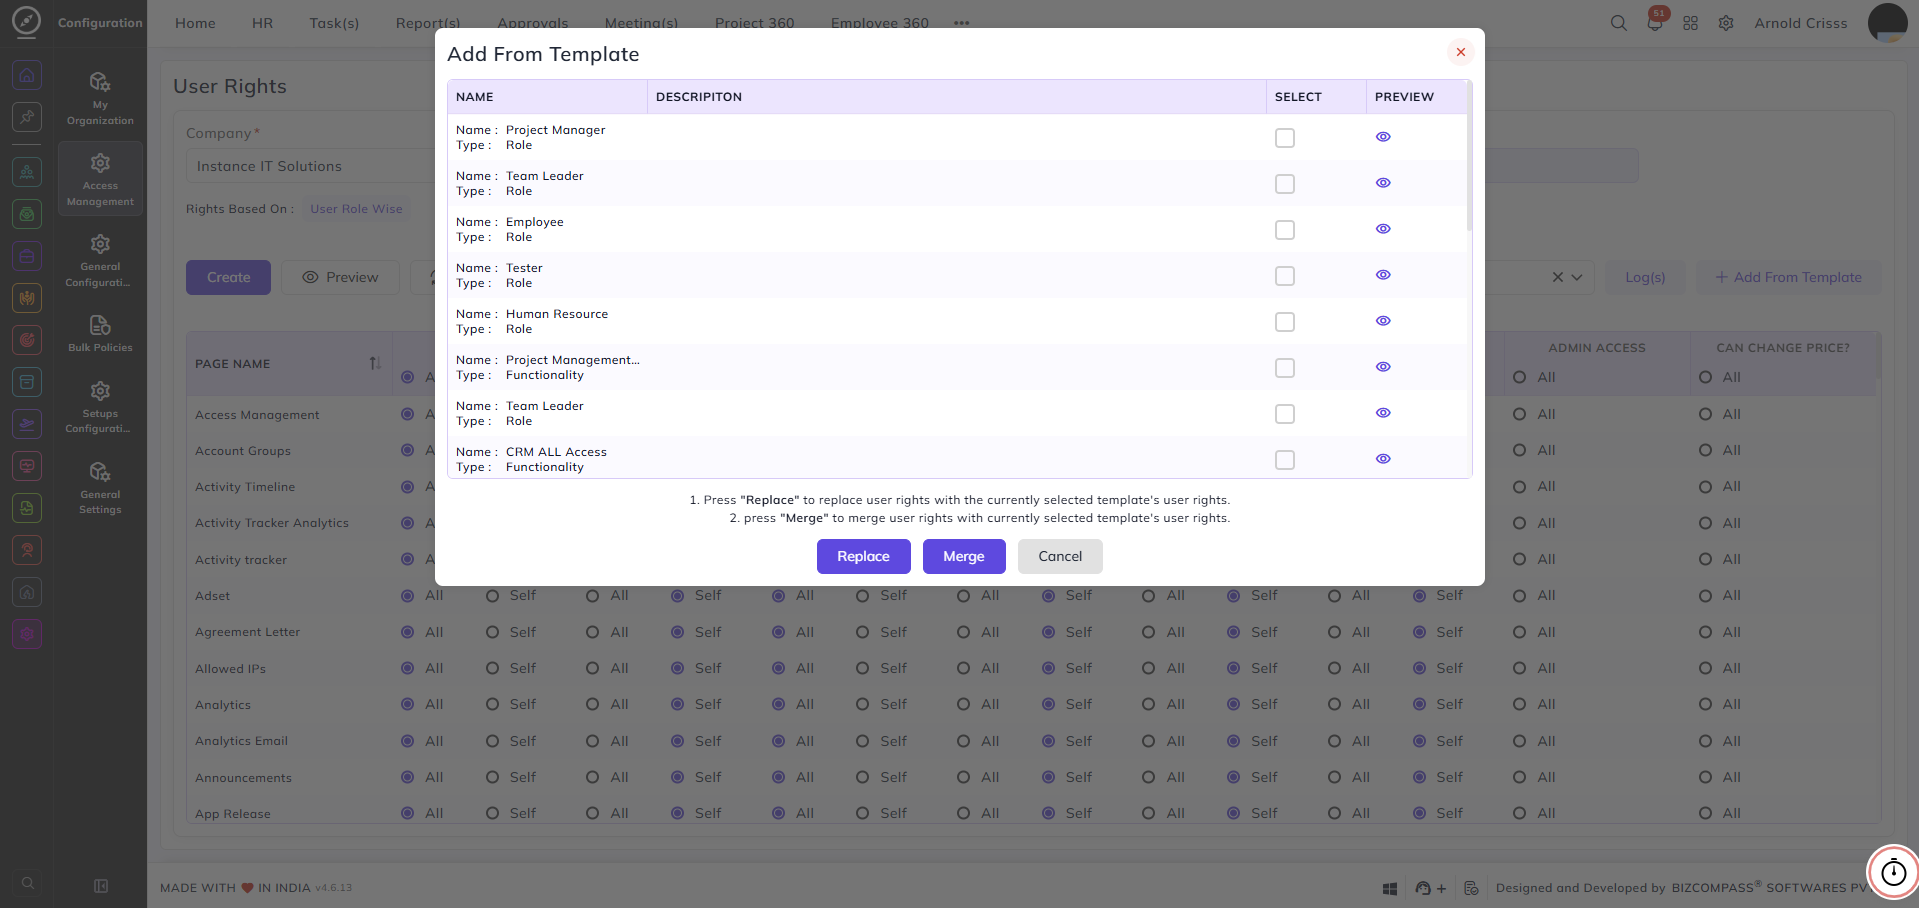
Click the eye icon next to any template to preview its rights configuration before applying it.
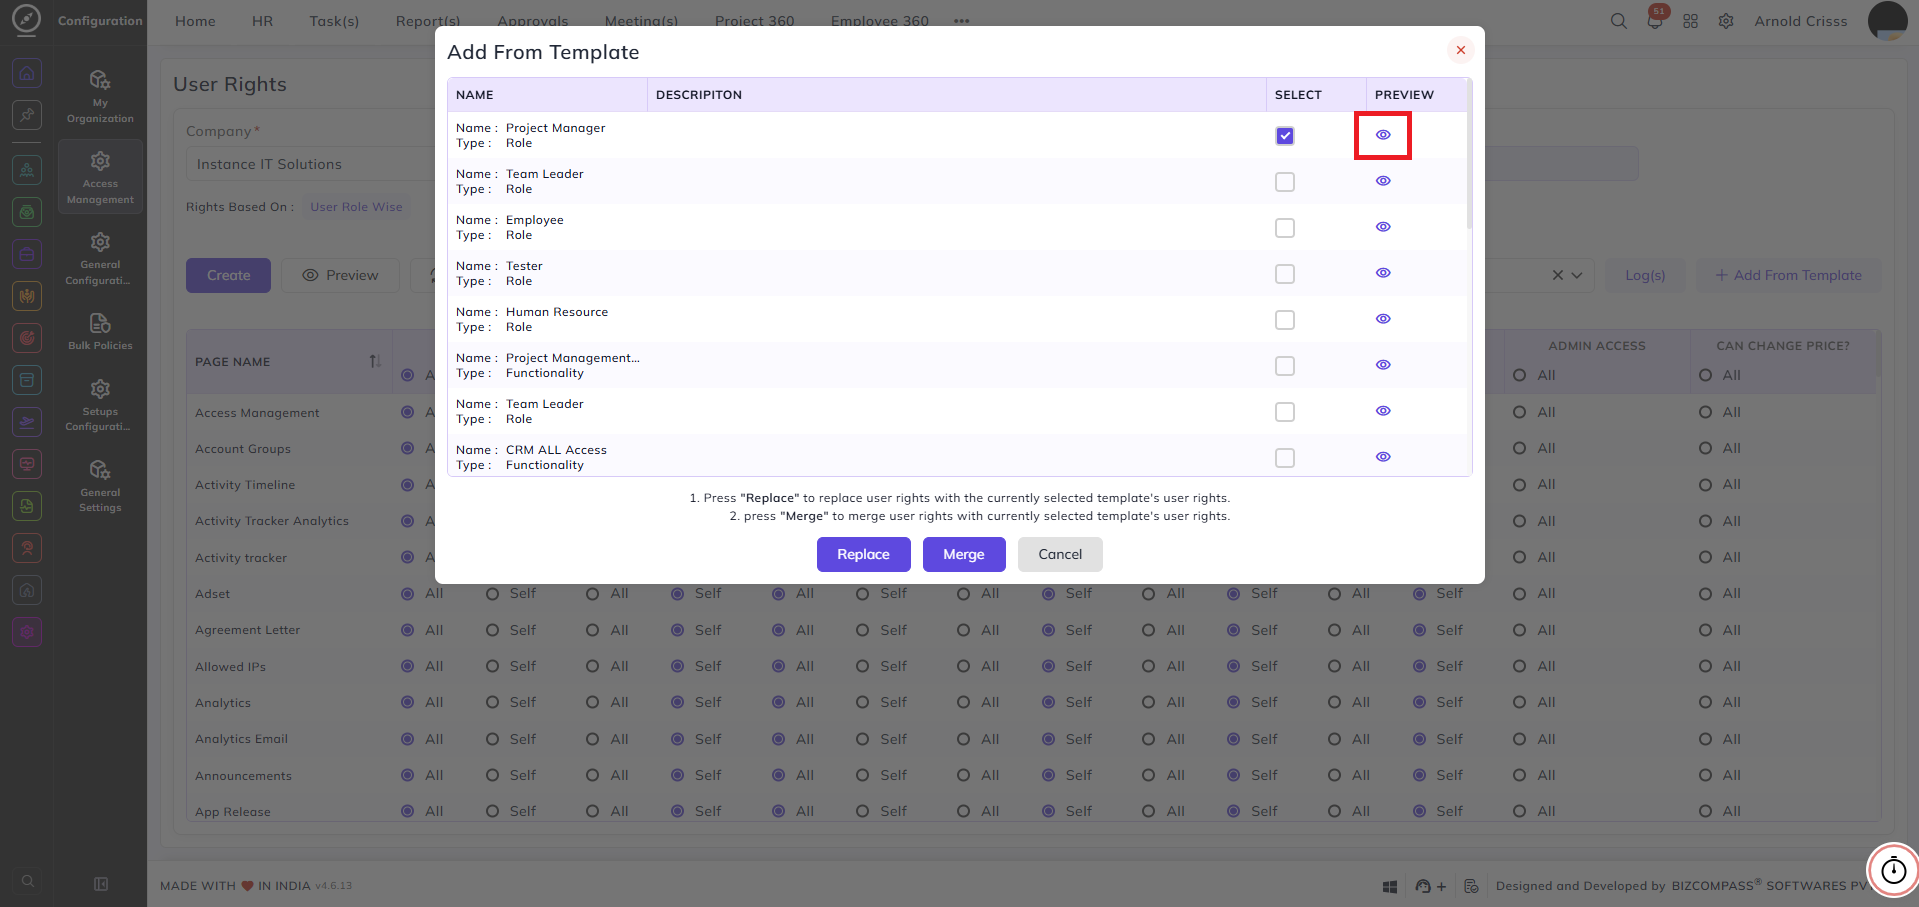
Select a template and choose one of the following:
- Replace — replaces the current user rights with the selected template's rights
- Merge — merges the selected template's rights with the existing rights, combining both configurations
- Cancel — closes the popup without making any changes
No comments to display
No comments to display