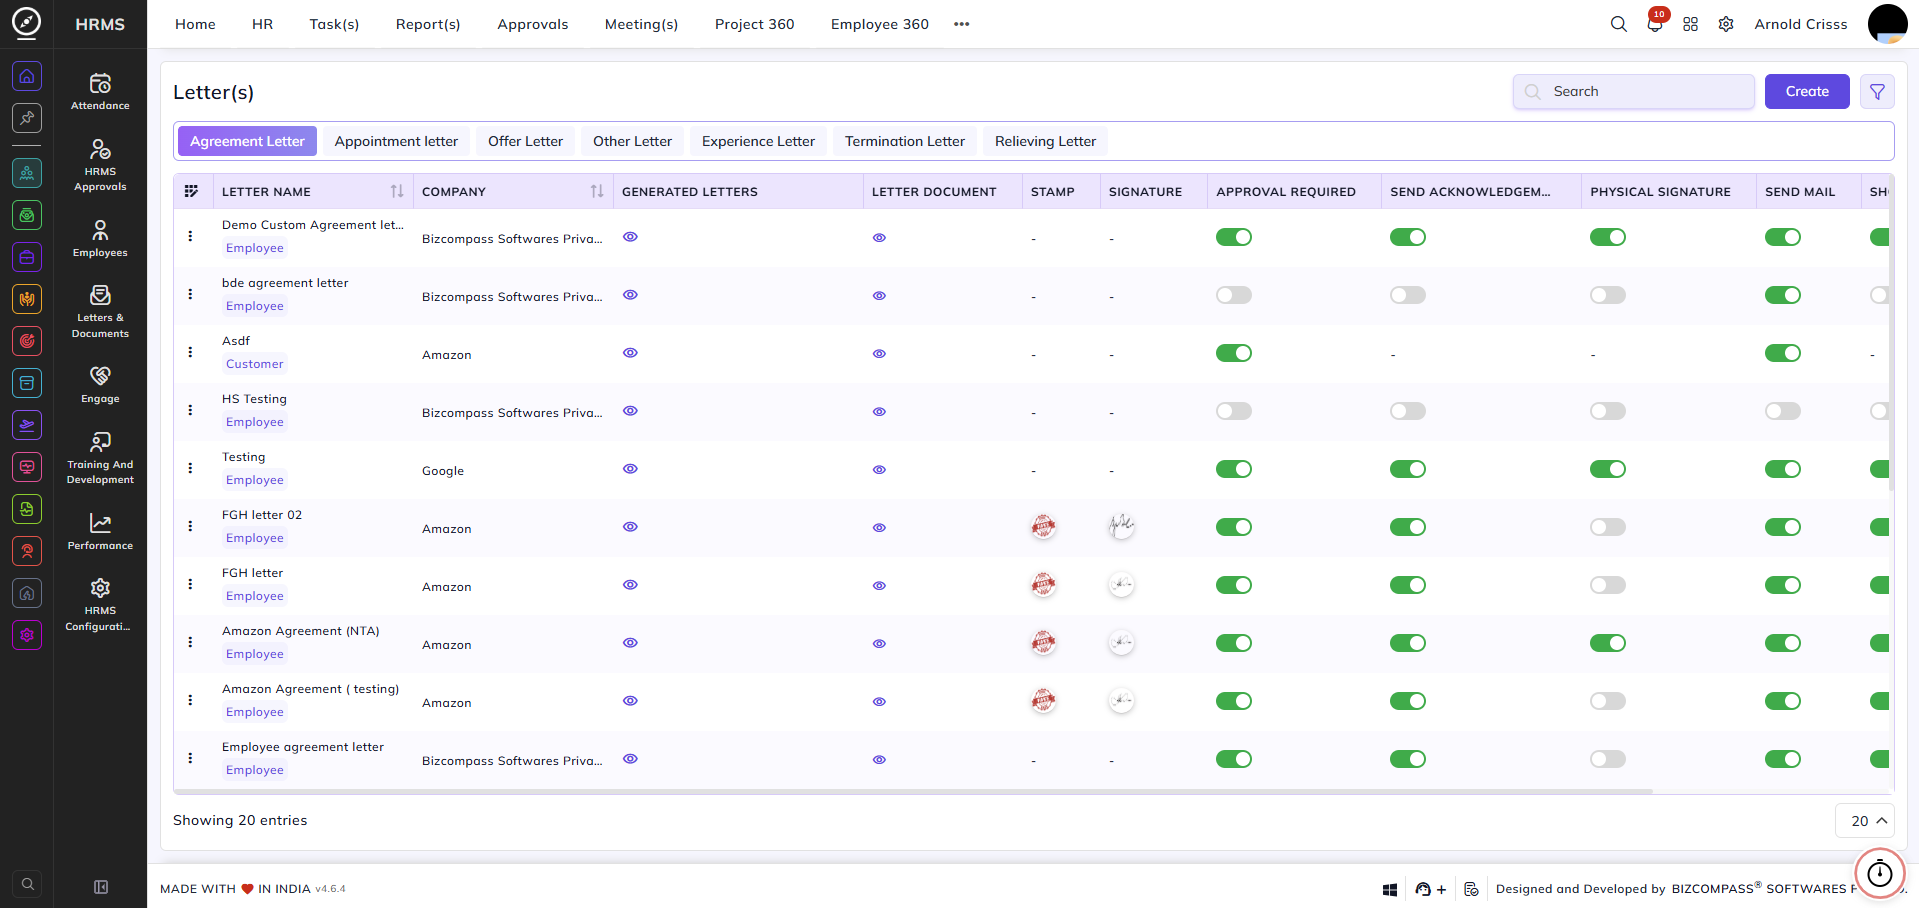
Letters
The Letters page is used to create and manage various types of official letters needed for the recruitment process, employee letter records, and the exit process. The organization can also issue letters in bulk for employees.
Each letter type can be configured separately based on organizational requirements and can be configured on Approval basis.
Letters for Recruitment / Onboarding Process:
The following letters are commonly used during recruitment and onboarding:
-
Agreement Letter (Type: Employee)
-
Appointment Letter
-
Offer Letter
-
Other Letter
Agreement Letter:
- An Agreement Letter is sent during the Agreement stage of the onboarding procedure to the selected candidate by checking the Agreement Sign option while configuring the Joining Procedure Flow.
- The candidate can review the agreement and provide an acknowledgement.
- If the agreement requires a signature, the candidate can upload their signature. The uploaded signature can then be merged with the generated agreement document, completing the agreement process.
Agreement Letter Types:
-
Employee – Used for employee or candidate agreements (recruitment and exit process)
-
Employee Loan – Used for loan-related agreements
-
Customer – Used for agreements with customers
-
Vendor – Used for agreements with vendors
For Employee, Employee Loan, and Customer types, the system provides tags that are replaced with values during letter generation.
Appointment Letter:
- An Appointment Letter is sent during the Appointment Letter stage of the onboarding procedure to the selected candidate by checking the Send Appointment Letter option while configuring the Joining Procedure Flow.
- The candidate can review the appointment letter and provide an acknowledgement.
- If the appointment letter requires a signature, the candidate can upload their signature. The uploaded signature can then be merged with the generated appointment document, completing the appointment process.
Offer Letter:
- An Offer Letter is sent during the Offer Letter stage of the onboarding procedure to the selected candidate by checking the Send Offer Letter option while configuring the Joining Procedure Flow.
- The candidate can review the offer letter and provide an acknowledgement.
- If the offer letter requires a signature, the candidate can upload their signature. The uploaded signature can then be merged with the generated offer letter document.
Other Letter:
- Other Letter types include Increment Letter, Warning Letter, Transfer Letter, etc.
- The candidate can review the letter and provide an acknowledgement.
- If the letter requires a signature, the candidate can upload their signature. The uploaded signature can then be merged with the generated letter document.
Letters for Exit Procedure:
The following letters are used during the employee exit process:
-
Experience Letter
-
Termination Letter
-
Relieving Letter
Experience Letter:
- An Experience Letter is sent during the Send Experience Letter stage of the exit procedure to the selected employee by checking the Send Experience Letter option while configuring the Exit Procedure Flow.
Termination Letter:
- A Termination Letter is sent to an employee while initiating his/her exit procedure from the Employee Master page.
Relieving Letter:
- A Relieving Letter is sent during the Send Relieving Letter stage of the exit procedure to the selected employee by checking the Send Relieving Letter option while configuring the Exit Procedure Flow.
These letters can be used in both the recruitment flow and the exit procedure flow.
Letter Creation:
For recruitment letters, some additional options are available compared to exit letters.
Apart from these additional options, the overall functionality remains the same for all letter types.
Common Configuration:
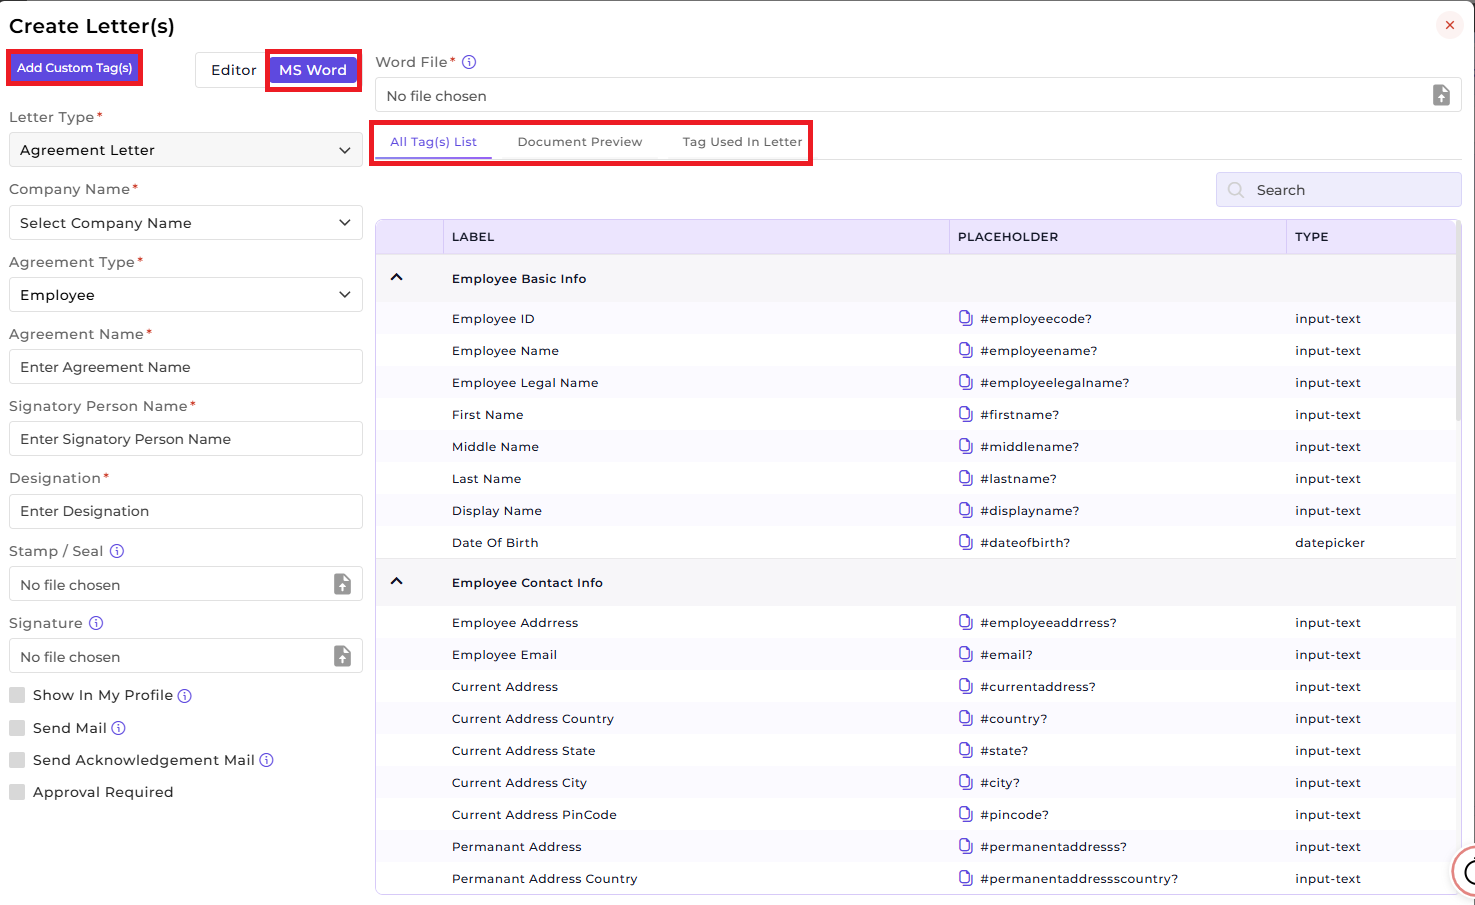
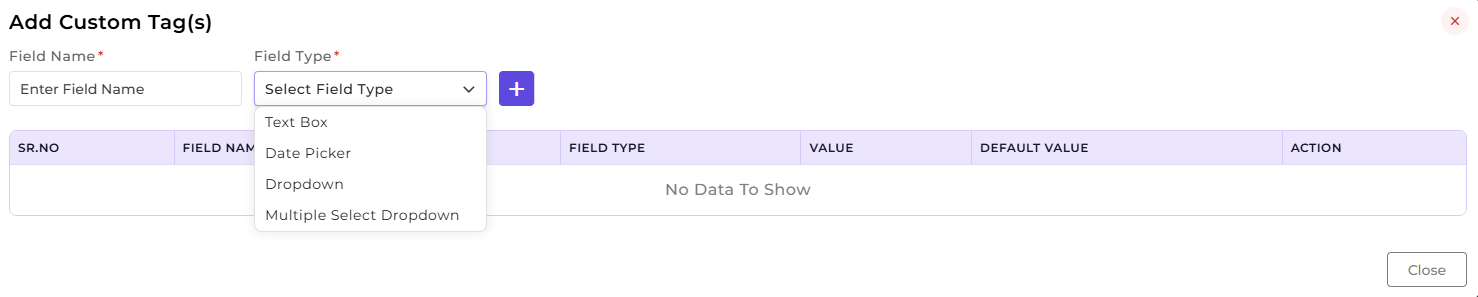
1. Add Custom Tag(s):
If the organization wants to use custom tags instead of the default Bizcompass tags, custom tags can be created.
While creating a custom tag, two fields must be defined:
-
Name of Tag
-
Field Type
The available field types are:
Text Box:
-
The value can be entered during letter generation
-
A default value can also be defined while creating the tag
Date Picker:
-
Works similar to the Text Box
-
A date can be selected during generation
-
A default date value can also be defined
Dropdown:
-
Multiple values can be added using comma-separated entries
-
One value can be set as the default option
Multiple Select Dropdown:
-
Similar to Dropdown
-
Multiple options can be selected
-
Multiple default values can also be defined
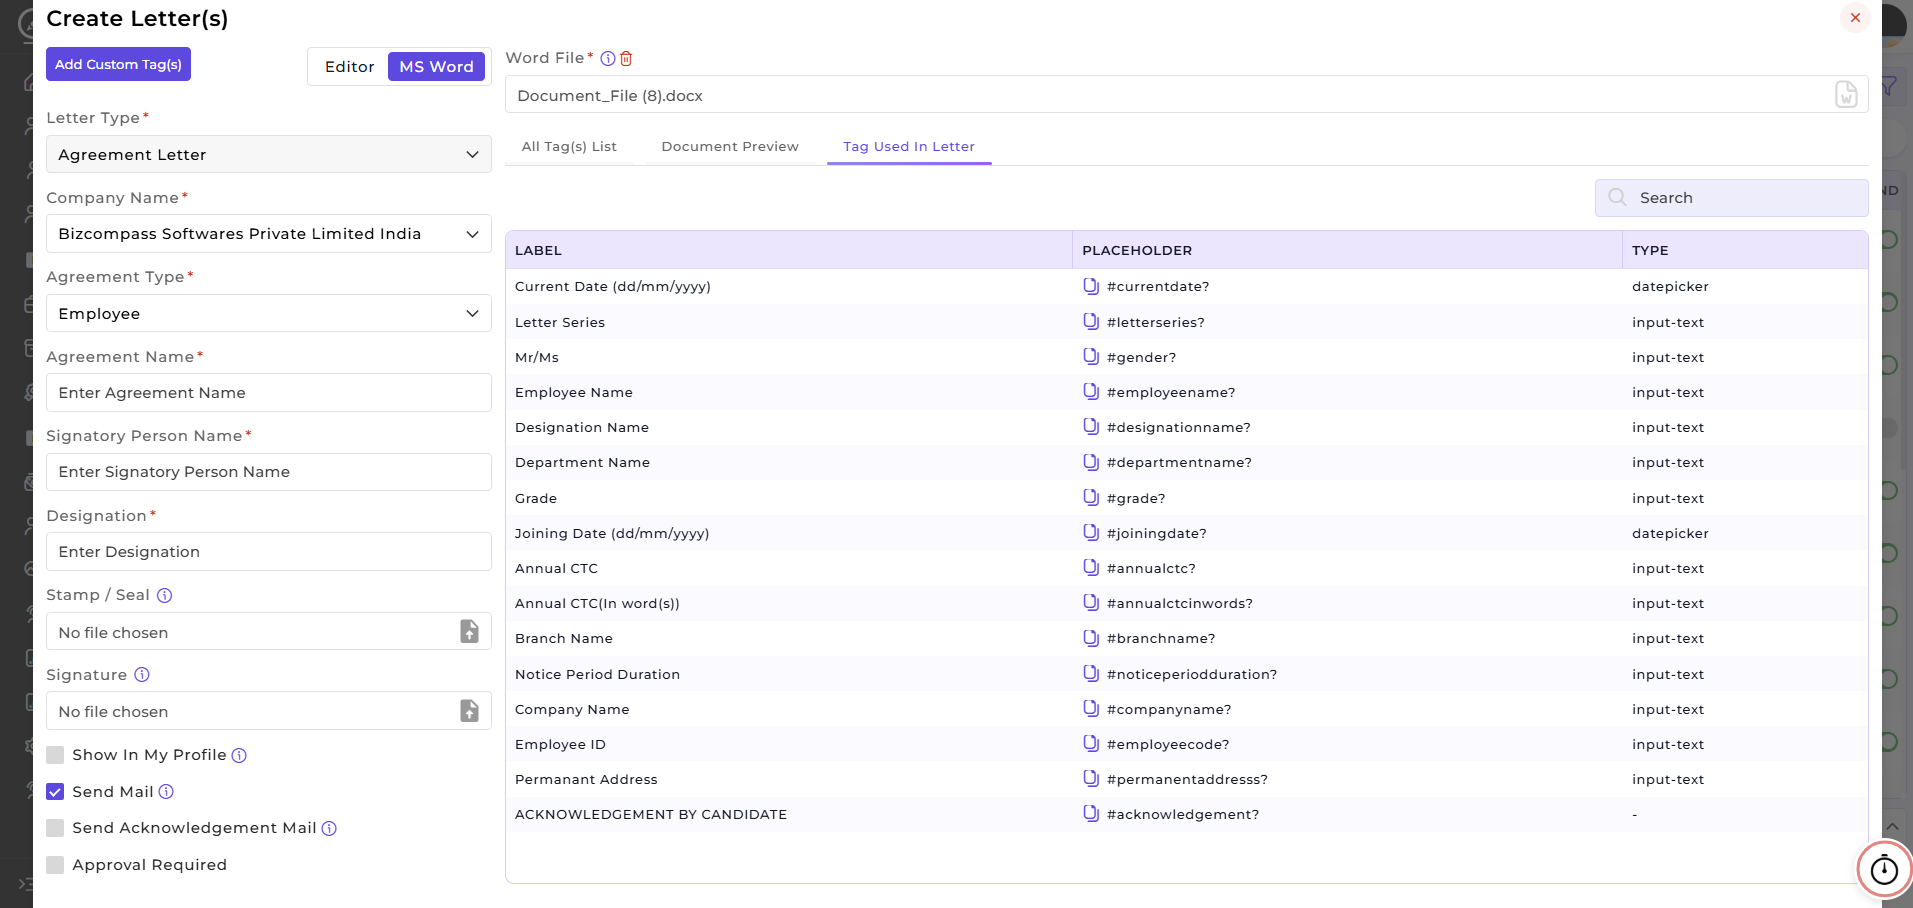
After creating the tag, it becomes visible in the Tag column in the table.
From there, the tag can be:
-
Copied and used while adding content in the header, body, or footer
-
Selected directly from the custom tag selection option
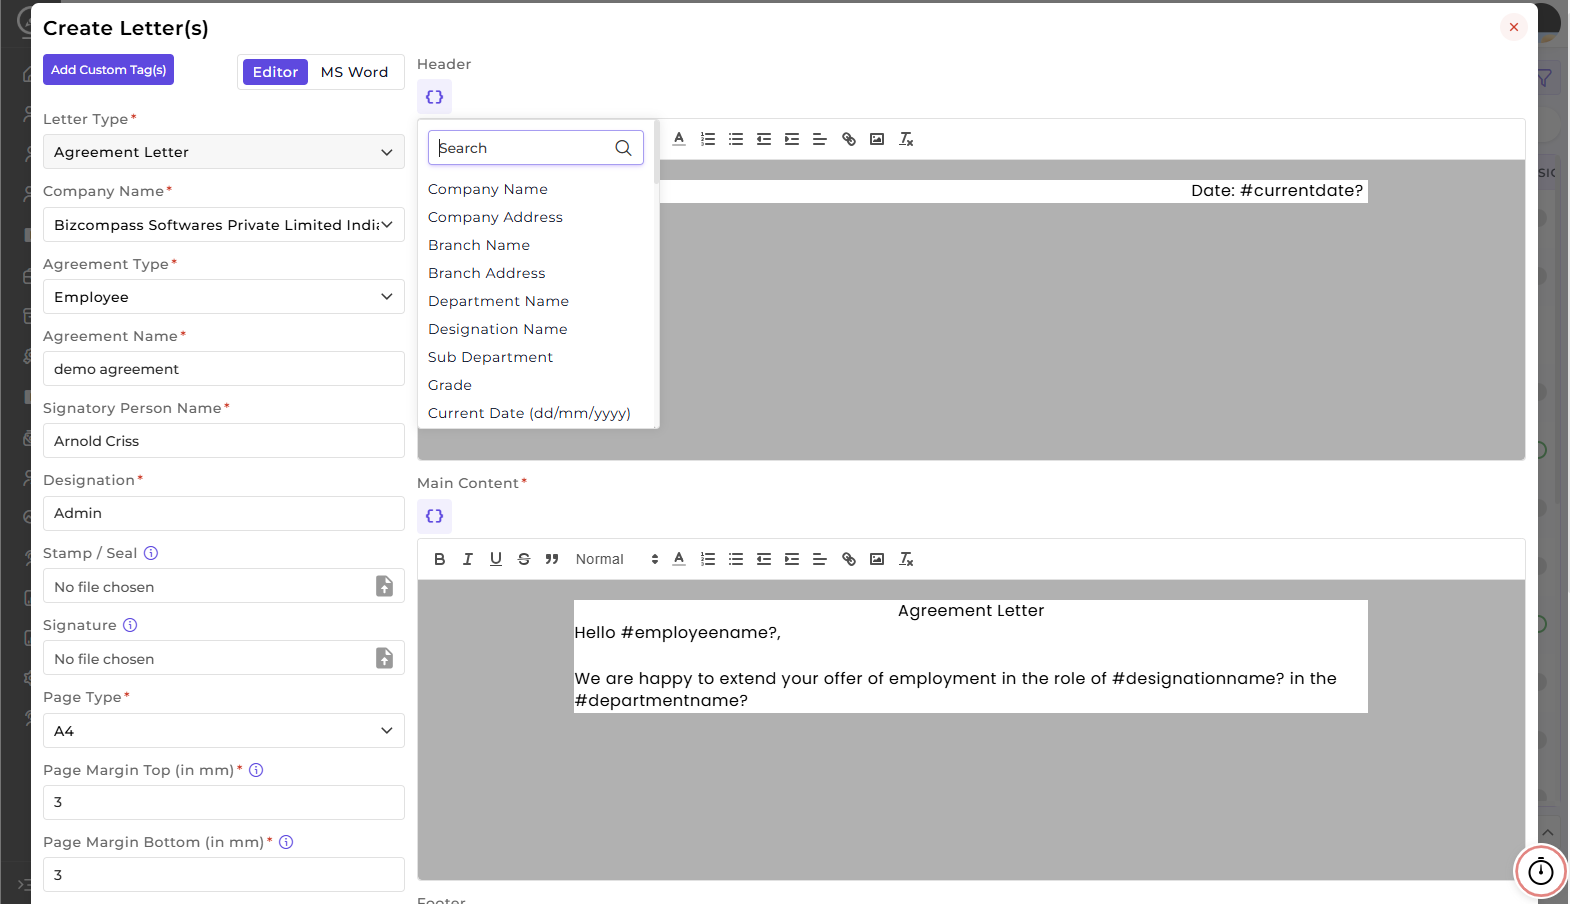
2. Left Side Options (Common Fields):
The following fields are available while creating a letter:
-
Company for which the letter is created
-
Letter Type and Letter Name
-
Signatory Person Name and Designation
-
Upload Company Stamp/Seal (used during letter generation)
-
Upload Signature (used during letter generation)
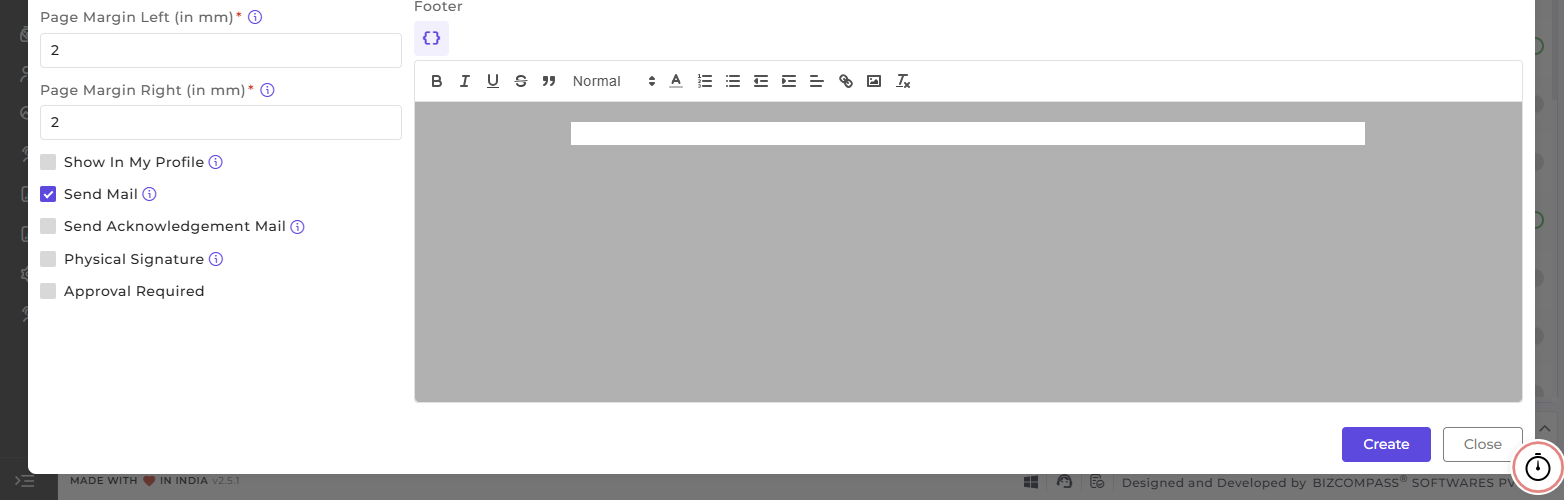
Visibility Options:
-
Show In My Profile: Enables the letter to be visible in the employee's My Profile section
-
Send Mail: Sends the generated letter via email
Acknowledgement Options:
If the organization wants the candidate or employee to acknowledge the letter, select:
- Send Acknowledgement Mail: If this option is selected, the Acknowledgement By Candidate tag can be used to send the acknowledgement email.
The candidate or employee can acknowledge the letter by:
-
Uploading a signature, or
-
Signing manually using a device such as Mobile, PC, Laptop or Tablet
Physical Signature:
If the organization wants to provide blank space for physical signatures, select it. It creates empty space where the employee or candidate can physically sign the printed letter.
Note: This option is available only in Editor Mode. In MS Word Mode, blank space can be added manually in the document.
If Physical Signature is enabled:
Approval Required:
If the letter requires approval before being finalized, enable it. Once enabled, the generated letter will go through the approval process.
Approval works as follows:
-
If an approval hierarchy is defined, the system follows that hierarchy.
-
If no hierarchy exists, the system follows:
-
Reporting To approval
-
Then Approve To approval
-
Note: These flag options differ for different types of Agreement Type. For example, for the Agreement Type - Vendor, only Send Mail and Approval Required options are available.
Letter Creation Modes:
Letters can be created using two different modes:
-
Editor Mode
-
MS Word Mode
1. MS Word Mode:
In MS Word Mode, a prepared Word document template can be uploaded.
Steps:
-
Select MS Word Mode
-
Upload the prepared Word document
-
Use the tag selection list below the upload option
-
Copy the required tag and paste it into the Word document where the value should appear
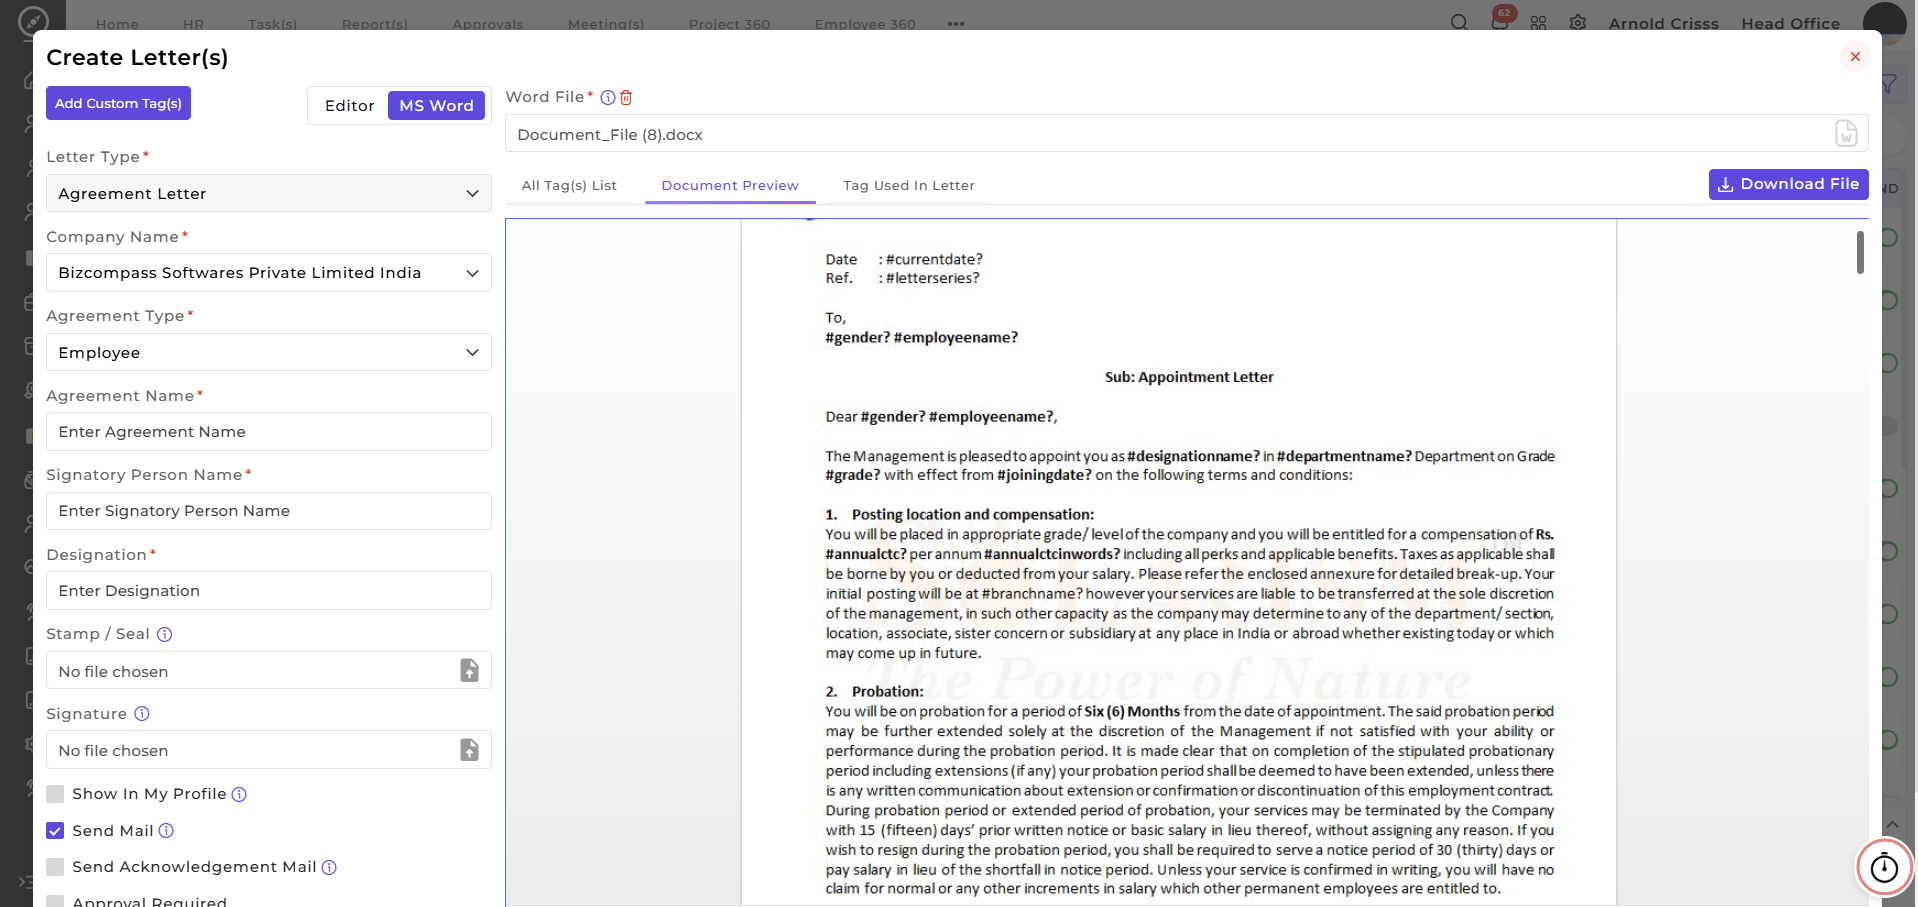
During letter generation, the system automatically replaces the tag with the actual value.
Tag Usage Example:
Example: If the organization wants to display the candidate or employee name, place the corresponding tag at that position in the letter.
Hello #employeename?,During letter generation, the tag #employeename? will automatically be replaced with the actual employee name. Many tags are available depending on the letter type.
Specific Tags Based on Letter Type:
Document Tag:
- Available only for Agreement Letter (Employee).
Salary Structure Tags:
-
Salary Structure
-
Salary Structure Without Date
-
Salary Structure Without Deduction
-
Salary Structure Without Contribution
Salary and Financial Tags:
-
Salary Breakup
-
Salary Certificate
-
Increment Salary Month
-
Annual Gross
-
Annual Total Deductions
-
Annual Net Salary
-
Financial Year
Note: For different Agreement Types (Employee, Loan, Customer and Employee), personalized pre-defined tags are available (except for Vendor type, which has no pre-defined tags), but you can still add custom tags in any agreement type.
2. Editor Mode:
In Editor Mode, the letter format is created directly inside Bizcompass using three sections:
Page Settings:
The following page settings are available:
-
Set page margins (in mm)
-
Enable Physical Signature if blank space is required
-
Select Page Type
Available page types include:
-
A4
-
A3
-
A5
-
Legal
-
Letter
-
Ledger
Images can also be uploaded in:
If additional spacing is required, it can be created using Enter or Space in the header or footer sections.
Text Formatting Options:
The editor includes several formatting tools:
-
B – Bold
-
I – Italic
-
U – Underline
-
S – Strikethrough
-
“ – Blockquote
Other formatting options include:
-
Text size selection
-
Font color selection
-
Numbering and bullet lists
-
Increase/decrease indentation
-
Text alignment
-
Hyperlink insertion (write the text first, then apply the link)
Images can be added using:
-
Image picker
-
Drag and drop
-
Copy and paste
A Remove All Formatting option is also available.
This feature is optional; if your company manages letters offline, you don't have to configure it.
No comments to display
No comments to display